Setting up the PushTopic in Salesforce
This documentation explains how to set up the Salesforce environment to connect with WSO2 Salesforce Inbound Endpoint. Please follow up the steps given below
- Create a custom object or object in Salesforce.
- Creating a PushTopic.
- Subscribing to the PushTopic Channel
- Testing the PushTopic Channel.
- Reset Security Token.
Create a custom object or object in Salesforce.
As first step you need to create a custom object in Salesforce. In this scenario we use the Account object to store the records.
Creating a PushTopic
The PushTopic record contains a SOQL query. Event notifications are generated for updates that match the query. Alternatively, you can also use Workbench to create a PushTopic. In this sample we using Salesforce Developer Console to create a Push Topic.
-
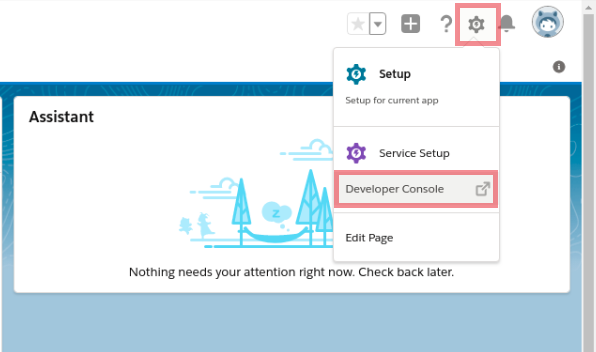
Login to the Salesforce Account. Navigate to the top right corner of the Home page and click the Setup icon. Then select Developer Console.
-
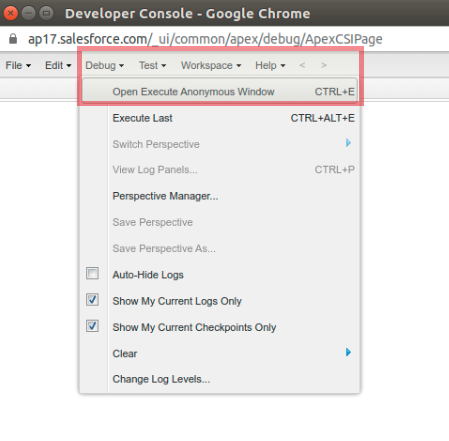
After populating the Developer console, click Debug -> Open Execute Anonymous Window.
-
Add the following entry in the Enter Apex Code window and click Execute.
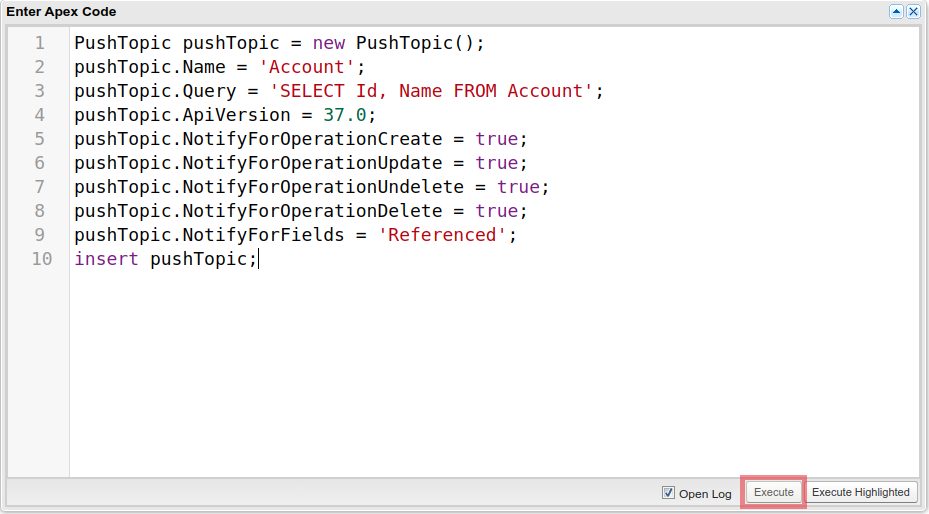 We are essentially creating a SOQL query with a few extra parameters that watch for changes in a specified object. If the Push Topic is executed successfully then Salesforce is ready to post notification to WSO2 Salesforce Inbound Endpoint, if any changes are made in the Account object in Salesforce. This is because the below Push Topic has been created for Salesforce's Account object.
PushTopic pushTopic = new PushTopic();
pushTopic.Name = 'Account';
pushTopic.Query = 'SELECT Id, Name FROM Account';
pushTopic.ApiVersion = 37.0;
pushTopic.NotifyForOperationCreate = true;
pushTopic.NotifyForOperationUpdate = true;
pushTopic.NotifyForOperationUndelete = true;
pushTopic.NotifyForOperationDelete = true;
pushTopic.NotifyForFields = 'Referenced';
insert pushTopic;
Subscribing to the PushTopic Channel
In this step, we need to subscribe to the channel that we created with the PushTopic record in the previous step. For this can be done through the Workbench. Workbench is a free, open source, community-supported tool that helps administrators and developers to interact with Salesforce for Data Insert, Update, Upsert, Delete, and Export purposes.
Note: Salesforce provides a hosted instance of Workbench for demonstration purposes only - Salesforce recommends that you do not use this hosted instance of Workbench to access data in a production database.
-
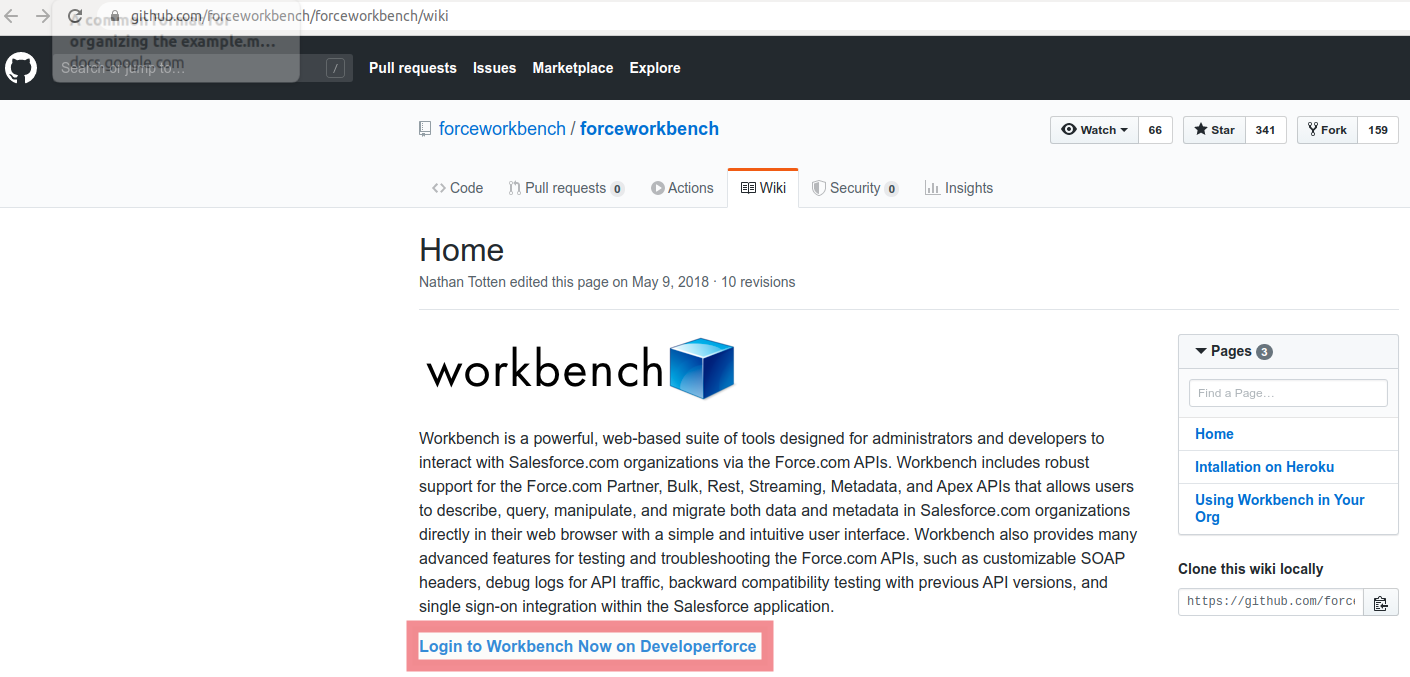
Using your browser, navigate to the workbench.
-
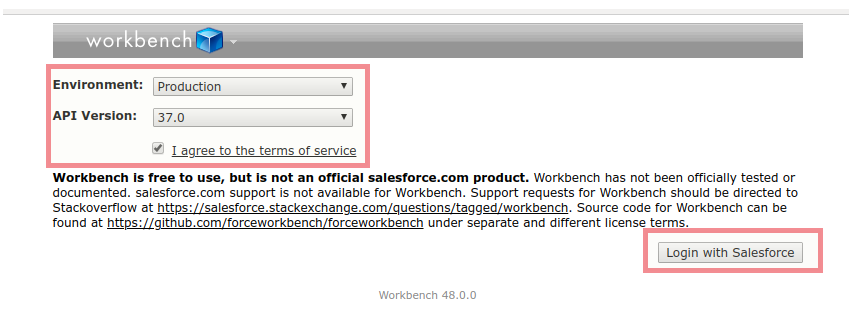
Select Environment as Production and API Version as 37.0.
-
Accept the terms of service, and click Login with Salesforce.
-
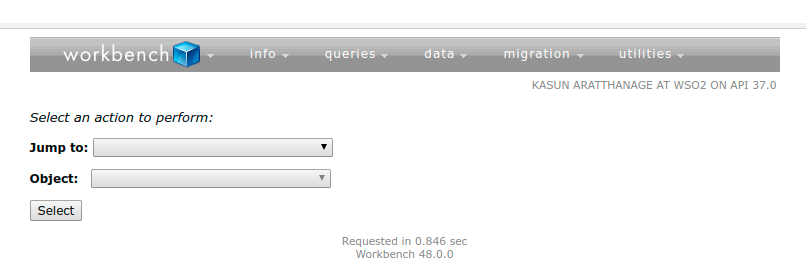
After logging in with Salesforce, you establish a connection to your database, and land on the Select page.
-
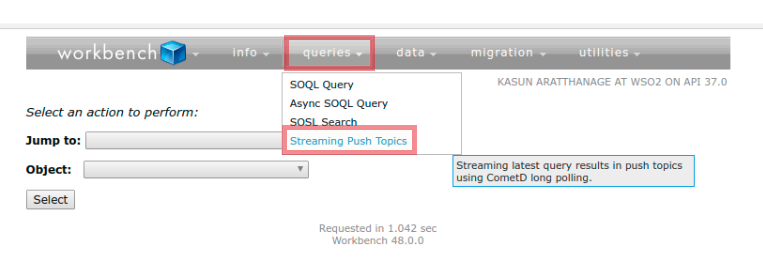
Select queries -> Streaming Push Topics.
-
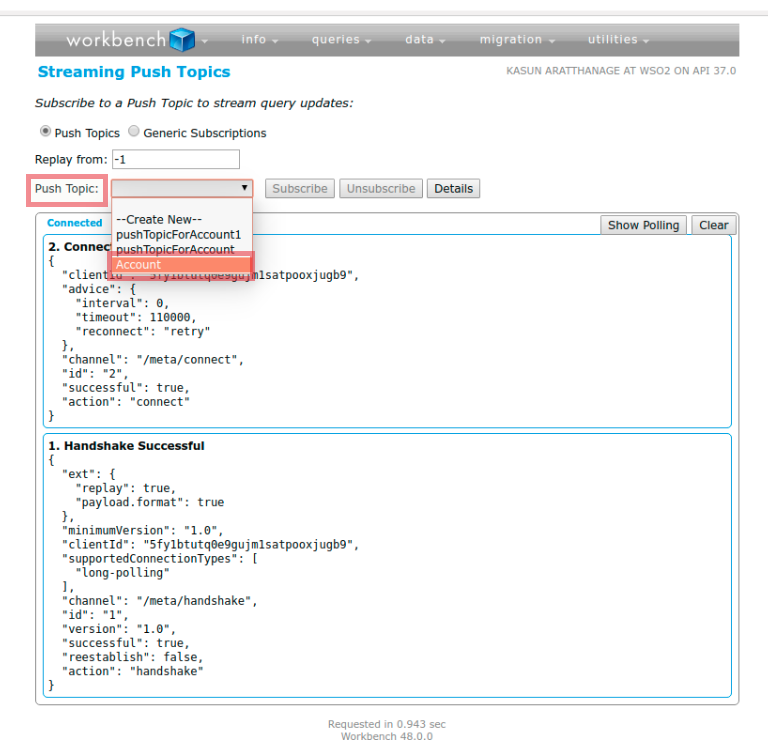
In the Push Topic field, select Account.
-
Click Subscribe. You’ll see the connection and response information and a response like
Subscribed to /topic/Account.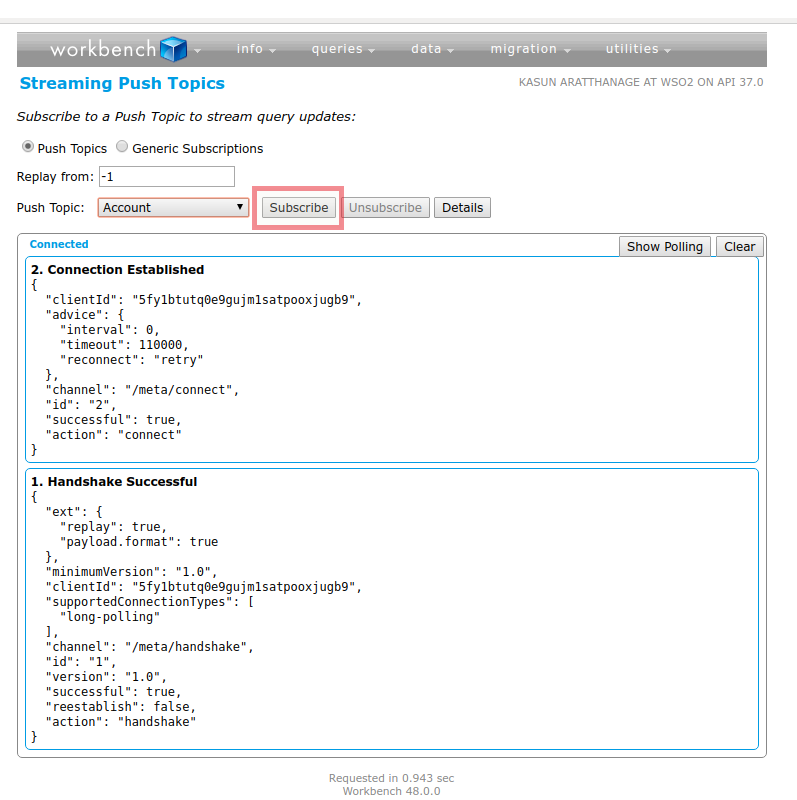
Note: Keep this browser window open and make sure that the connection does not time out. You’ll be able to see the event notifications triggered by the Account record you create when testing the PushTopic channel.
Testing the PushTopic Channel.
-
Open new browser window and navigate to the workbench using the same username and password. Please follow the steps given in
Subscribe to the PushTopic ChannelStep 1. -
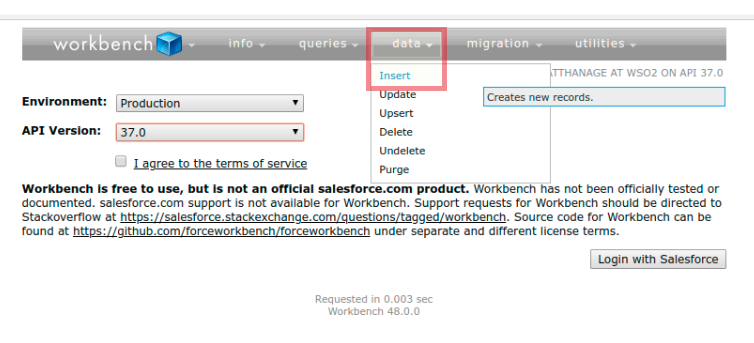
Select data -> Insert.
-
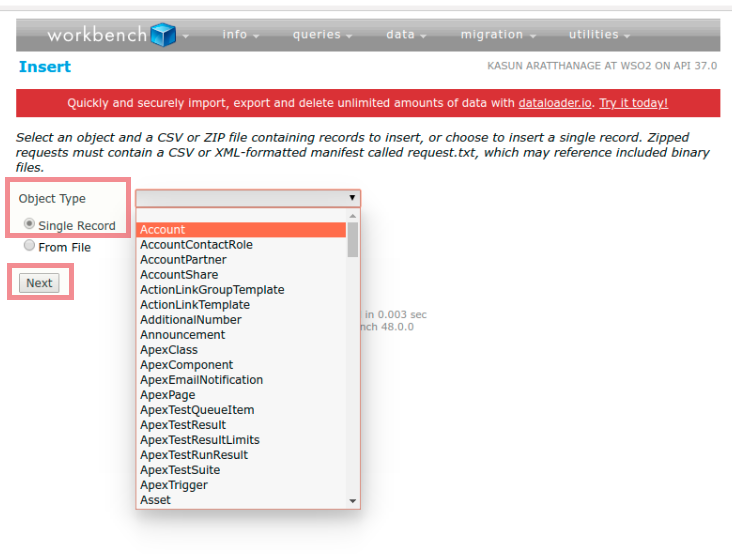
For Object Type, select Account. Ensure that the Single Record field is selected, and click Next.
-
Type in a value for the
Namefield. Then click Confirm Insert.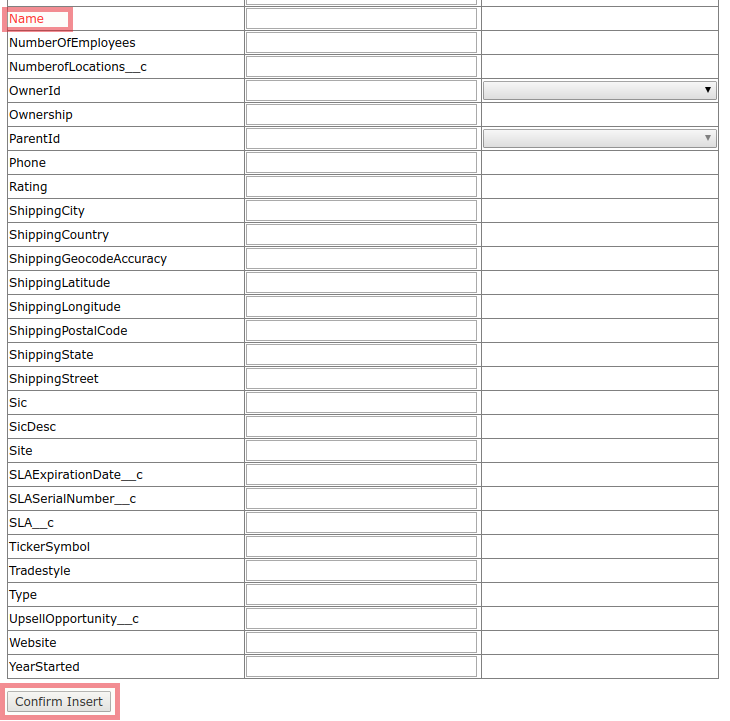
-
Switch to your Streaming Push Topics browser window. You’ll see a notification that the Account update was created. The notification returns the
IdandNamefields that we defined in the SELECT statement of our PushTopic query. Please find the notification message as shown bellow.Message received from: /topic/Account { "data": { "event": { "createdDate": "2020-04-21T13:02:56.967Z", "replayId": 11, "type": "created" }, "sobject": { "Id": "0012x0000048qhUAAQ", "Name": "Doctor" } }, "channel": "/topic/Account" }Reset Security Token
-
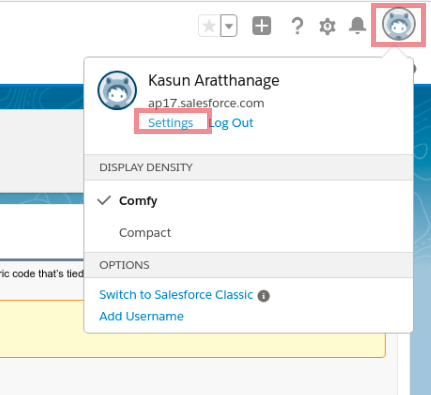
Login to the Salesforce Account. Navigate to the top right corner of the Home page and click Settings.
-
Select Reset My Security Token and then click Reset Security Token button.
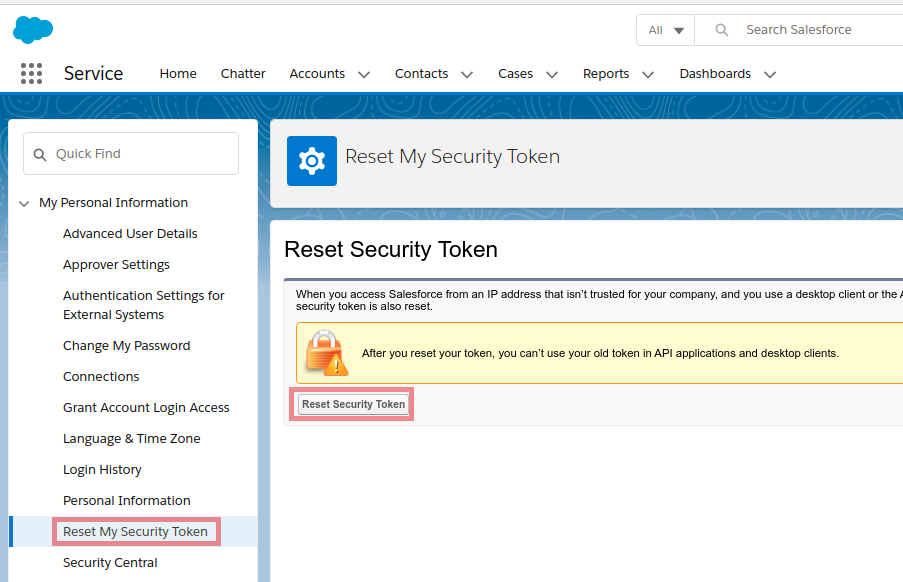
When setting up the Inbound Endpoint you need to provide the Salesforce password in the following manner. The password provided here is a concatenation of the user password and the security token provided by Salesforce. For more information, see information on creating a security token in Salesforce.
Example :
Field Value salesforce password test123 Security Token XXXXXXXXXX <parameter name="connection.salesforce.password">test123XXXXXXXXXX</parameter>