Creating a Proxy Service
Follow the instructions given below to create a new Proxy Service artifact in WSO2 Integration Studio.
Instructions
Creating the Proxy Service artifact
Follow the steps given below.
-
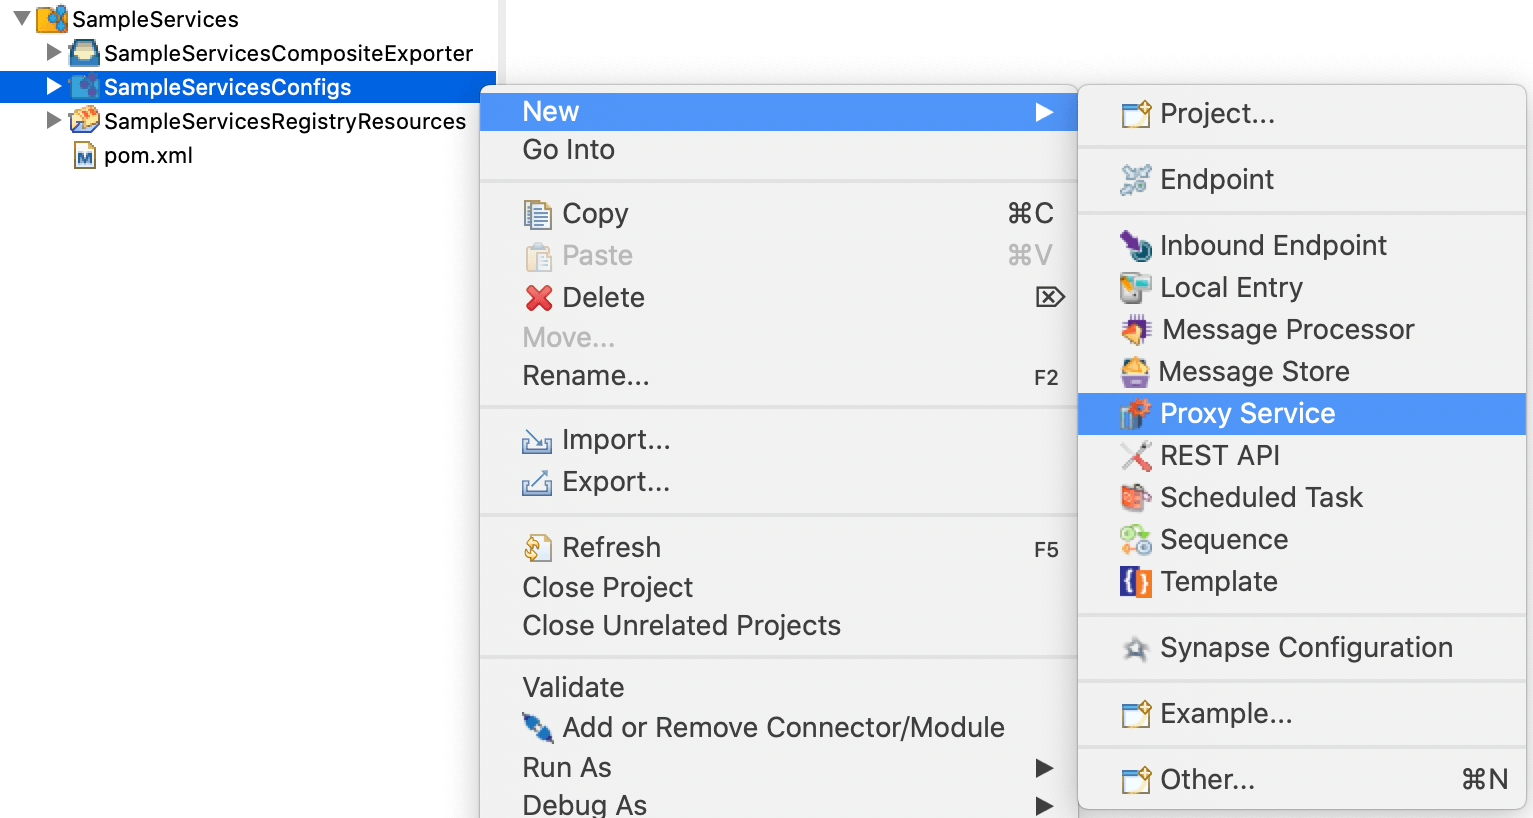
Right-click the project in the navigator and go to New → Proxy Service to open the New Proxy Service dialog box.
-
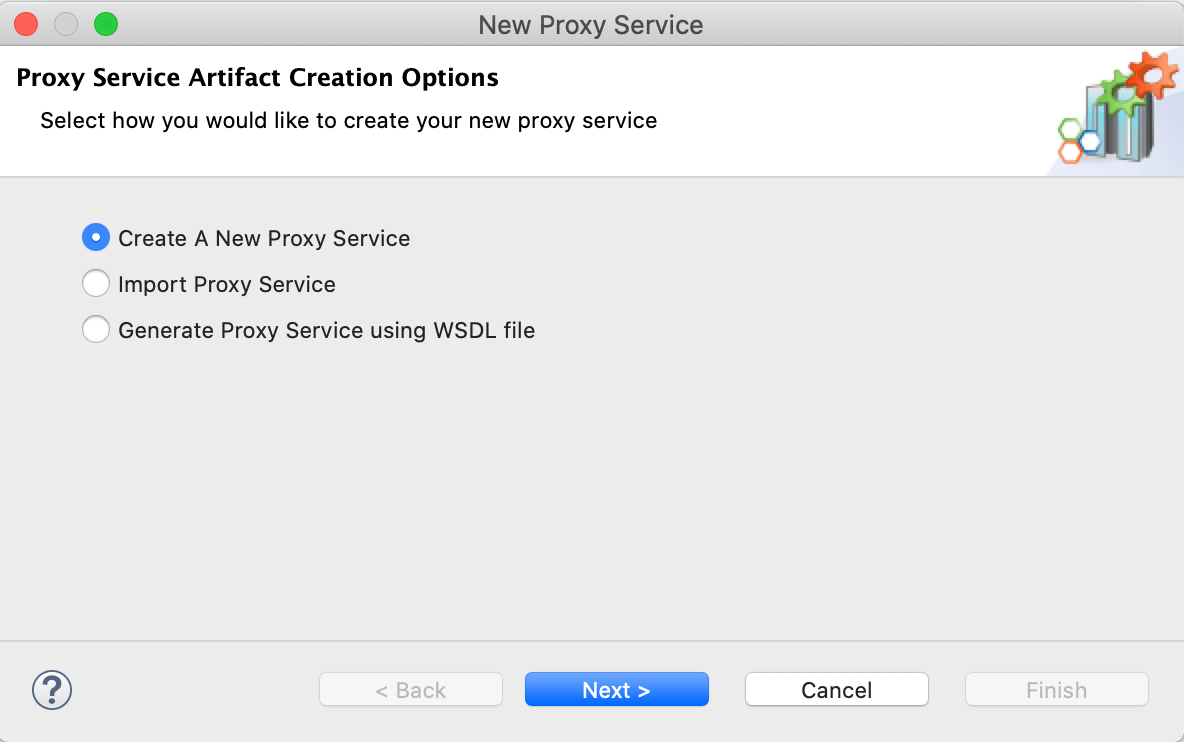
Select Create New Proxy Service and click Next.
-
Enter a unique name for the proxy service and select a proxy service template from the list shown below. These templates will automatically generate the mediation flow that is required for each use case.
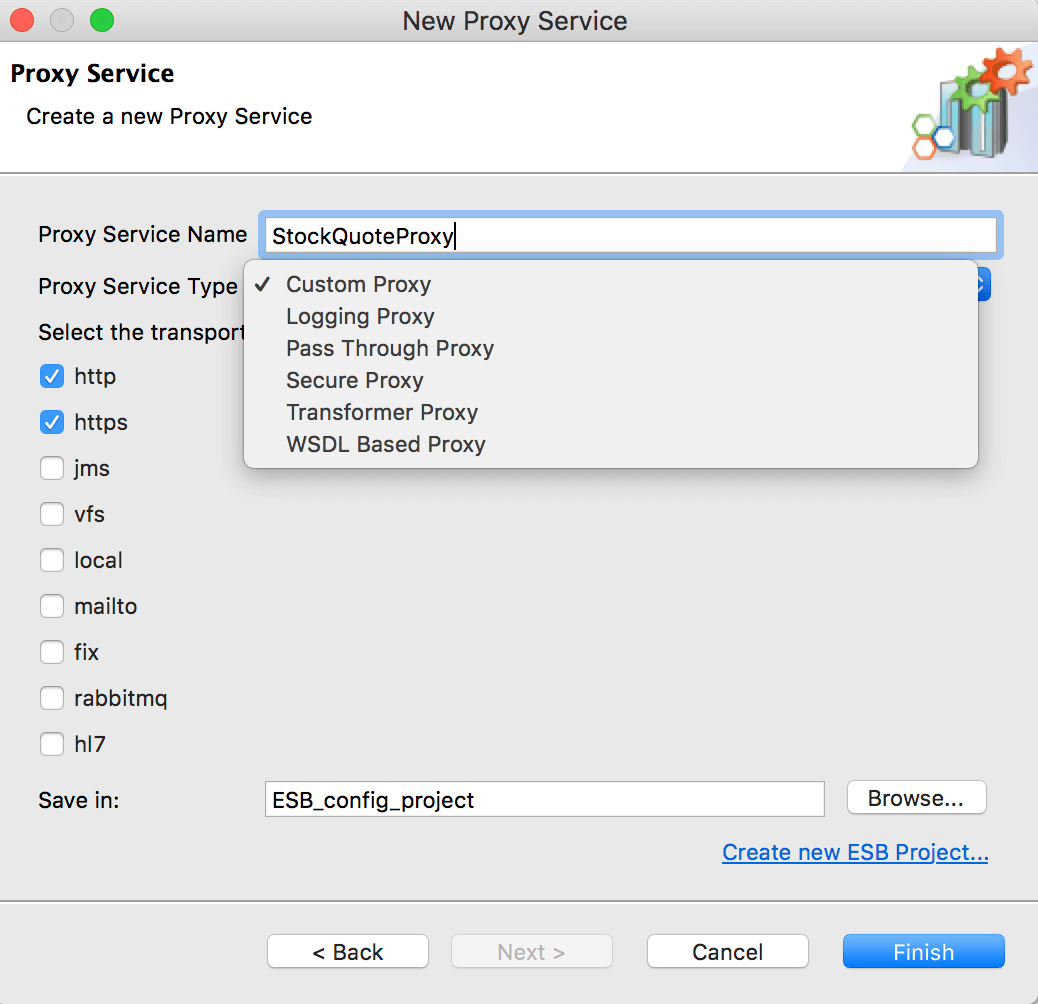
Template Type Description Pass-Through proxy This template creates a proxy service that forwards messages to the endpoint without performing any processing. Transformer proxy This template creates a proxy service that transforms all the incoming requests using XSLT and then forwards them to a given endpoint. If required it can also transform responses from the back-end service according to an XSLT that you specify. Log Forward proxy This template creates a proxy service that first logs all the incoming requests and passes them to a given endpoint. It can also log responses from the backend service before routing them to the client. You can specify the log level for requests and responses. WSDL-Based proxy This template generates a proxy service from the remotely hosted WSDL of an existing web service. The endpoint information is extracted from the WSDL you specify. Alternatively, you can generate a proxy service from a WSDL definition as explained below. Secure proxy This template creates a proxy service that uses WS-Security to process incoming requests and forward them to an unsecured backend service. You simply need to provide the policy file that should be used. Custom proxy This template creates an empty proxy service file, where you can manually create the mediation flow by adding all the sequences, endpoints, transports, and other QoS settings. -
Do one of the following to save the proxy service:
- To save the proxy service in an existing ESB Config project in your workspace, click Browse and select that project.
- To save the proxy service in a new ESB Config project, click Create new Project and create the new project.
- Click Finish.
The proxy service is created in the src/main/synapse-config/proxy-services folder under the project you specified.
Creating a Proxy Service using a WSDL definition
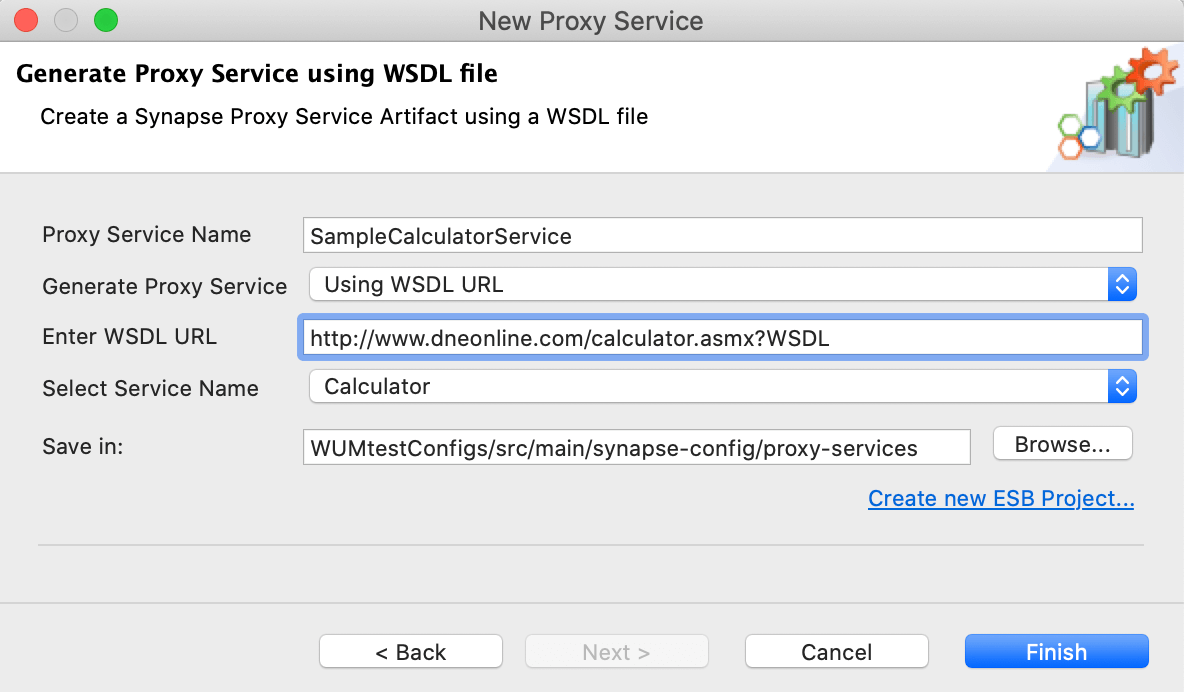
Follow the steps given below after opening the New Proxy Service dialog box.
-
Select Generate Proxy Service using WSDL file and click Next.
-
Provide a URL or a file location as the source of the WSDL and click Finish.
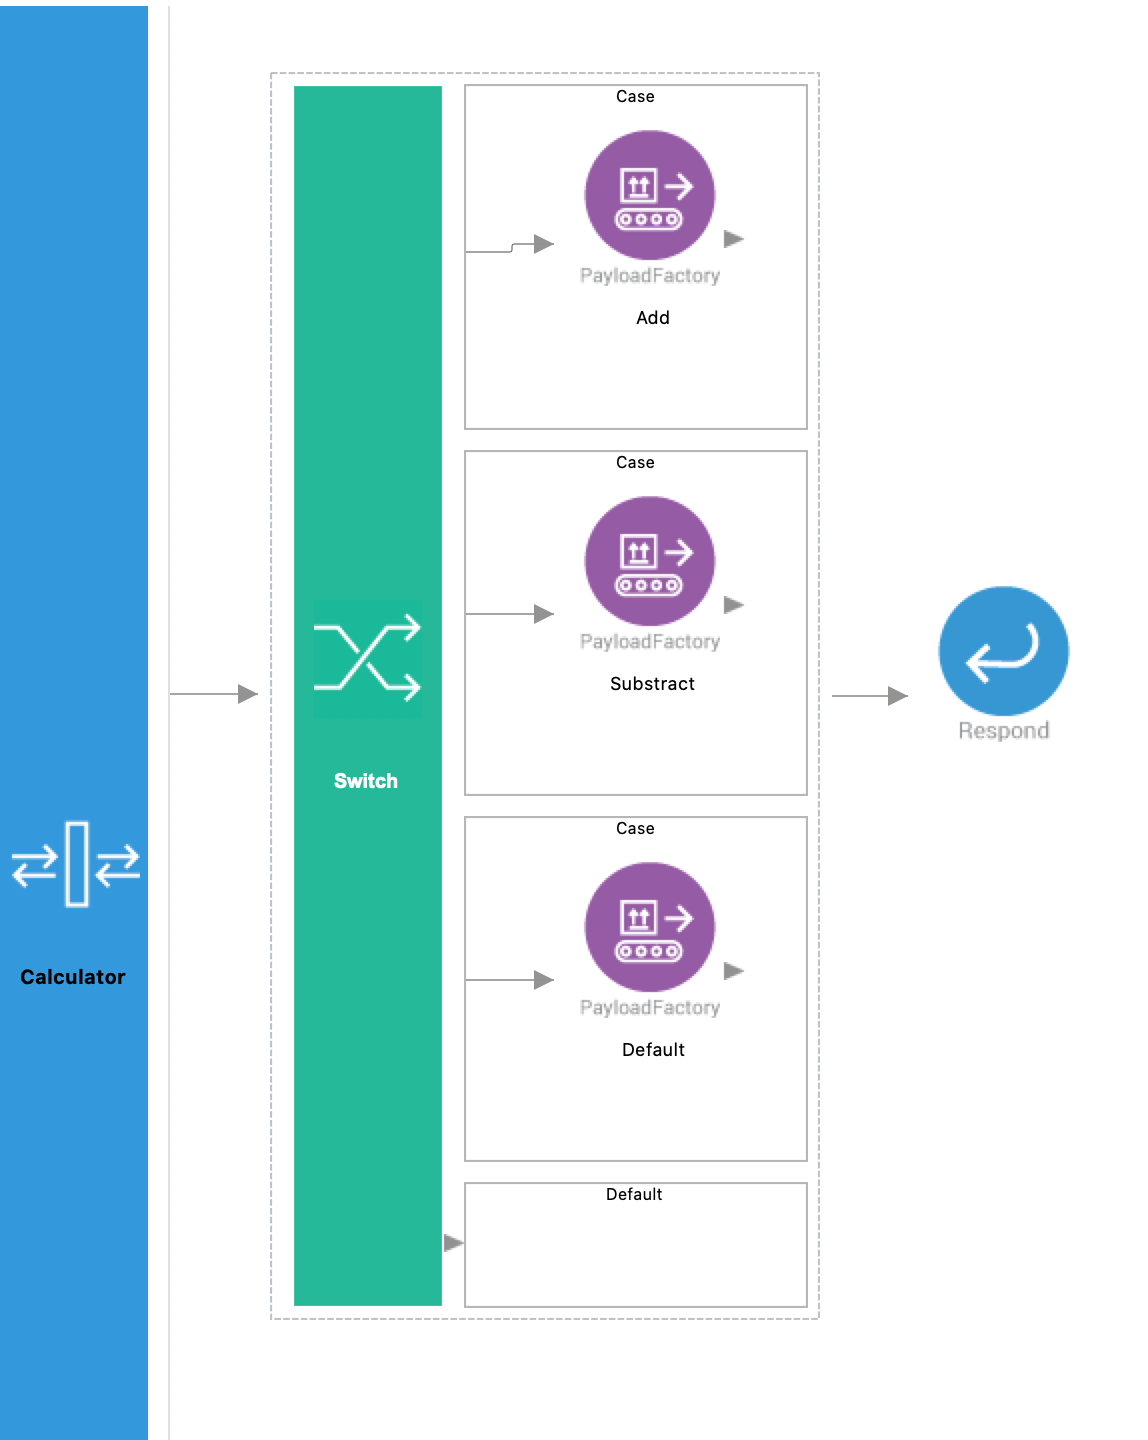
You will now see the mediation logic generated from the WSDL as shown below. Note that the Switch mediator is added to the mediation logic and that the different operations given in the WSDL are represented as switch cases.
Tip
If your WSDL does not have SOAPActions specified for the operations, only the default switch case will be generated.
Designing the integration
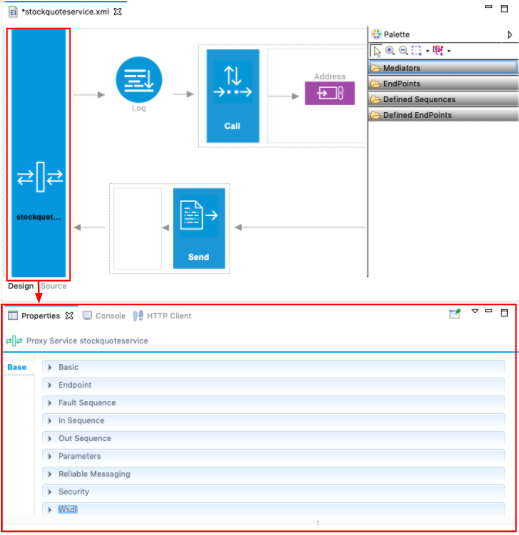
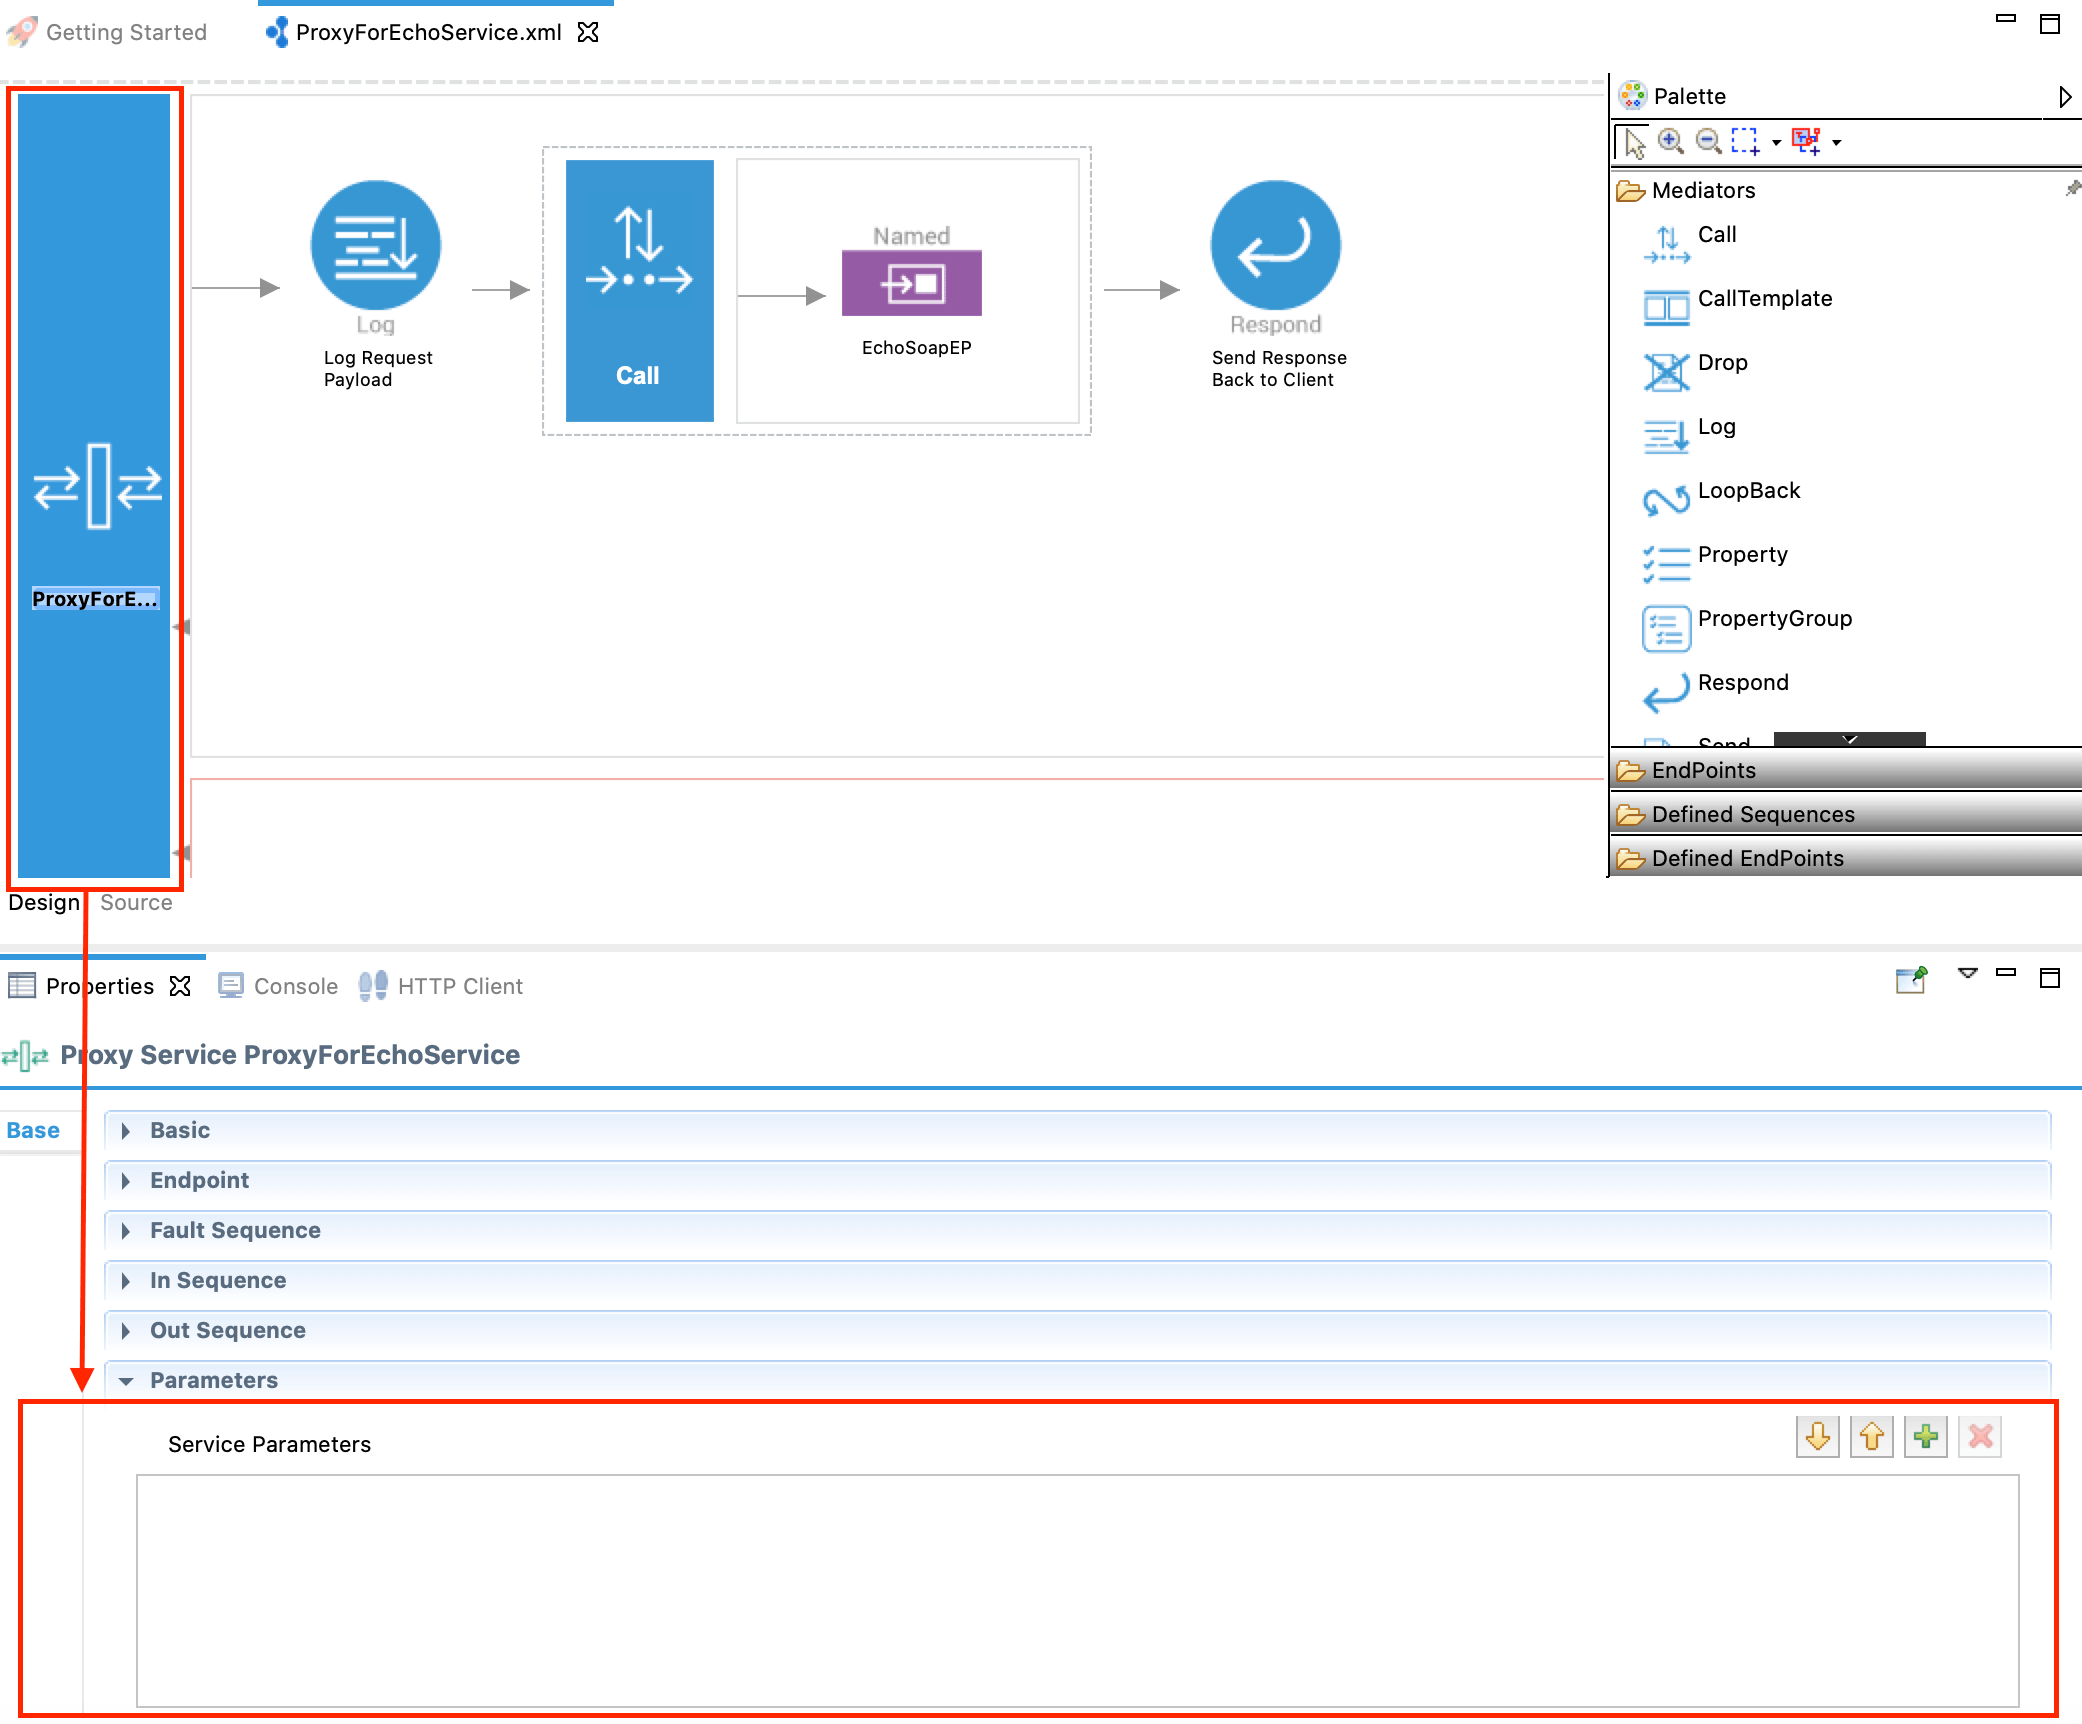
When you open the proxy service from the Config project in the project explorer, you will see the default Design view as shown below.

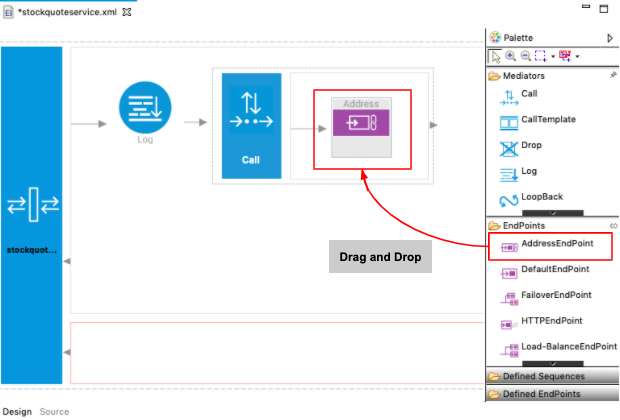
Drag and drop the required integration artifacts from the Palette to the canvas and design the integration flow.
Updating the properties
To add service-level properties to the proxy service from the Design view:
-
Double-click the Proxy Service icon to open the Properties tab for the service.
-
Expand each section and add the required parameters.
To add service-level transport parameters:
-
Go to the Properties tab and expand the Parameters section as shown below.
-
Click the plus
 icon and add the parameter name and value as a key-value pair:
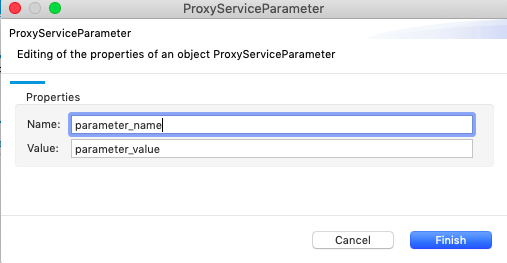
See the following links for the list of transport parameters you can use:
- VFS Parameters
- JMS Parameters
- FIX Parameters
- MailTo Parameters
- MQTT Parameters
-
See the complete list of service-level properties and parameters that you can configure.
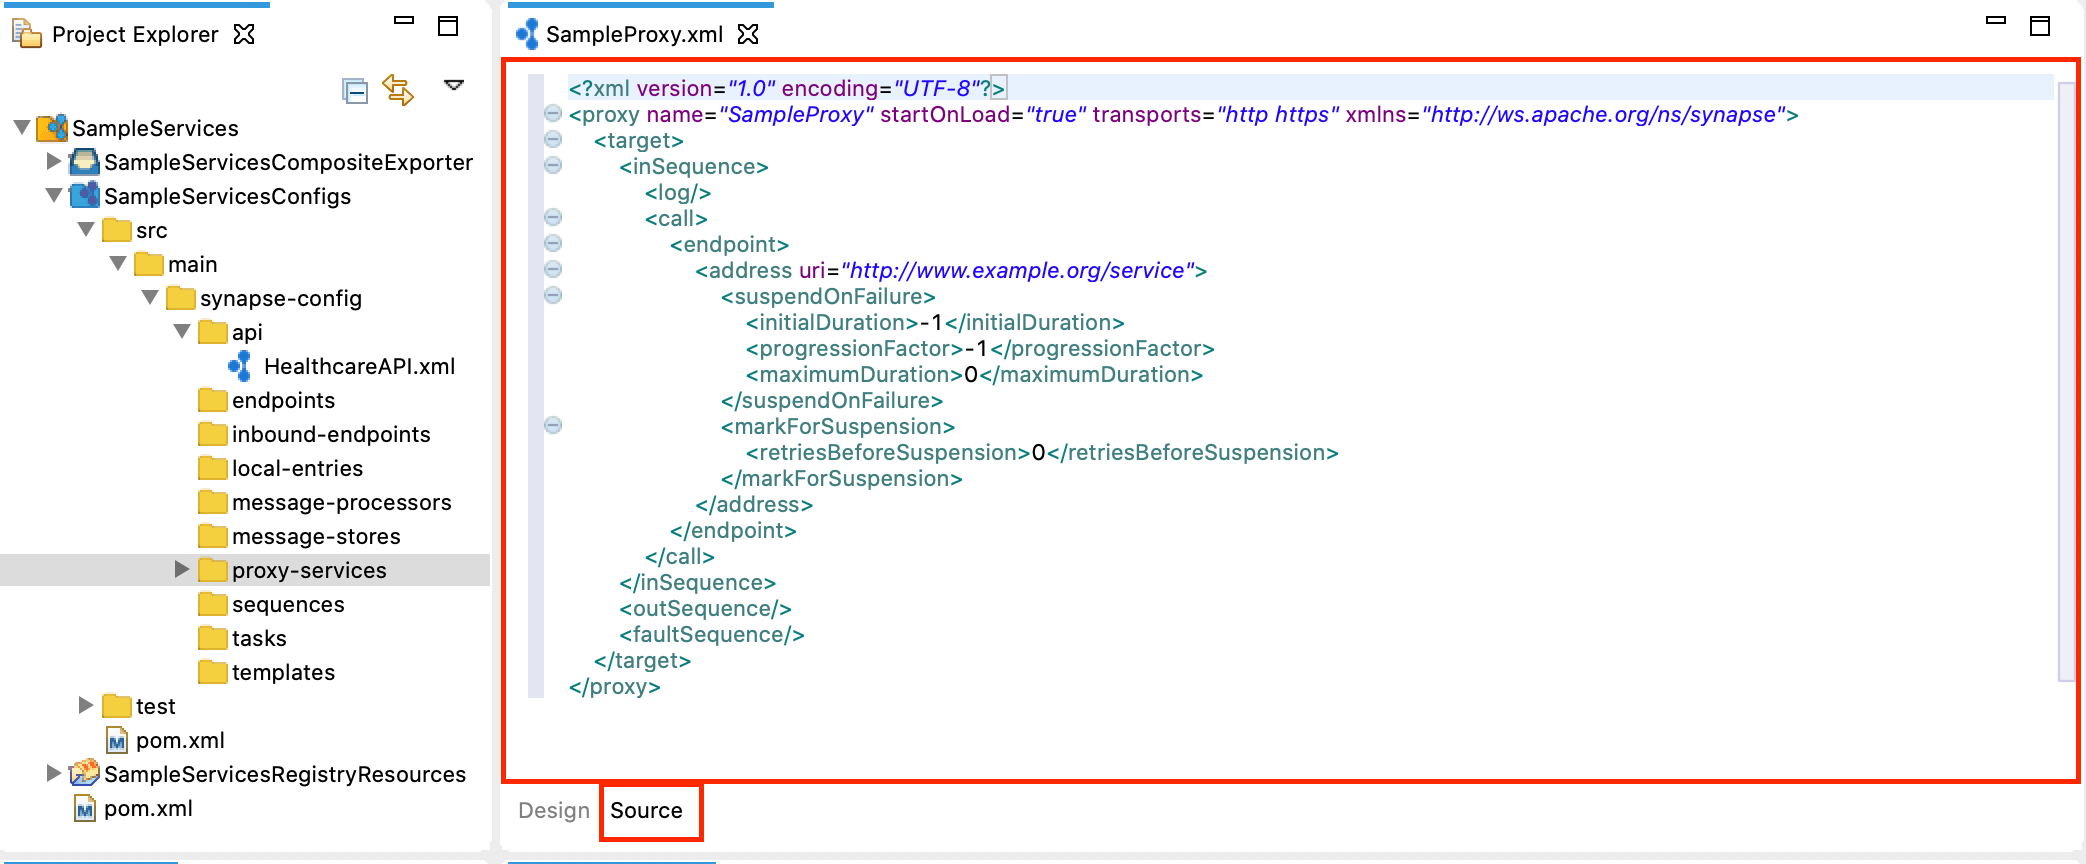
Using the Source View
Click the Source tab to view the XML-based synapse configuration (source code) of the proxy service. You can update the service using this view.