Creating an Inbound Endpoint
Follow the instructions given below to create a new Inbound Endpoint artifact in WSO2 Integration Studio.
Instructions
Creating the Inbound Endpoint artifact
-
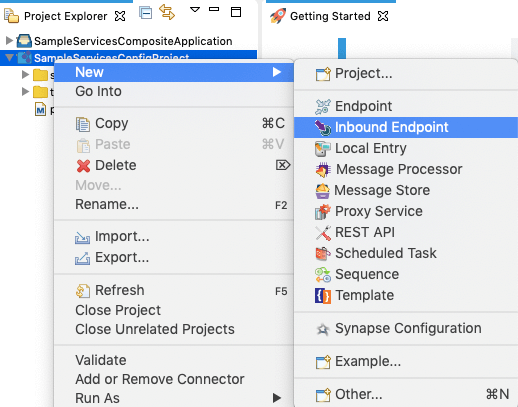
If you have already created an ESB Config project, right-click the project and go to New → Inbound Endpoint to open the New Inbound Endpoint Artifact.
-
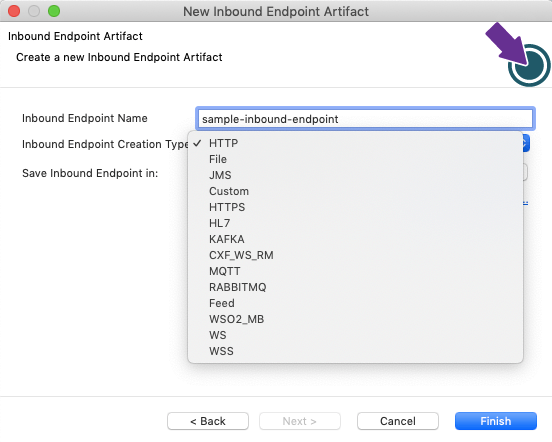
Select Create a New Inbound Endpoint and click Next.

-
Enter a unique name for the inbound endpoint, and select an Inbound Endpoint Creation Type from the list.
-
Specify values for the required parameter for the selected inbound endpoint type.
Note
For certain protocols (HL7, KAFKA, Custom, MQTT, RabbitMq, WSO2_MB, WS, and WSS) the main sequence and error sequence are mandatory fields.
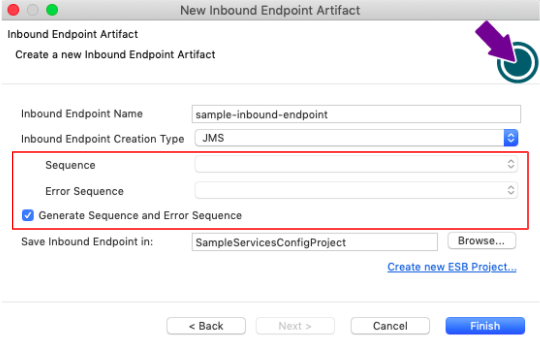
You can select sequences that already exist in the workspace and add them to the Sequence and Error sequence fields. If you don't have any sequences in the workspace, click Generate Sequence and Error Sequence to generate new sequences for the inbound endpoint.
-
Do one of the following:
- To save the endpoint in an existing ESB Config project in your workspace, click Browse and select that project.
- To save the endpoint in a new ESB Config project, click Create new Project and create the new project.
- Click Finish.
The inbound endpoint is created in the src/main/synapse-config/inbound-endpoint folder under the ESB Config project you specified.
Designing the integration
When you open the inbound endpoint from the Config project in the project explorer, you will see the default Design view.
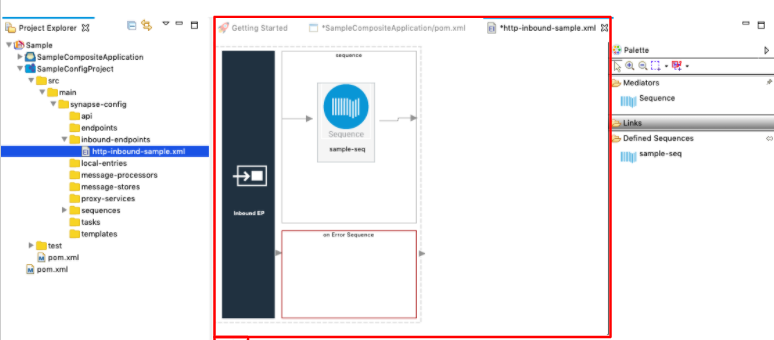
The integration flow for an inbound endpoint is defined within named sequences. You can drag and drop sequences from the Palette to the canvas as shown below.
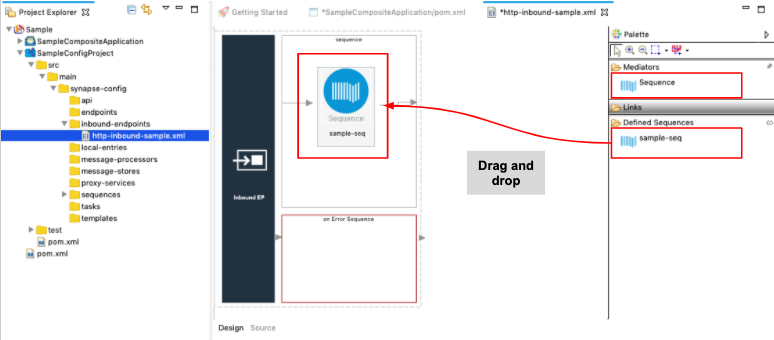
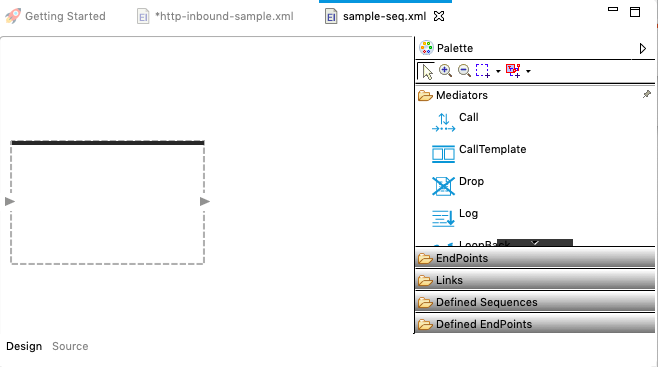
Double-click the Sequence artifact to open the canvas for the sequence. You can now drag and drop the mediation artifacts from the palette and design the integration flow.
Updating the properties
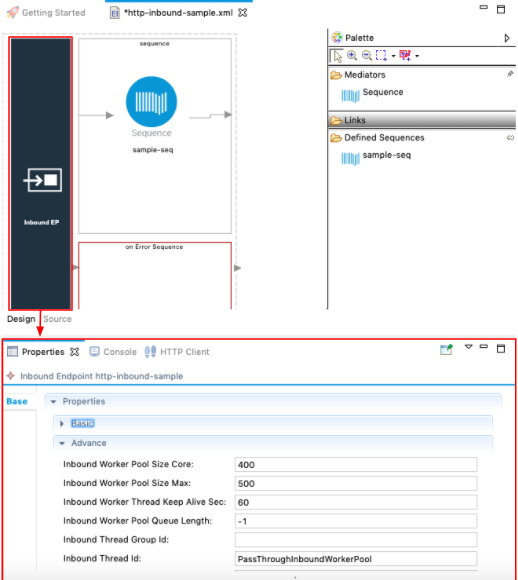
To update properties from the Design view:
-
Double-click the Inbound Endpoint icon to open the Properties tab.
-
See the following links for the list of parameters for each inbound endpoint type:
Note
Redeployment of listening inbound endpoints fail?
A listening inbound endpoint opens the port for itself during deployment. Therefore, if you are redeploying a listening inbound endpoint artifact, the redeployment will not be successful until the port that was previously opened for the inbound endpoint is closed.
By default, the system will wait for 10 seconds for the previously opened port to close down. If you want to increase this waiting time beyond 10 seconds, be sure to add the following system property in the deployment.toml file, which is stored in the MI_HOME/conf/ directory and restart the server before redeploying the artifacts.
[system.parameter]
'synapse.transport.portCloseVerifyTimeout' = 20
synapse.transport.portCloseVerifyTimeout should be wrapped by single quotes since it contain dots. The TOML format detects the dot as an object separator.
Also note that this setting may be required in Windows environments as the process of closing a port can sometimes take longer than 10 seconds.
Using the Source View
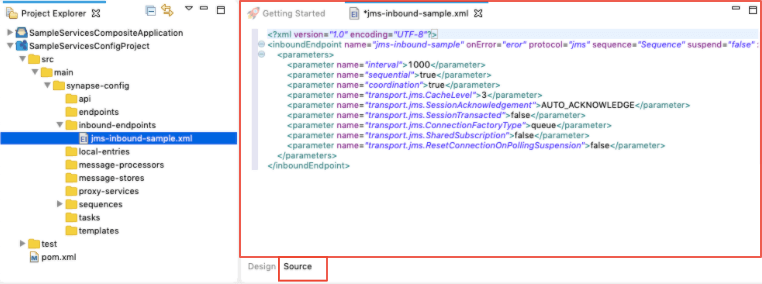
Click the Source tab to view the XML-based synapse configuration (source code) of the inbound endpoint. You can update the service using this view.
Examples
- JMS Inbound Endpoint example
- File Inbound Endpoint example
- HTTP Inbound Endpoint example
- HTTPS Inbound Endpoint example
- HL7 Inbound Endpoint example
- MQTT Inbound Endpoint example
- RabbitMQ Inbound Endpoint example
- Kafka Inbound Endpoint example
- WebSocket Inbound Endpoint example
- Using Inbound Endpoints with Registry
Tutorial
- See the tutorial on using inbound endpoints