Skip to content

Apply Security to a Proxy Service

Follow the instructions below to apply security to a proxy service via WSO2 Integration Studio:

Prerequisites

Be sure to configure a user store for the Micro Integrator and add the required users and roles.

Step 1 - Create the security policy file

Follow the instructions below to create a WS-Policy resource in your integration project. This will be your security policy file.

  1. Follow the steps in create integration project guide to set up the Integration Project.
  2. Open the project overview and click on + Add Artifact.
    Add Artifact
  3. Click on + View More to expand the list of artifacts.
    View More
  4. Select Registry under the Other Artifacts section.
    Select Registry
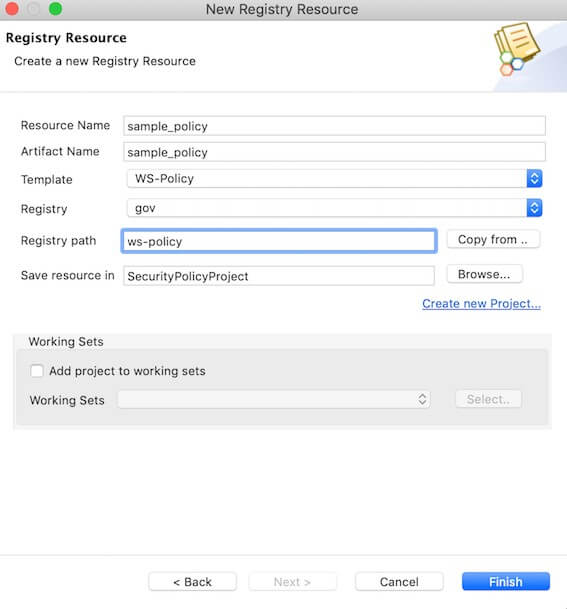
  5. Add the following details in the Create New Registry Resource window that opens and click on Create.
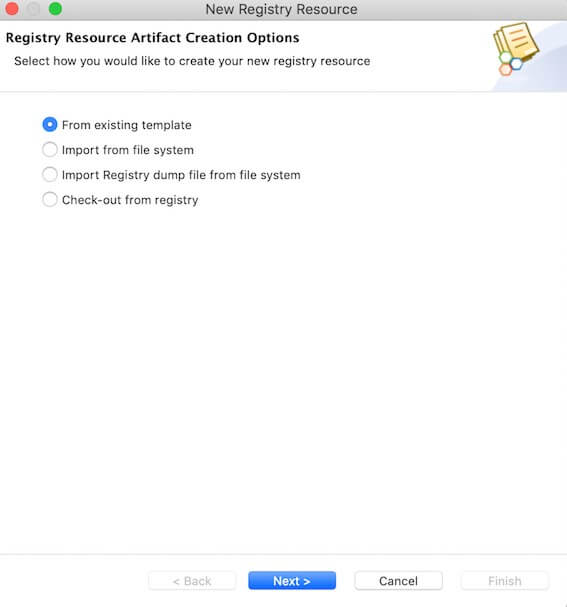
    Create Options: Select From existing template.
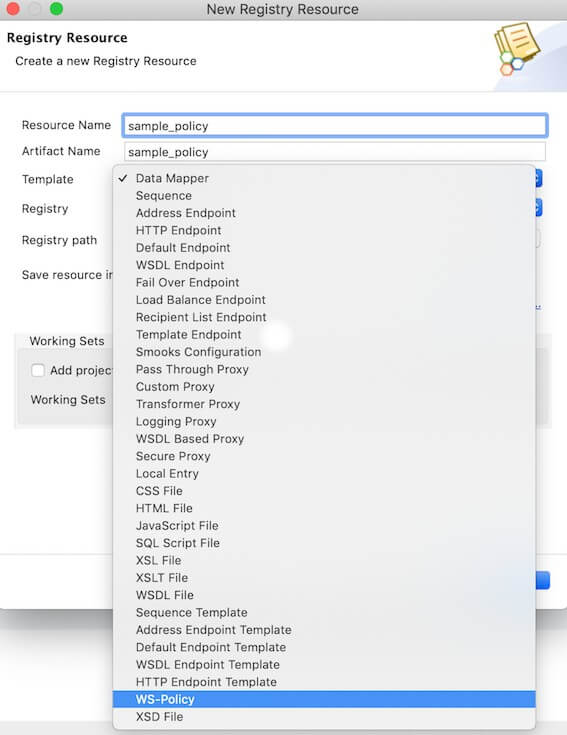
    Template Type: Select WS-Policy.
    Resource Name: Enter a name for the resource. Artifact Name: Enter a name for the artifact. Select registry type: Select the registry type where the resource should be saved. Select Governance registry (gov) for this example. Registry Path: Provide the registry path where the resource should be saved.
    Create New Registry Resource
  6. The created policy file will be listed in the project explorer.
    Resource in Project Explorer
    You can also find this security policy file under the Registry Explorer section in the sidebar. Double-click on the file to open it.
    Registry Explorer

    Note

    Currently, the Design View of the policy editor is not available in WSO2 MI for VSCode. You can edit the properties via the Source View.

  7. Edit the policy file in the Source View to enable the required security scenario.
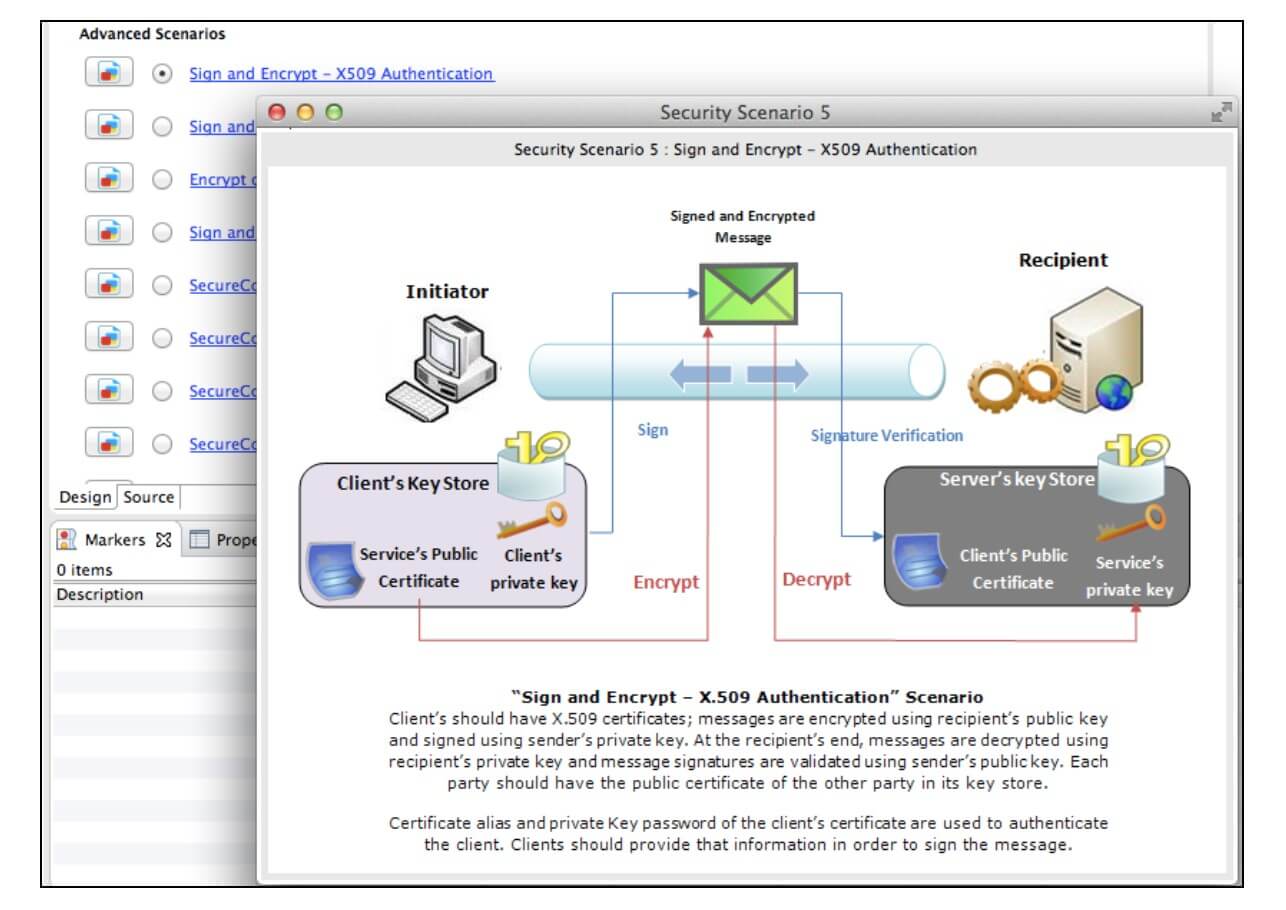
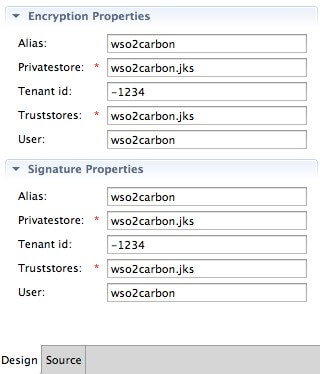
    For example, to enable the Sign and Encrypt security scenario, add the following encryption/signature properties to the policy file.
    Alias: wso2carbon Privatestore: wso2carbon.jks Tenant id: -1234 Truststores: wso2carbon.jks User: wso2carbon

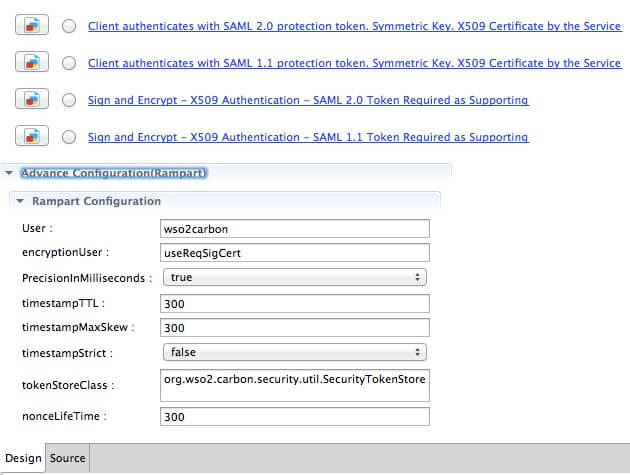
    The following advanced rampart properties have been added to your policy file by default.
    User: wso2carbon encryptionUser: useReqSigCert timestampPrecisionInMilliseconds: true timestampTTL: 300 timestampMaxSkew: 300 timestampStrict: false tokenStoreClass: org.wso2.carbon.security.util.SecurityTokenStore nonceLifeTime: 300

    The complete policy file with enabled Sign and Encrypt - X509 Authentication security scenario will look as follows.

    <wsp:Policy wsu:Id="SigEncr" xmlns:wsp="http://schemas.xmlsoap.org/ws/2004/09/policy" xmlns:wsu="http://docs.oasis-open.org/wss/2004/01/oasis-200401-wss-wssecurity-utility-1.0.xsd">
        <wsp:ExactlyOne>
            <wsp:All>
                <sp:AsymmetricBinding xmlns:sp="http://schemas.xmlsoap.org/ws/2005/07/securitypolicy">
                    <wsp:Policy>
                        <sp:InitiatorToken>
                            <wsp:Policy>
                                <sp:X509Token sp:IncludeToken="http://schemas.xmlsoap.org/ws/2005/07/securitypolicy/IncludeToken/AlwaysToRecipient">
                                    <wsp:Policy>
                                        <sp:RequireThumbprintReference/>
                                        <sp:WssX509V3Token10/>
                                    </wsp:Policy>
                                </sp:X509Token>
                            </wsp:Policy>
                        </sp:InitiatorToken>
                        <sp:RecipientToken>
                            <wsp:Policy>
                                <sp:X509Token sp:IncludeToken="http://schemas.xmlsoap.org/ws/2005/07/securitypolicy/IncludeToken/Never">
                                    <wsp:Policy>
                                        <sp:RequireThumbprintReference/>
                                        <sp:WssX509V3Token10/>
                                    </wsp:Policy>
                                </sp:X509Token>
                            </wsp:Policy>
                        </sp:RecipientToken>
                        <sp:AlgorithmSuite>
                            <wsp:Policy>
                                <sp:Basic256/>
                            </wsp:Policy>
                        </sp:AlgorithmSuite>
                        <sp:Layout>
                            <wsp:Policy>
                                <sp:Strict/>
                            </wsp:Policy>
                        </sp:Layout>
                        <sp:IncludeTimestamp/>
                        <sp:OnlySignEntireHeadersAndBody/>
                    </wsp:Policy>
                </sp:AsymmetricBinding>
                <sp:Wss11 xmlns:sp="http://schemas.xmlsoap.org/ws/2005/07/securitypolicy">
                    <wsp:Policy>
                        <sp:MustSupportRefKeyIdentifier/>
                        <sp:MustSupportRefIssuerSerial/>
                        <sp:MustSupportRefThumbprint/>
                        <sp:MustSupportRefEncryptedKey/>
                        <sp:RequireSignatureConfirmation/>
                    </wsp:Policy>
                </sp:Wss11>
                <sp:Wss10 xmlns:sp="http://schemas.xmlsoap.org/ws/2005/07/securitypolicy">
                    <wsp:Policy>
                        <sp:MustSupportRefKeyIdentifier/>
                        <sp:MustSupportRefIssuerSerial/>
                    </wsp:Policy>
                </sp:Wss10>
                <sp:SignedParts xmlns:sp="http://schemas.xmlsoap.org/ws/2005/07/securitypolicy">
                    <sp:Body/>
                </sp:SignedParts>
                <sp:EncryptedParts xmlns:sp="http://schemas.xmlsoap.org/ws/2005/07/securitypolicy">
                    <sp:Body/>
                </sp:EncryptedParts>
            </wsp:All>
        </wsp:ExactlyOne>
        <rampart:RampartConfig xmlns:rampart="http://ws.apache.org/rampart/policy">
            <rampart:user>wso2carbon</rampart:user>
            <rampart:encryptionUser>useReqSigCert</rampart:encryptionUser>
            <rampart:timestampPrecisionInMilliseconds>true</rampart:timestampPrecisionInMilliseconds>
            <rampart:timestampTTL>300</rampart:timestampTTL>
            <rampart:timestampMaxSkew>300</rampart:timestampMaxSkew>
            <rampart:timestampStrict>false</rampart:timestampStrict>
            <rampart:tokenStoreClass>org.wso2.carbon.security.util.SecurityTokenStore
            </rampart:tokenStoreClass>
            <rampart:nonceLifeTime>300</rampart:nonceLifeTime>
            <rampart:encryptionCrypto>
                <rampart:crypto cryptoKey="org.wso2.carbon.security.crypto.privatestore" provider="org.wso2.carbon.security.util.ServerCrypto">
                    <rampart:property name="org.wso2.carbon.security.crypto.alias">wso2carbon</rampart:property>
                    <rampart:property name="org.wso2.carbon.security.crypto.privatestore">wso2carbon.jks</rampart:property>
                    <rampart:property name="org.wso2.stratos.tenant.id">-1234</rampart:property>
                    <rampart:property name="org.wso2.carbon.security.crypto.truststores">wso2carbon.jks</rampart:property>
                    <rampart:property name="rampart.config.user">wso2carbon</rampart:property>
                </rampart:crypto>
            </rampart:encryptionCrypto>
            <rampart:signatureCrypto>
                <rampart:crypto cryptoKey="org.wso2.carbon.security.crypto.privatestore" provider="org.wso2.carbon.security.util.ServerCrypto">
                    <rampart:property name="org.wso2.carbon.security.crypto.alias">wso2carbon</rampart:property>
                    <rampart:property name="org.wso2.carbon.security.crypto.privatestore">wso2carbon.jks</rampart:property>
                    <rampart:property name="org.wso2.stratos.tenant.id">-1234</rampart:property>
                    <rampart:property name="org.wso2.carbon.security.crypto.truststores">wso2carbon.jks</rampart:property>
                    <rampart:property name="rampart.config.user">wso2carbon</rampart:property>
                </rampart:crypto>
            </rampart:signatureCrypto>
        </rampart:RampartConfig>
    </wsp:Policy>
    

    Info

    • Change the tokenStoreClass in the policy file to org.wso2.micro.integrator.security.extensions.SecurityTokenStore

    • Replace ServerCrypto class with org.wso2.micro.integrator.security.util.ServerCrypto if present.

Step 2 - Add the security policy to the proxy service

  1. Add a proxy service to your workspace.

    You can do either one of the following actions for this purpose.

  2. Click the proxy service on the project explorer to open the design view and click on Edit to open the form view.

  3. Click on Advanced Options and navigate to the Security section.

    Security tab

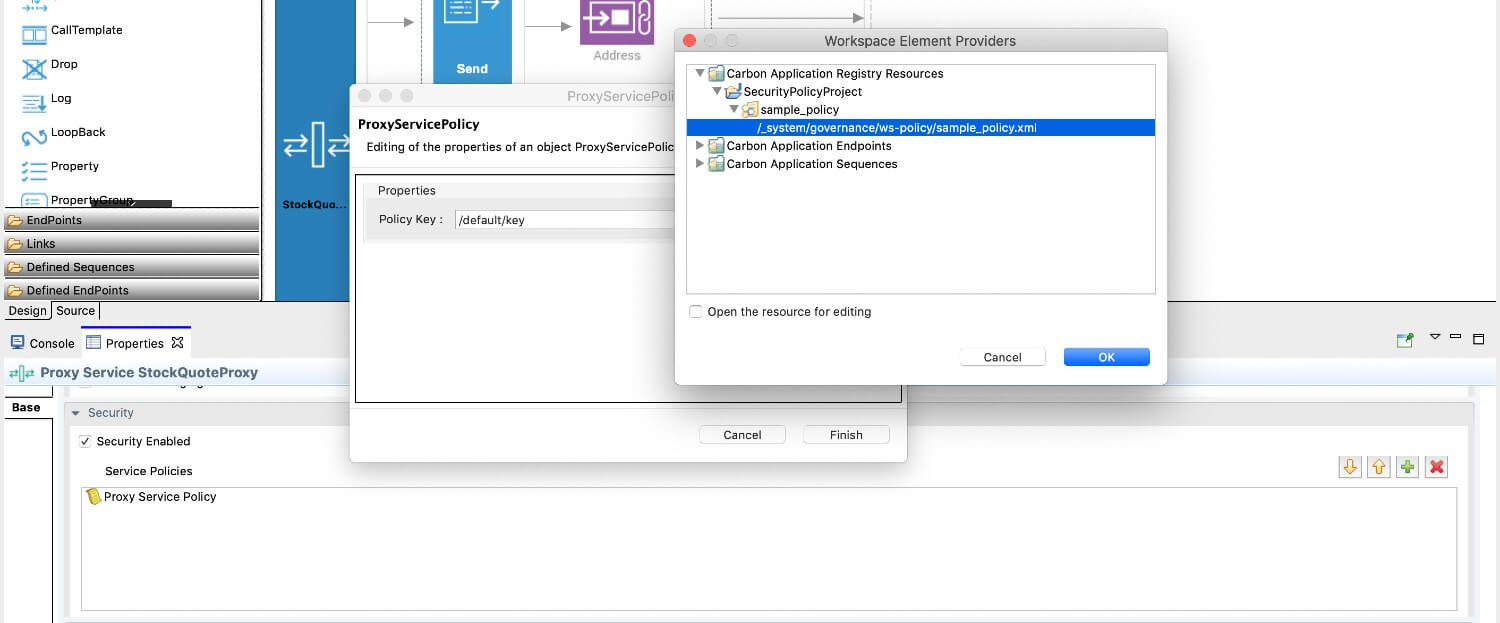
  4. Select the Security Enabled checkbox and click on the + Add Policy to select the security policy file you created in the previous step.

    Security Policy

    Select the security policy file from the drop-down list and click Save.

Step 3 - Build and run the artifacts

To deploy and run the project, refer the build and run guide.

Step 4 - Test the service

Create a Soap UI project with the relevant security settings and then send the request to the hosted service.

General guidelines on testing with SOAP UI

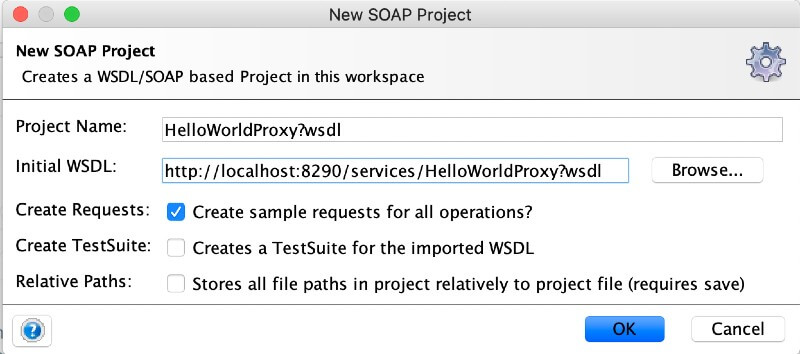
  1. Create a "SOAP Project" in SOAP UI using the WSDL URL of the proxy service.

    Example: http://localhost:8280/services/SampleProxy?wsdl
  2. Double-click on the created SOAP project, click on WS-Security-Configuration, Keystores, and add the WSO2 keystore.
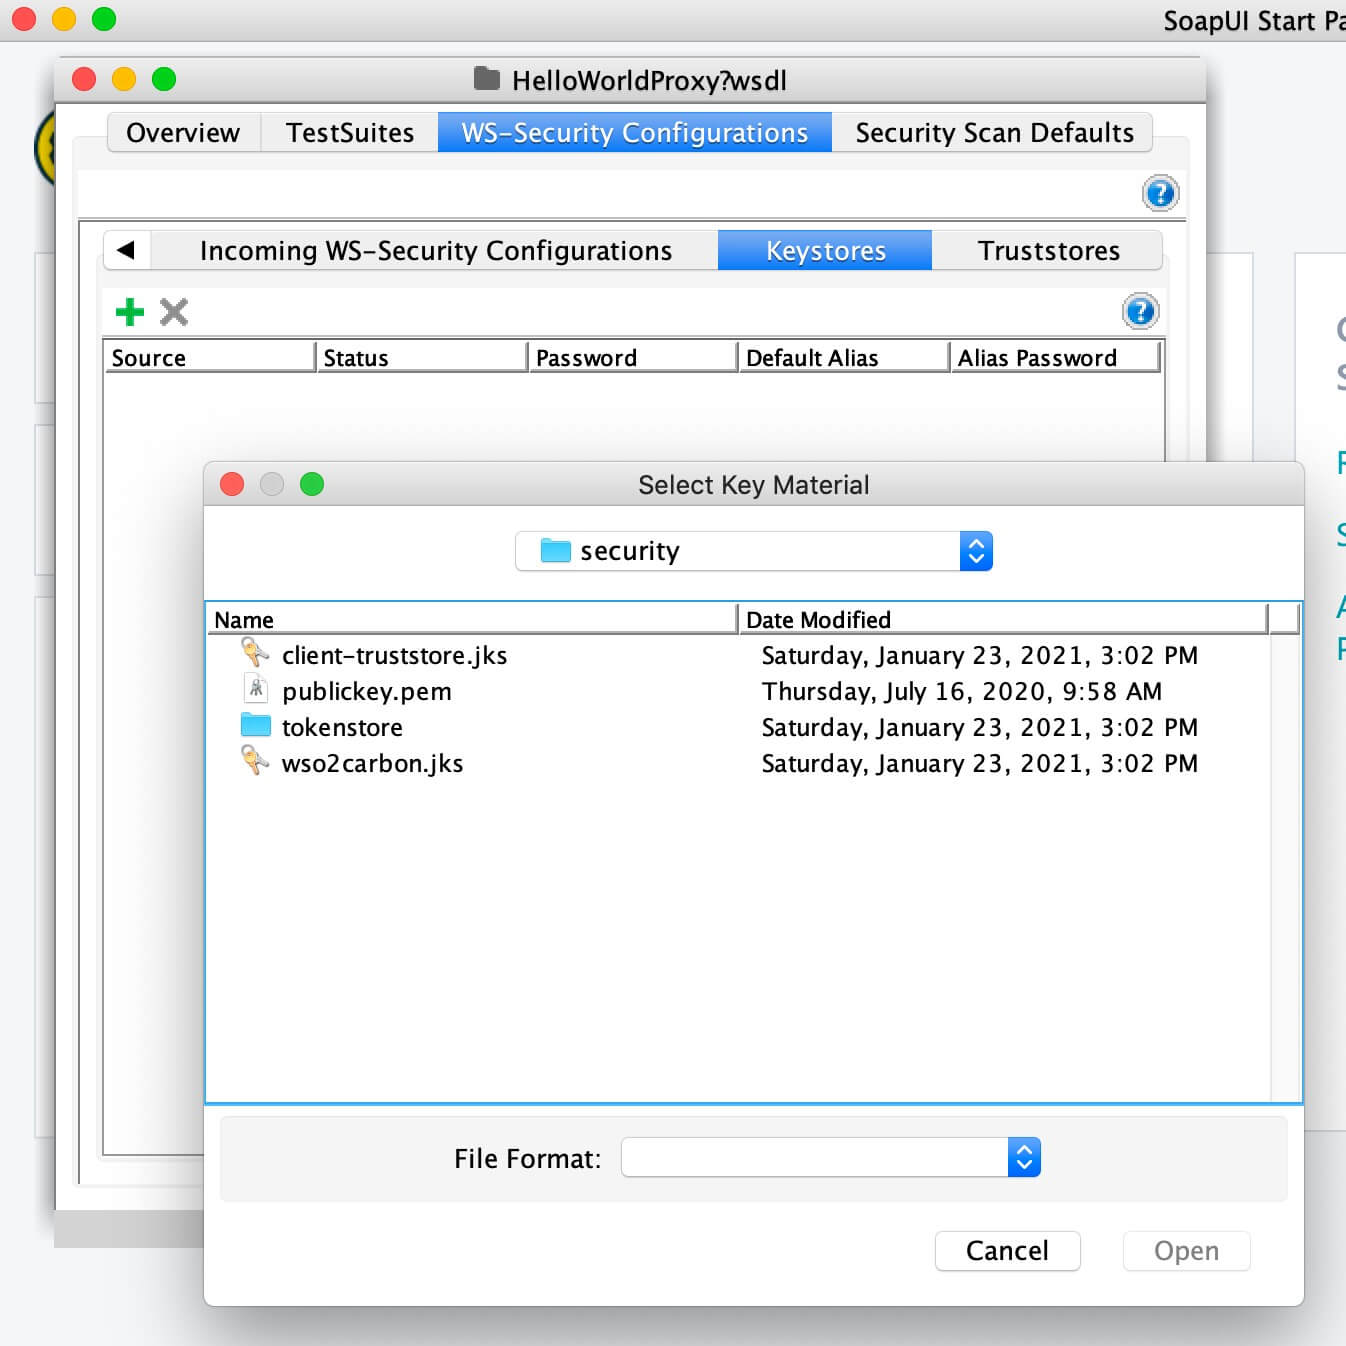
  3. Enter the keystore password for the keystore configuration.

  4. Click on Outgoing WS-Security Configuration, and add a new policy by specifying a name.

    The name can be anything.
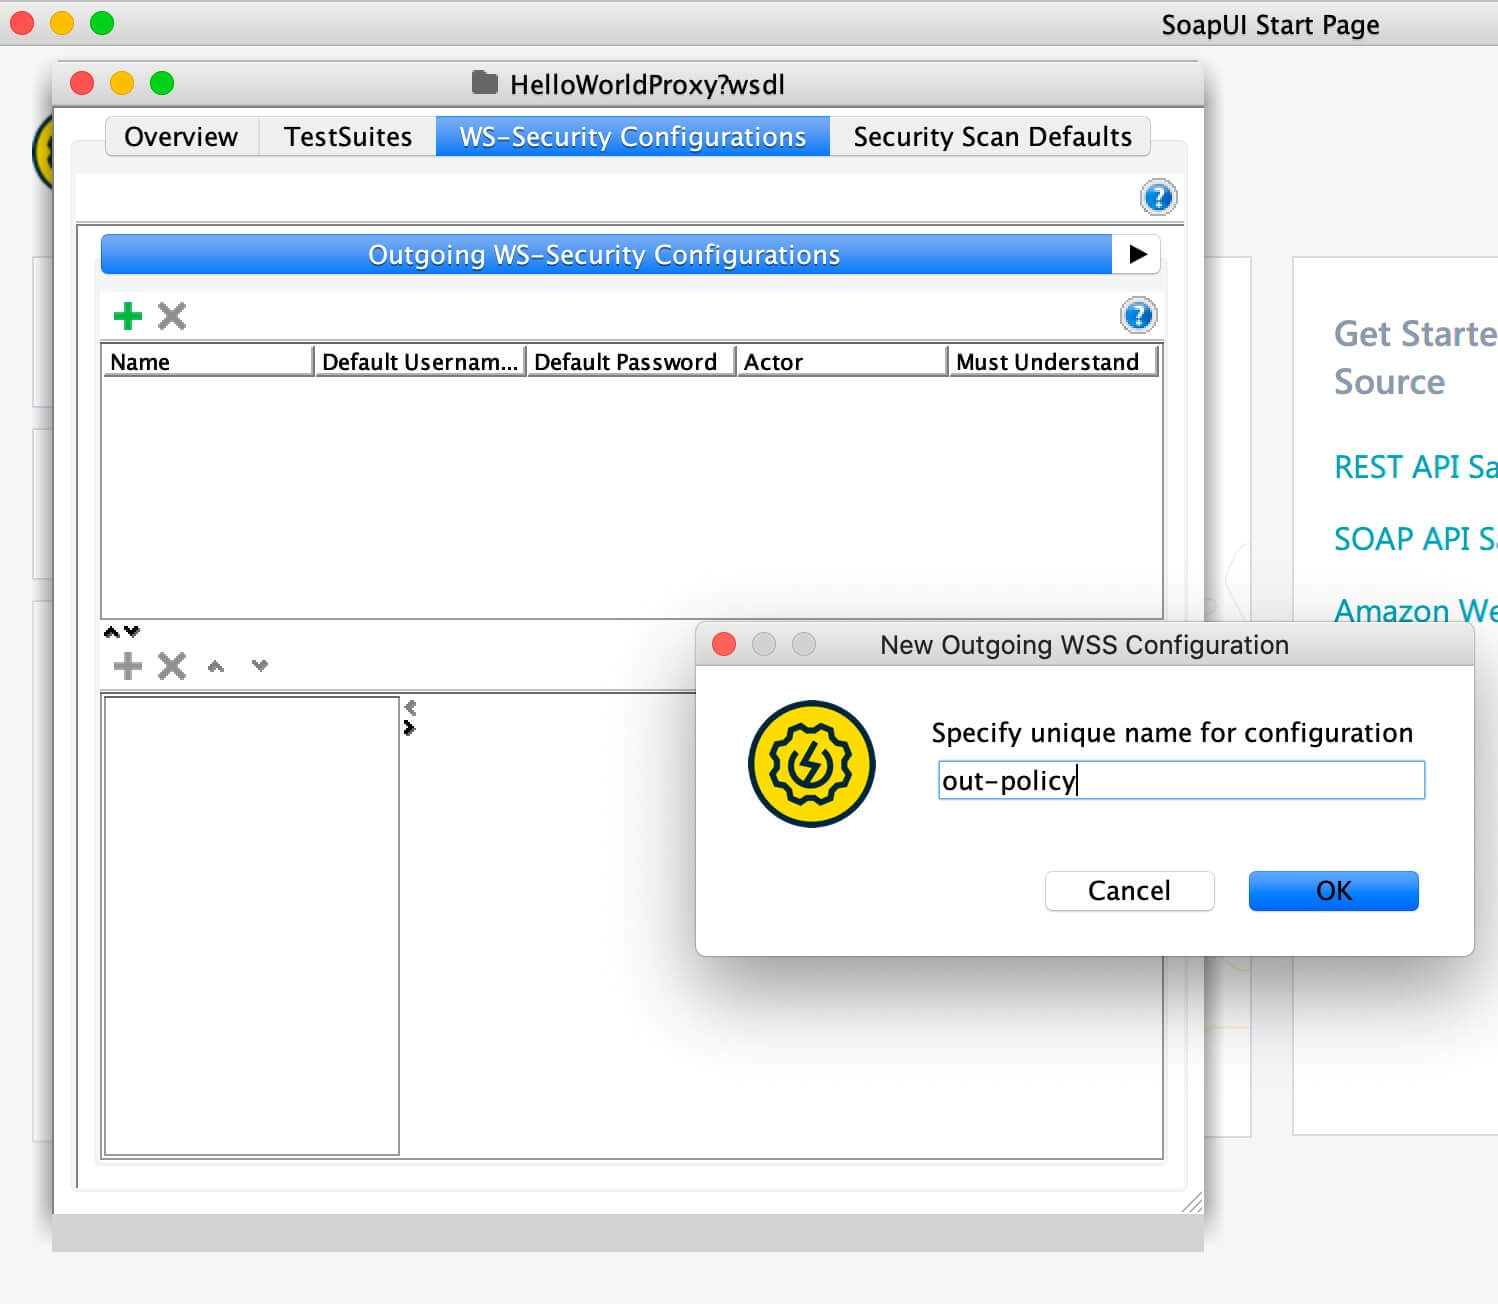
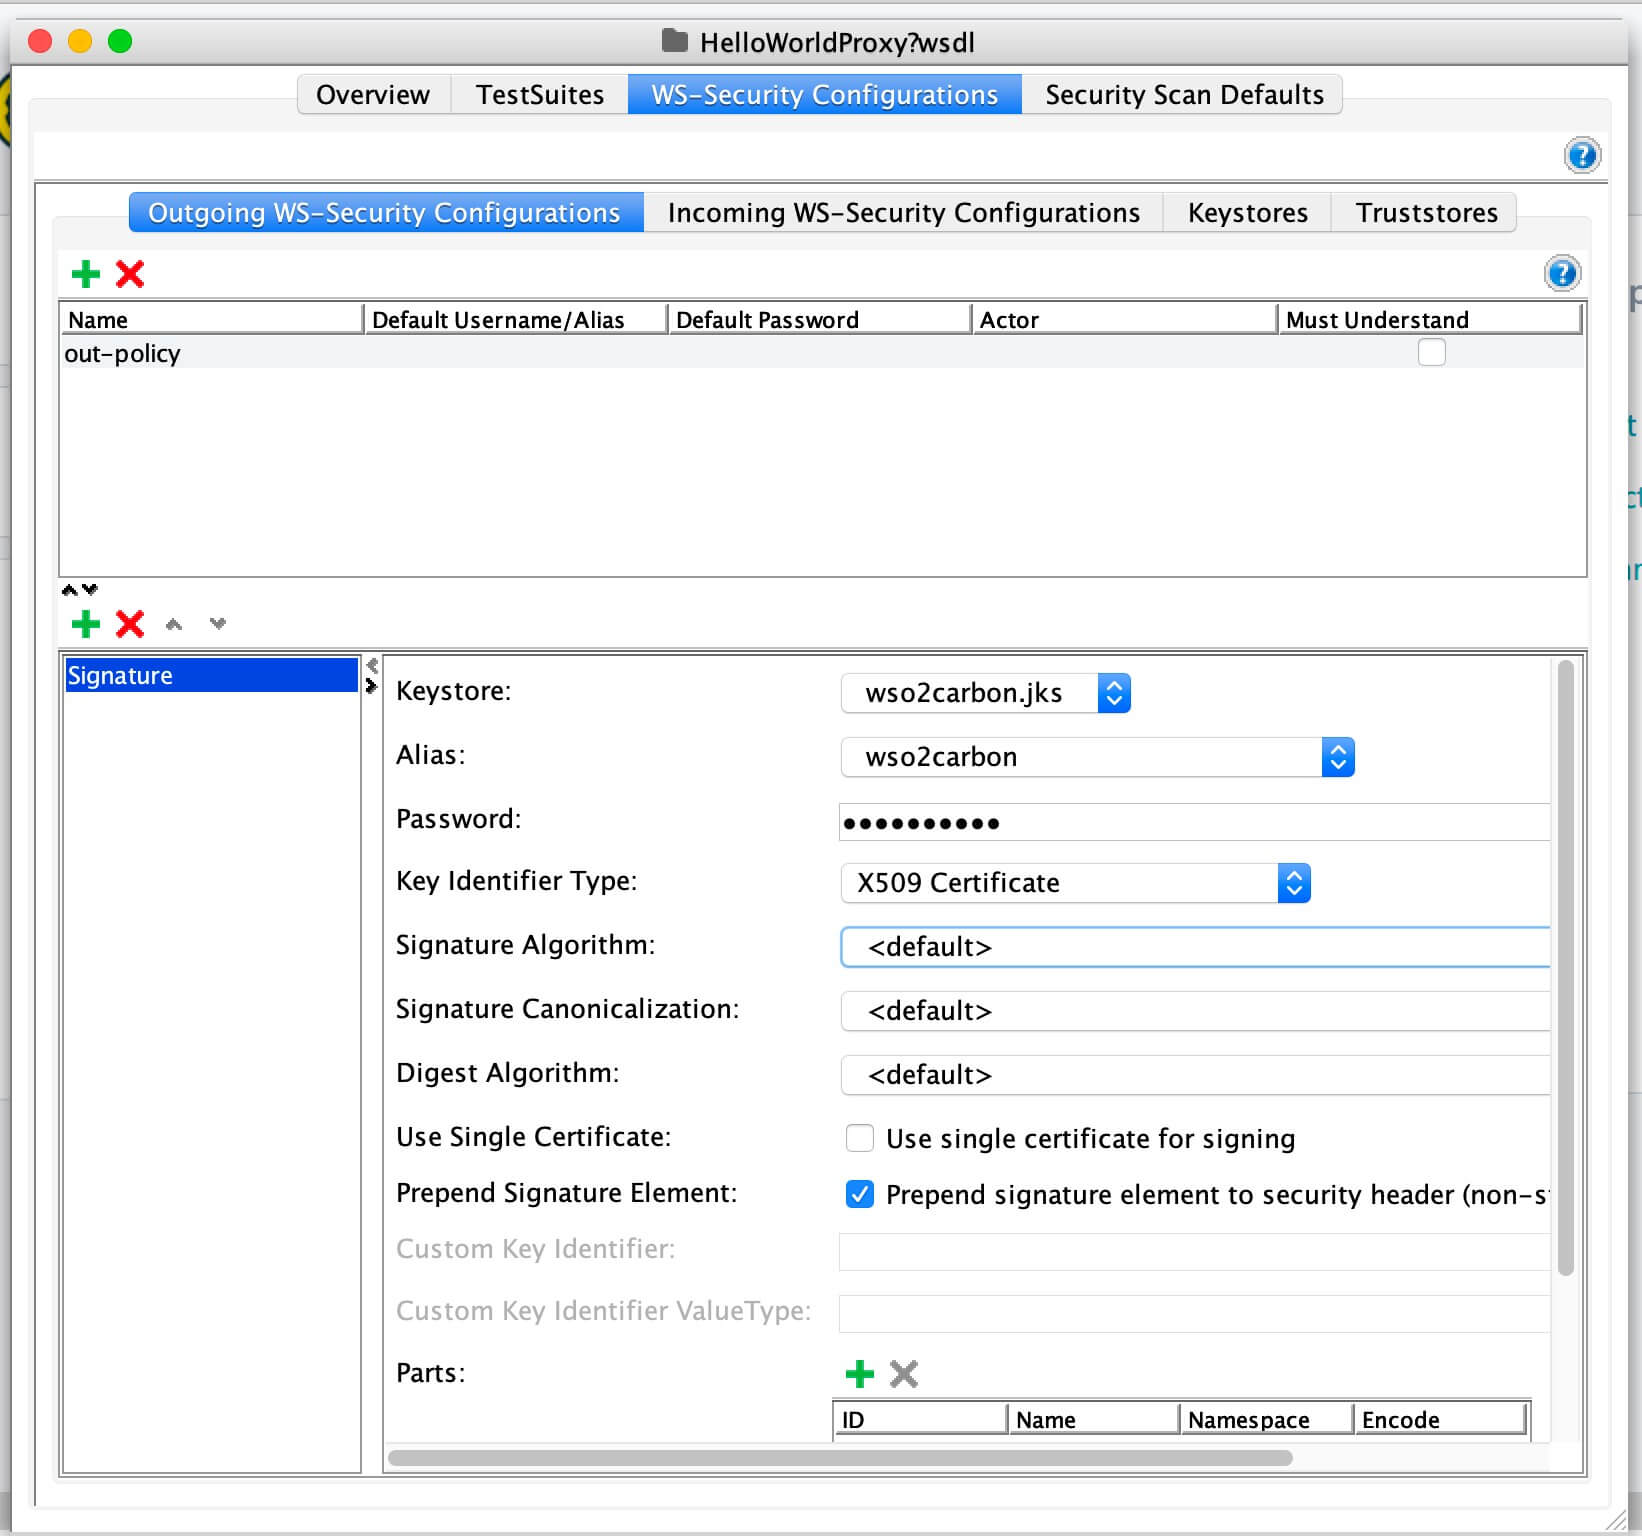
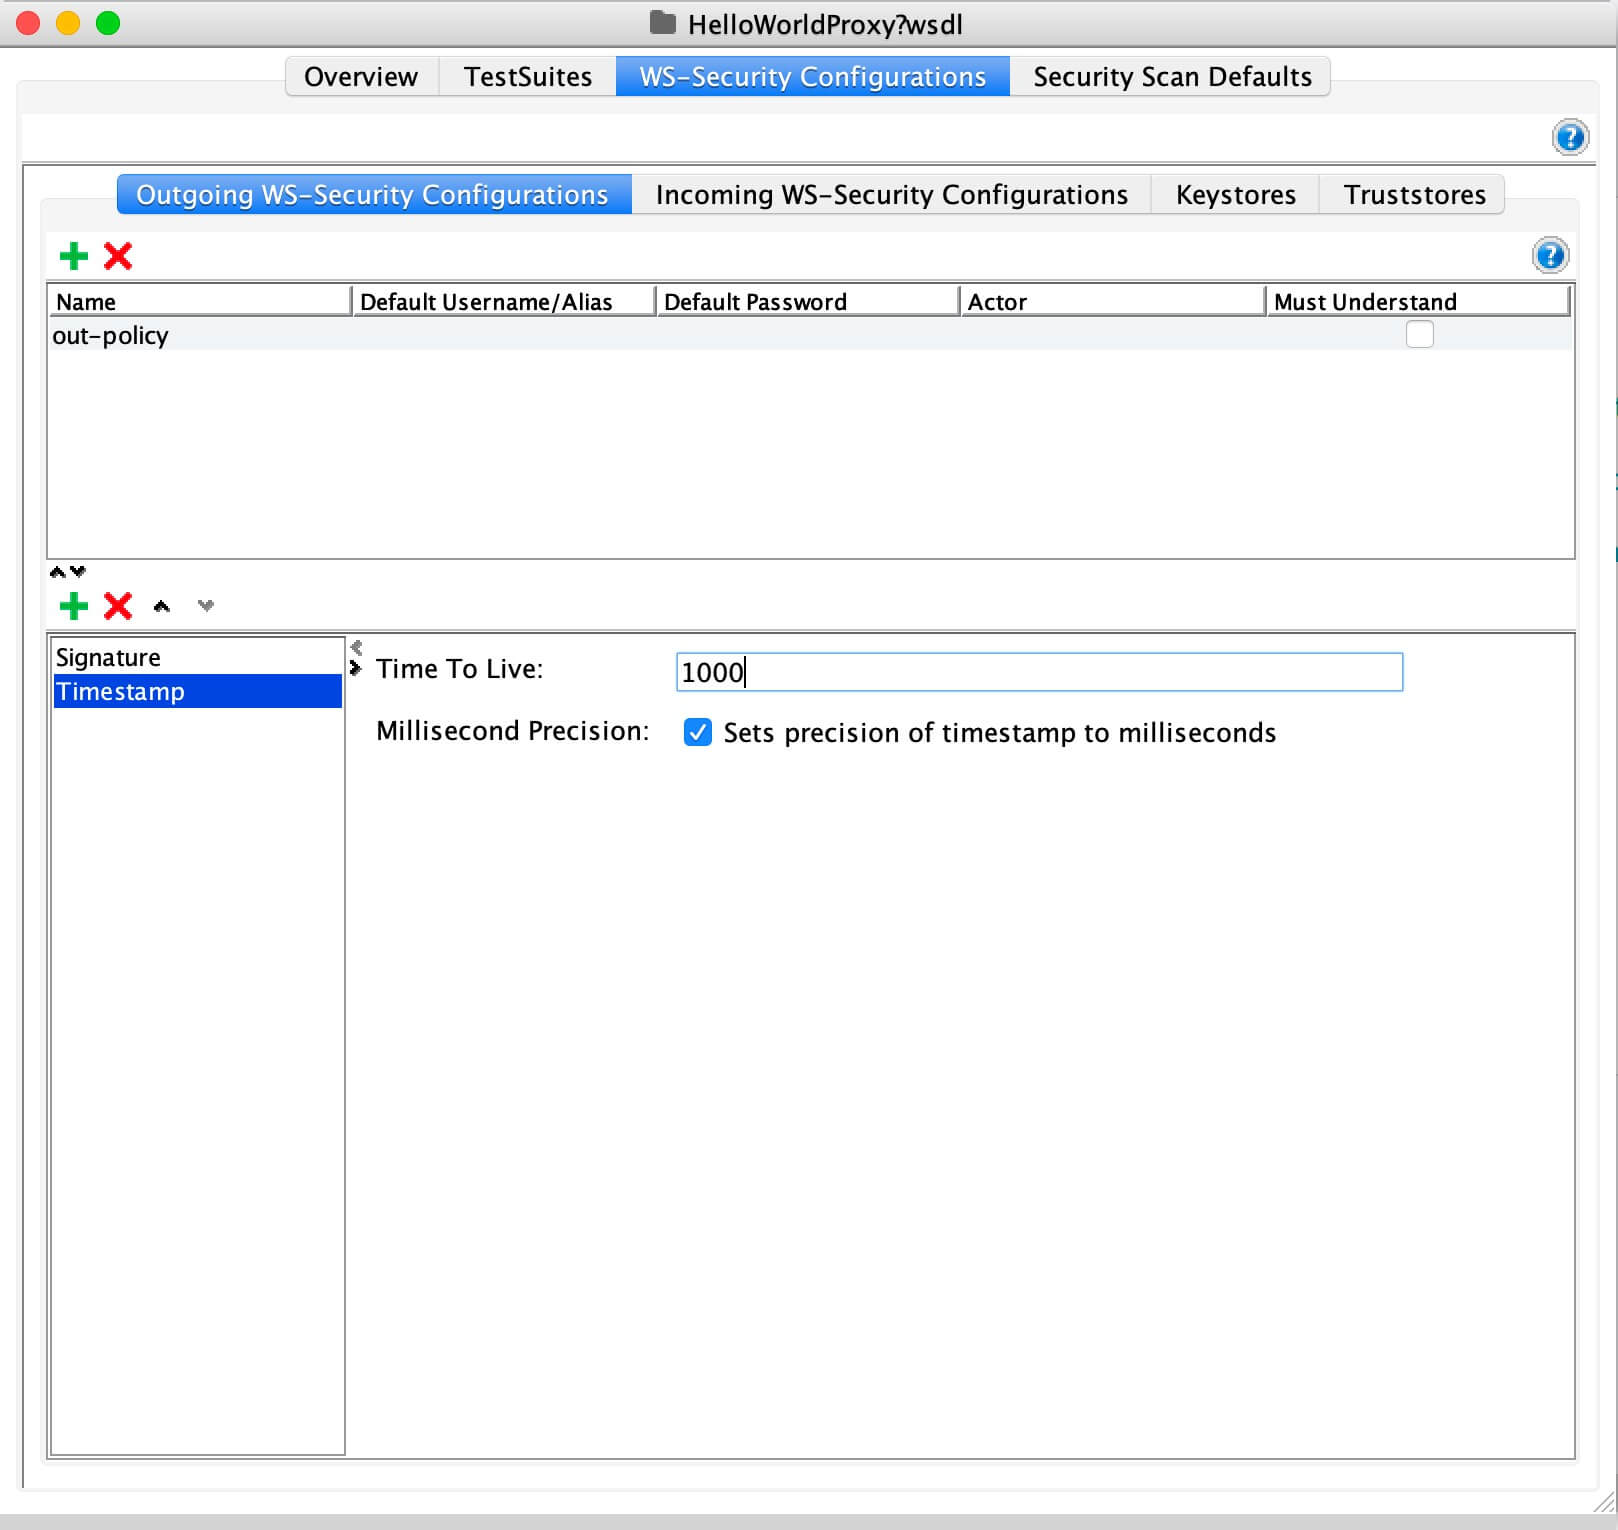
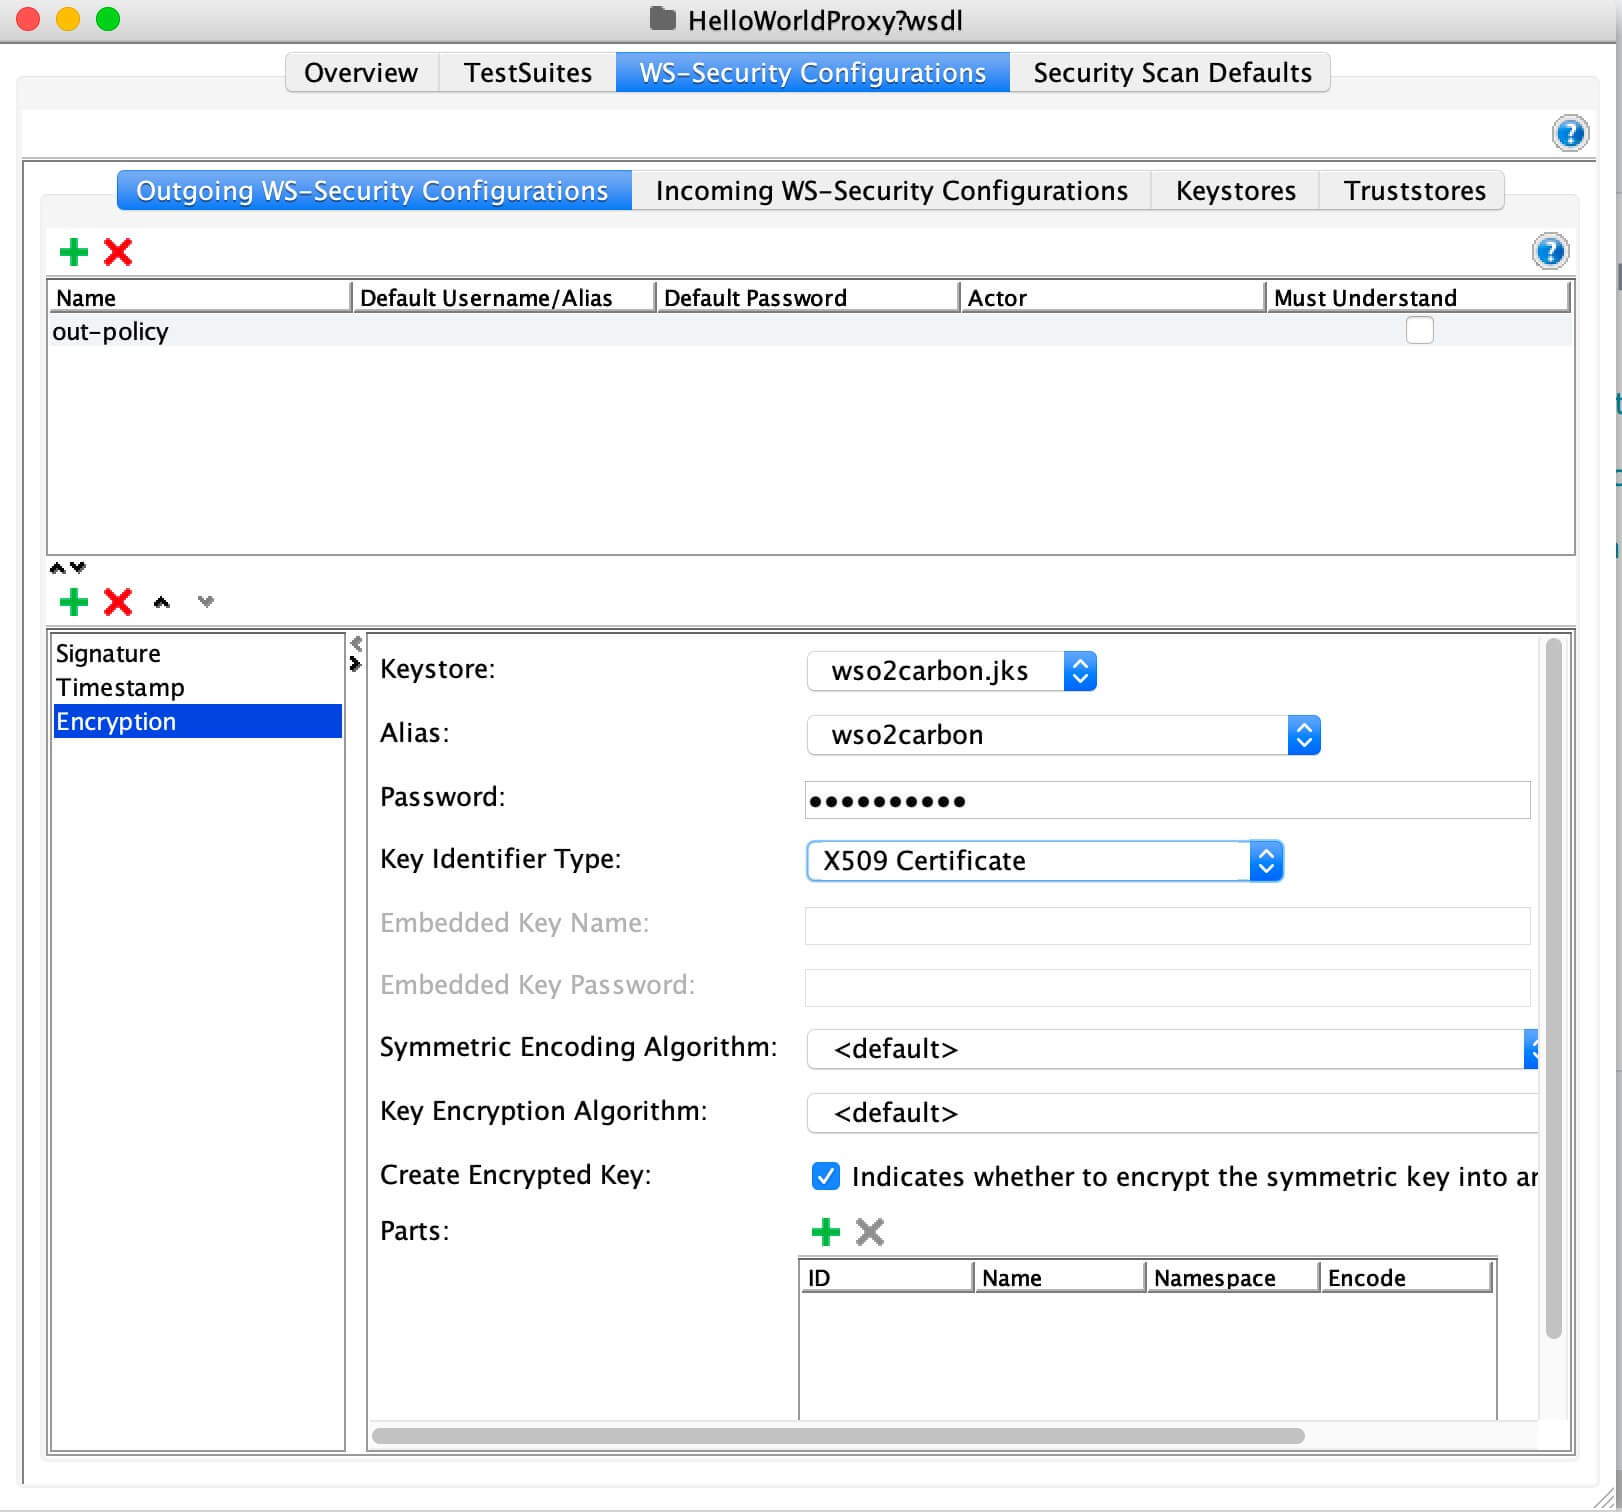
  5. Add the required WSS entries for the created configuration.

    What you need add will vary according to the policy you are using. The explanation about adding three main sections is given below.

    • Adding a Signature

      Adding a Signature

    • Adding a Timestamp

      Adding a Timestamp

    • Adding an Encryption

      Adding an Encryption

    Note

    The order of the WS entries matters. So always add the above one after the other. If you are adding only two sections, you need to maintain the order.

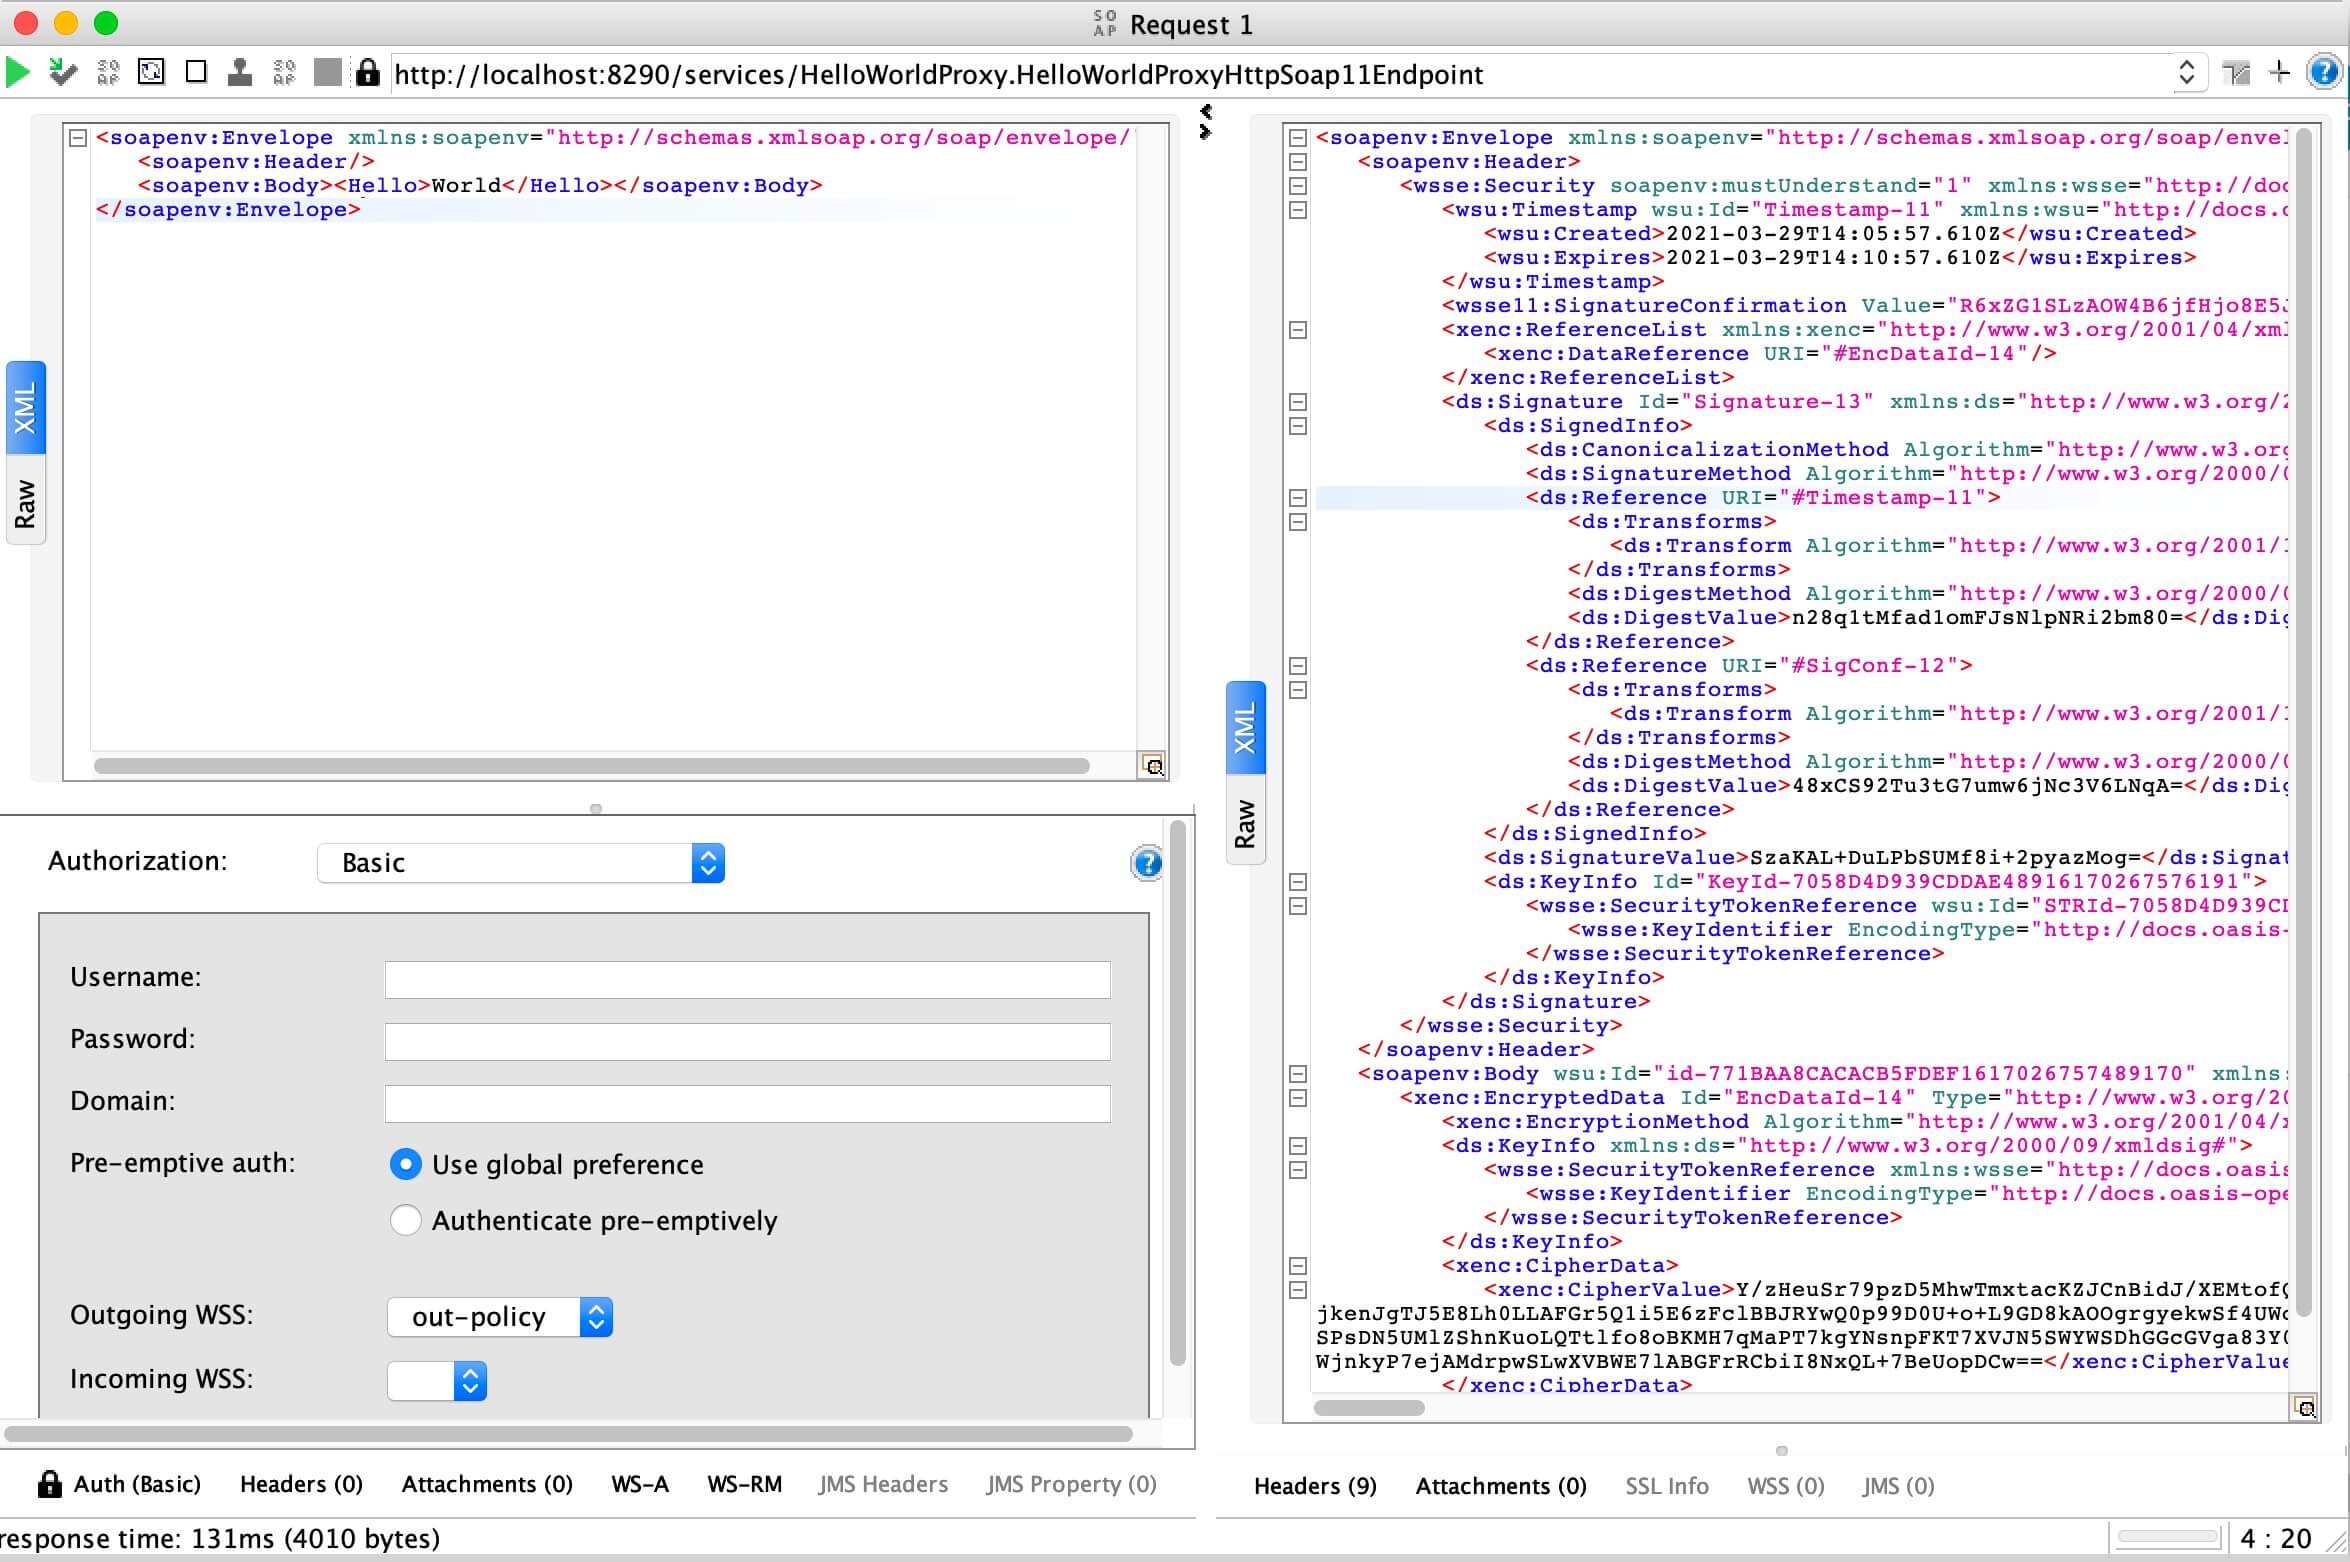
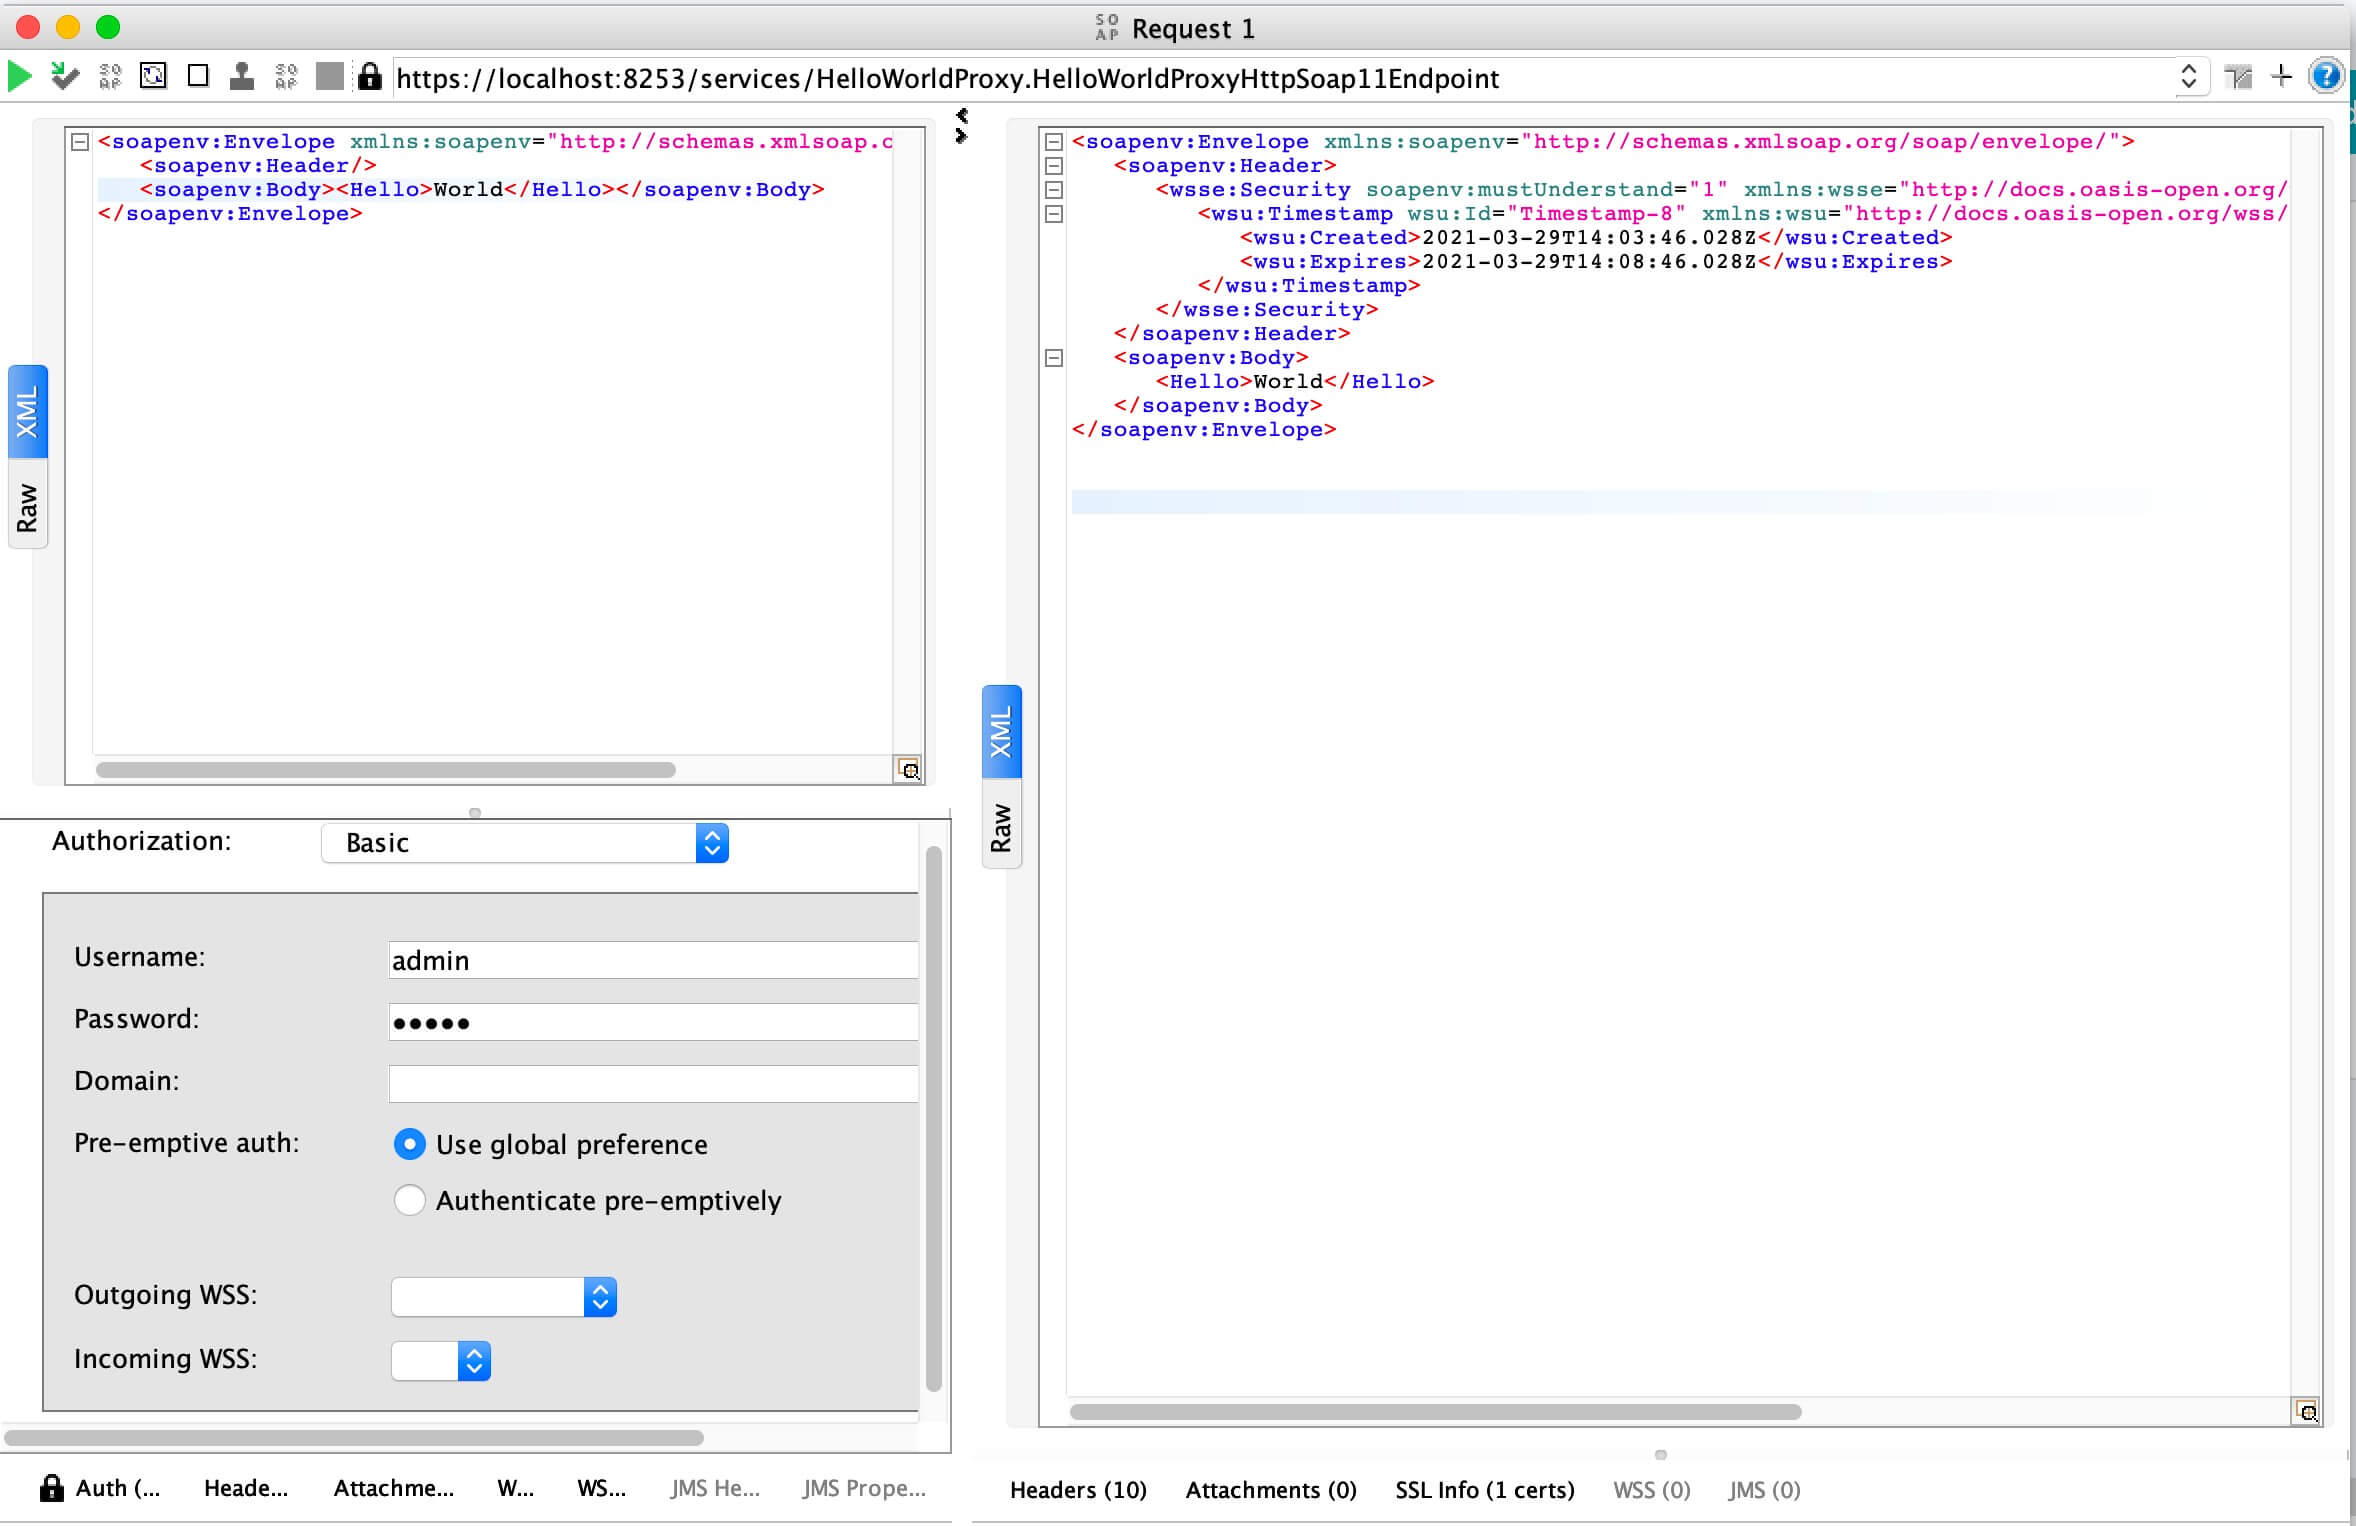
  6. Specify the created WS-policy under Outgoing WSS at the request Authorization.

    Specify the created WS-policy

  7. Invoke the Proxy Service.

Info

When defining the Outgoing WS-Security Configuration, you need to pick the WS entries based on your WS policy.

Eg:
  • A Non Repudiation policy needs only Timestamp and Signature.
  • A Confidentiality policy needs all three: Timestamp, Signature and Encryption.
  • You do not need to provide an Outgoing WS-Security Configuration for a Username Token policy. Providing the basic auth configuration is enough.