Exposing an Integration Service as a Managed API
What you'll build
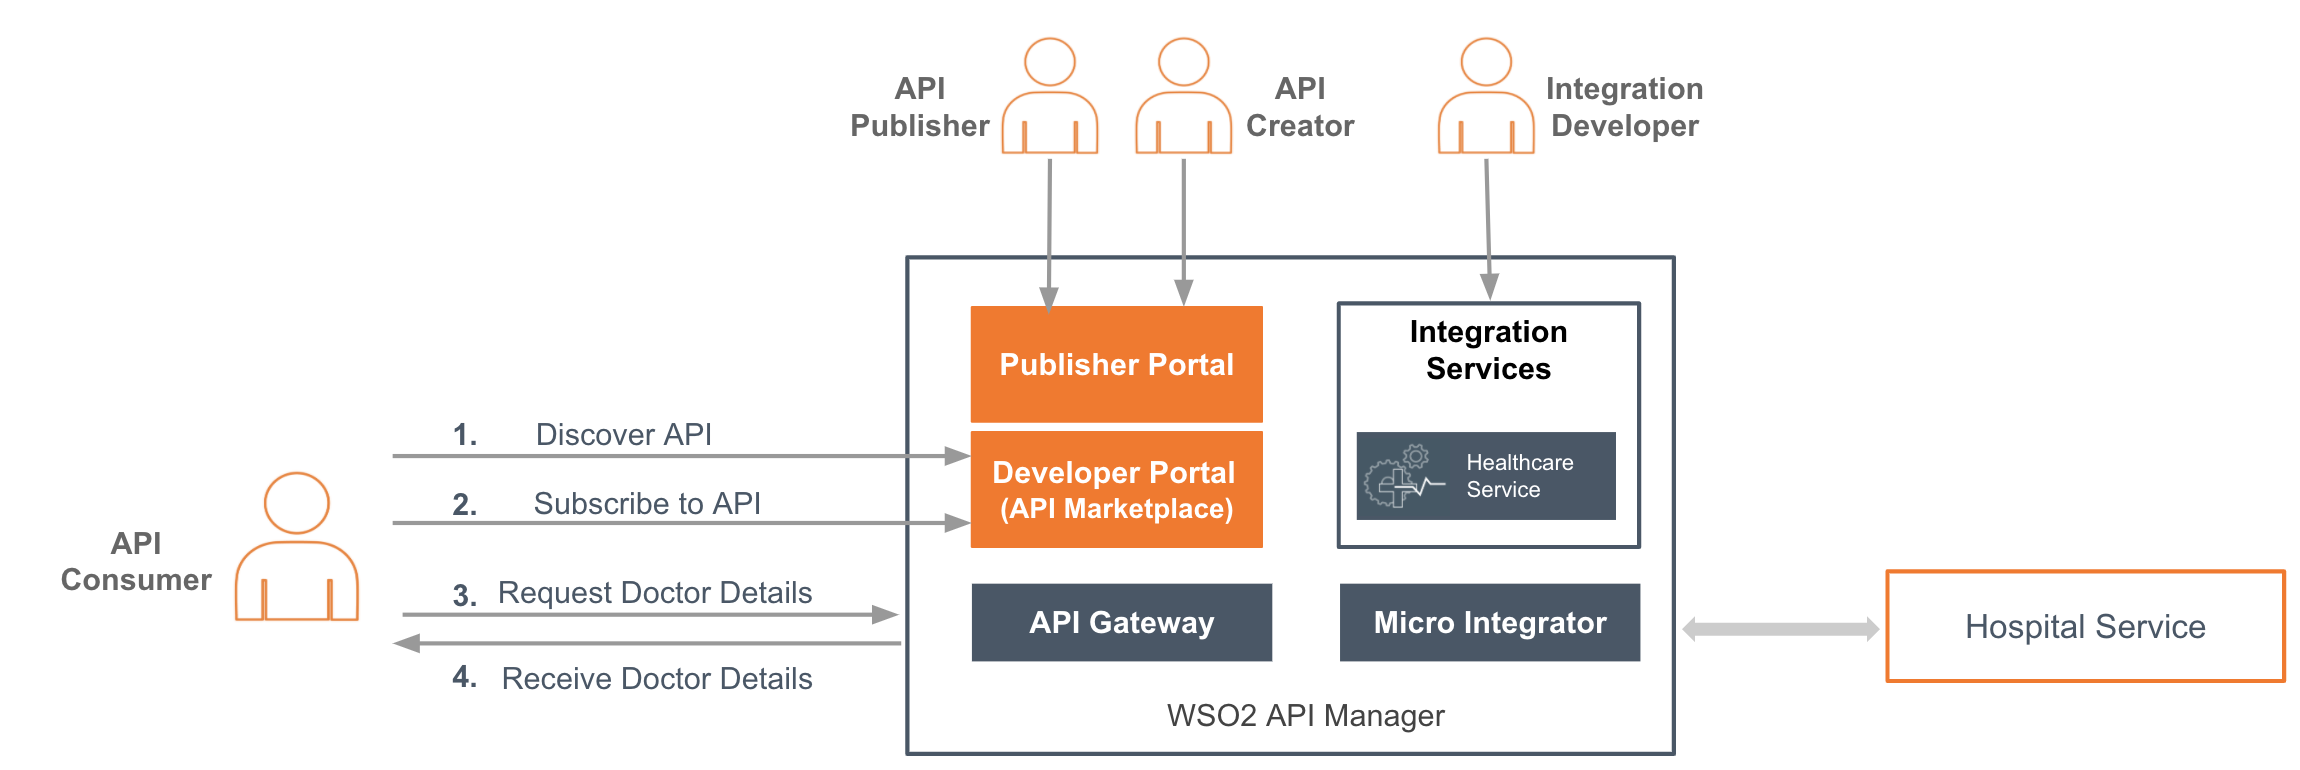
In this tutorial, you are defining an integration service using WSO2 Integration Studio and exposing it as a managed API to the API marketplace. API consumers then discover the API from the marketplace, subscribe to it, and use it for application development.

This demonstrates how the integration components and API management components of WSO2 API Manager work together to enable API-led integration. The following diagram illustrates the various API Manager components and the different user roles that are involved in implementing this process:
-
An Integration Developer creates the service using WSO2 Integration Studio and deploys it in the Micro Integrator runtime.
Note
The integration service is designed to communicate with a back-end service (representing a Hospital) and get details of available doctors for various specializations.
-
An API Creator converts the integration service to a managed API (apply security, rate limiting, etc.).
- An API Publisher publishes the API to the API marketplace (Developer Portal).
- An API Consumer (application developer) discovers and uses this API from the Developer Portal.
Concepts and artifacts used
The following concepts and artifacts are used in this tutorial:
- REST API / Integration Service
- Endpoints
- Mediators
- Service Catalog
- API Publisher
- API Developer Portal
Let's get started!
Follow the steps given below to build this use case and try it out.
Note
For more information on generating metadata artifacts if you are using an older Integration Studio workspace, see Generating Service Catalog Metadata Artifact.
Step 1 - Develop the integration service
Follow the instructions given in this section to create and configure the required artifacts.
- Download the relevant WSO2 Integration Studio based on your operating system.
- Open WSO2 Integration Studio.
-
Click New Integration Project in the Getting Started tab as shown below.
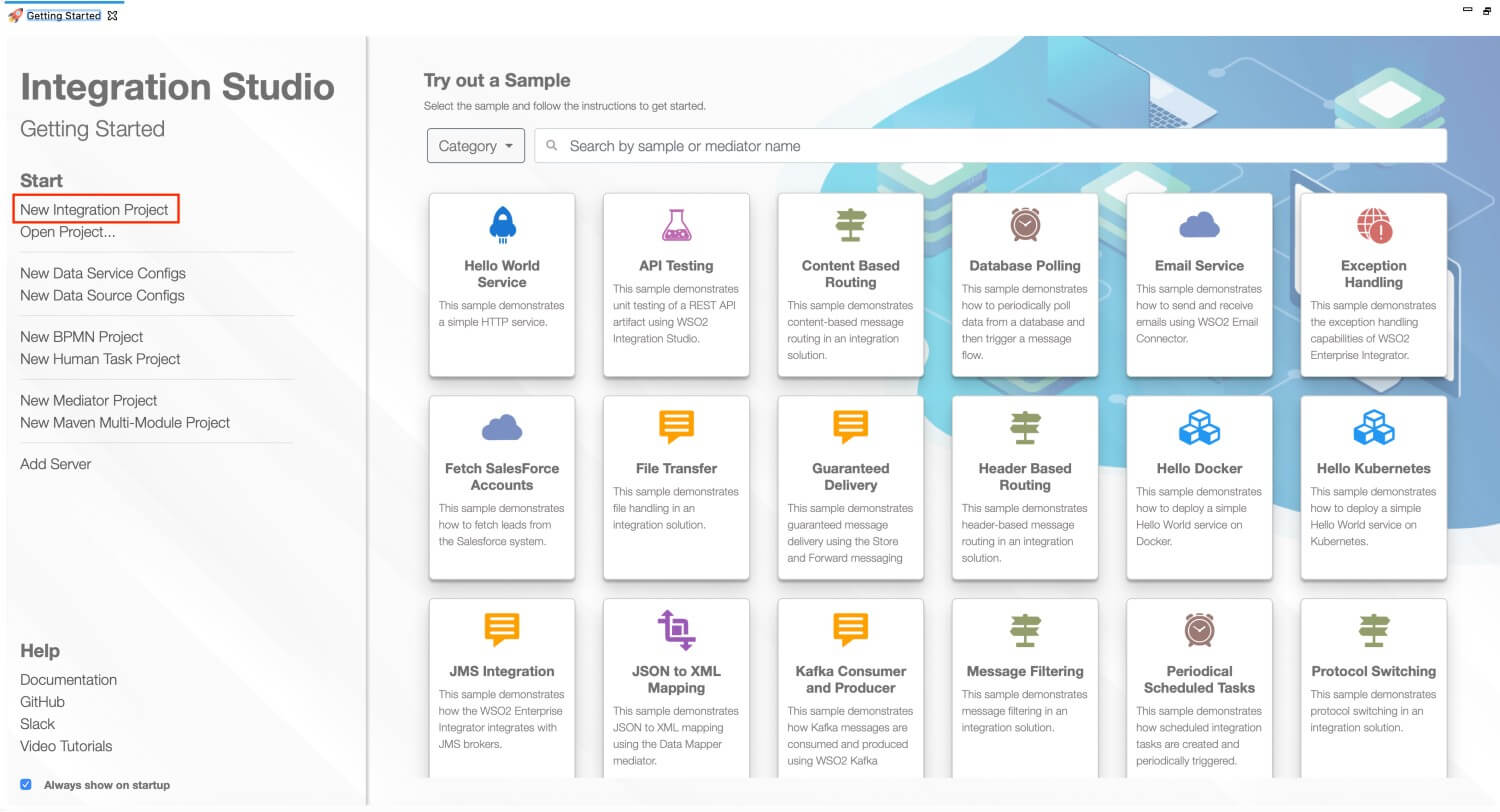
This will open the New Integration Project dialog box.
-
Enter
ServiceCatalogSampleas the project name and select the following check boxes to create the required modules.- Create ESB Configs
- Create Composite Exporter
-
Click Finish.
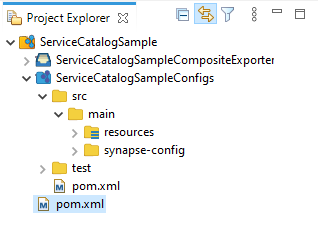
You can see the projects listed in the Project Explorer as shown below:
Note
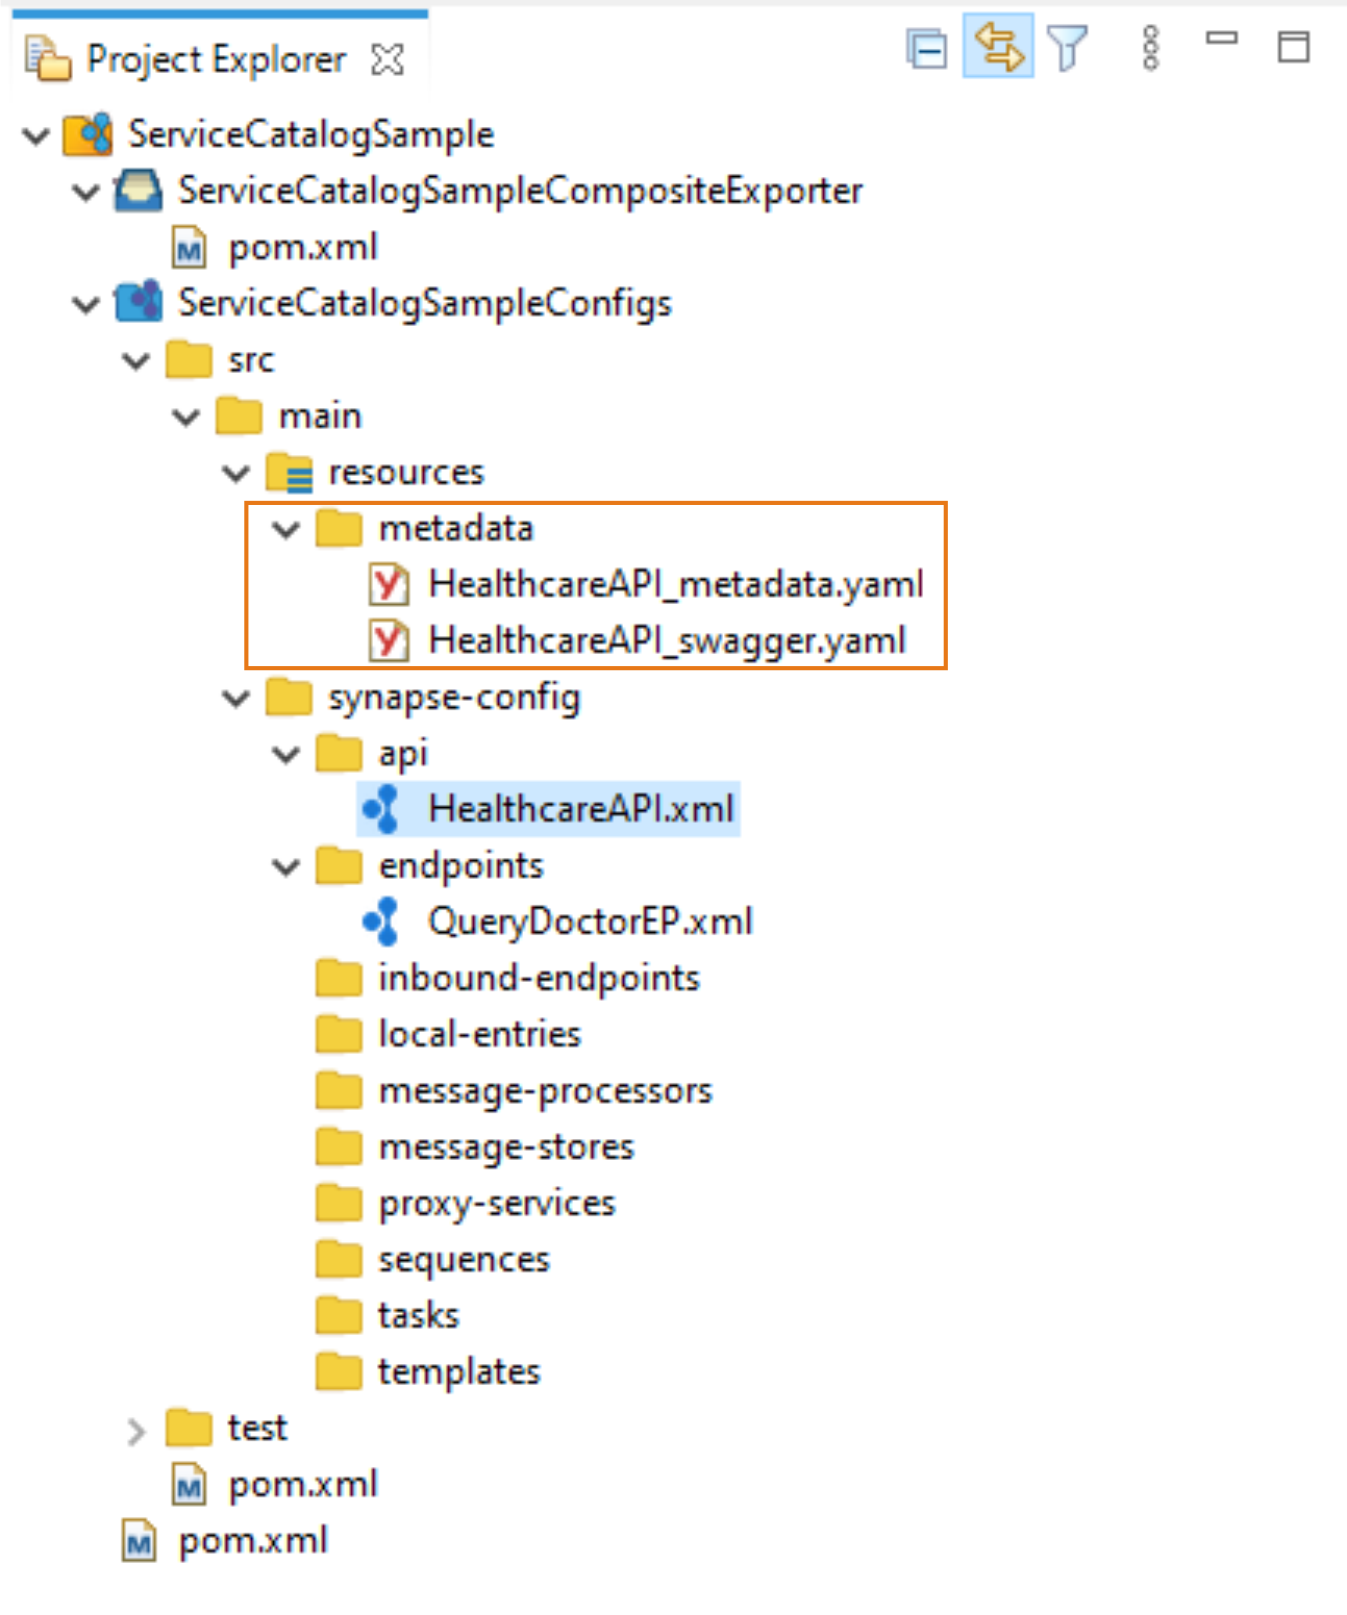
A resources folder is created in the
ServiceCatalogSampleConfigsproject. This folder holds the Swagger and metadata YAML files. These YAML files will be uploaded to the service catalog later in this tutorial. -
Create an Endpoint artifact.
- Right-click ServiceCatalogSampleConfigs in the project explorer and click New -> Endpoint.
- Ensure that Create a New Endpoint is selected and click Next.
-
Enter the information given below to create the new endpoint.
Property Value Description Endpoint Name QueryDoctorEPThe name of the endpoint. Endpoint Type HTTP EndpointIndicates that the back-end service is HTTP. URI Template http://localhost:9090/healthcare/{uri.var.category}The template for the request URL expected by the back-end service. In this case, the variable 'category' that needs to be included in the request for querying doctors is represented as {uri.var.category}in the template.Method GETIndicates that we are creating this endpoint for GET requests that are sent to the back-end service. Save Endpoint in ServiceCatalogSampleConfigsThis is the ESB Config module where the artifact will be saved. -
Click Finish.
-
Create a REST API artifact.
- In the project explorer, right-click ServiceCatalogSampleConfigs and click New -> REST API.
- Ensure Create A New API Artifact is selected and click Next.
-
Enter the details given below to create a new REST API.
Property Value Description Name HealthcareAPIThe name of the REST API. Context /healthcareThis anchors the API in the /healthcarecontext. The context becomes part of the name of the API's URL, which will be used by the client when sending requests to the Healthcare service. For example, setting the context to /healthcare means that the API only handles HTTP requests where the URL path starts withhttp://host:port/healthcare.Save location ServiceCatalogSampleConfigs This is the ESB Config module where the artifact will be saved. -
Click Finish.
-
Open the Source view of the HealthcareAPI that you created and apply the following.
<?xml version="1.0" encoding="UTF-8"?> <api context="/healthcare" name="HealthcareAPI" xmlns="http://ws.apache.org/ns/synapse"> <resource methods="GET" uri-template="/querydoctor/{category}"> <inSequence> <log description="Request Log" level="custom"> <property name="Log Property message" value=""Welcome to HealthcareService""/> </log> <send> <endpoint key="QueryDoctorEP"/> </send> </inSequence> <outSequence> <send/> </outSequence> <faultSequence/> </resource> </api>
When the HealthcareAPI is created, the following two new files are created in the metadata folder.
Tip
This data is used later in this tutorial by the API management runtime to generate the managed API proxy.
| HealthcareAPI_metadata.yaml | This file contains the metadata of the integration service you created in the previous step. |
|---|---|
| HealthcareAPI_swagger.yaml | This Swagger file contains the OpenAPI definition of the integration service. |
Step 2 - Configure service metadata
Let's update the metadata of the integration service.
- Open the
HealthcareAPI_metadata.yamlfile from the project explorer. -
Update the following values in the file.
Parameter Value Description description API to fetch doctors for a given categoryExplain the purpose of the API. serviceUrl http://localhost:8290/healthcareThis is the URL of the API when it gets deployed in the Micro Integrator. You (as the integration developer) may not know this URL during development. Therefore, you can parameterize the URL to be resolved later using environment variables. By default, the {MI_HOST}and{MI_PORT}values are parameterized with placeholders. You can configure the serviceUrl in the following ways:-
Add the complete URL without parameters. For example:
http://localhost:8290/healthcare. Let's use this option for this tutorial. -
Parameterize using the host and port combination. For example:
http://{MI_HOST}:{MI_PORT}/healthcare. -
Parameterize using a preconfigured URL. For example:
http://{MI_URL}/healthcare.
Tip
See the Service Catalog API documentation for more information on the metadata in the YAML file.
-
Add the complete URL without parameters. For example:
-
Important: Be sure to change the
serviceUrlfrom HTTPS to HTTP. This is required because the HealthcareAPI is not secured. -
Leave the default values for the remaining parameters.
Step 3 - Configure the Micro Integrator
The Micro Integrator contains a client application, which automatically publishes artifacts to the Service Catalog in the API Publisher portal.
Let's enable this client for the embedded Micro Integrator of WSO2 Integration Studio.
- Click the Embedded Micro Integrator Configuration (
 ) icon on the upper menu to open the dialog box.
 -
Uncomment the
[[service_catalog]]section as shown below and change the APIM server configurations accordingly.Tip
The default username and password for connecting to the API gateway is
admin.[[service_catalog]] apim_host = "https://localhost:9443" enable = true username = "admin" password = "admin" -
Optionally, you can encrypt the username and password for better security:
-
Update the configuration as shown below.
[secrets] userName = "[admin]" password = "[admin]" [[service_catalog]] apim_host = "https://localhost:9443" enable = true username = "$secret{username}" password = "$secret{password}" -
Click Encrypt Secrets.
Tip
See Encrypt static (embedded) server secrets for details.
-
-
Save the configurations.
-
Optionally, inject environment variables to your Micro Integrator.
If you chose to parameterize the
serviceUrlin the metadata file, you must inject the parameterized values as environment variables. Shown below are example placeholder values that you may have used in theserviceUrlfollowed by the corresponding environment variables.{MI_HOST} : localhost {MI_PORT} : 8290 {MI_URL} : localhost:8290Tip
See the instructions on injecting environment variables to the embedded Micro Integrator.
Step 4 - Package the artifacts
Package the artifacts in your composite exporter module to be able to deploy the artifacts in the server.
- Open the
pom.xmlfile of the ServiceCatalogSampleCompositeExporter module. -
Ensure that the following artifacts are selected in the POM file.
HealthcareAPIQueryDoctorEP
-
By default, the
Publish to Service Catalogcheckbox is enabled. If not, select the checkbox in the wizard so that it will include metadata files of the selected artifacts. -
Save the changes.
Step 5 - Start the API Manager runtime
Let's start the API Manager runtime before starting the Micro Integrator.
- Download and set up WSO2 API Manager.
- Start the server.
Step 6 - Build and run the service
Let's deploy the packaged artifacts in the embedded Micro Integrator:
Info
When you do this step:
- The Micro Integrator first reads the metadata files.
- If you used placeholders in the metadata file, they are replaced with environment variable values and a ZIP file is created.
- Finally, it uploads the metadata to the API management runtime.
- Right-click the composite exporter module and click Export Project Artifacts and Run.
- In the dialog box that opens, confirm that the required artifacts from the composite exporter module are selected.
- Click Finish.
The artifacts are deployed in the embedded Micro Integrator and the Micro Integrator starts. The integration service is also deployed in the Service Catalog during server startup. You will see the following in the server start-up log.
Successfully updated the service catalog
Step 7 - Create and Deploy the API
Create the API
Let's expose the integration service as a managed API.
-
Sign in to the API Publisher portal:
https://localhost:9443/publisher.Tip
Use
adminas the user name and password. -
You can also click the hamburger icon on the upper-left and click Services to see the available services.
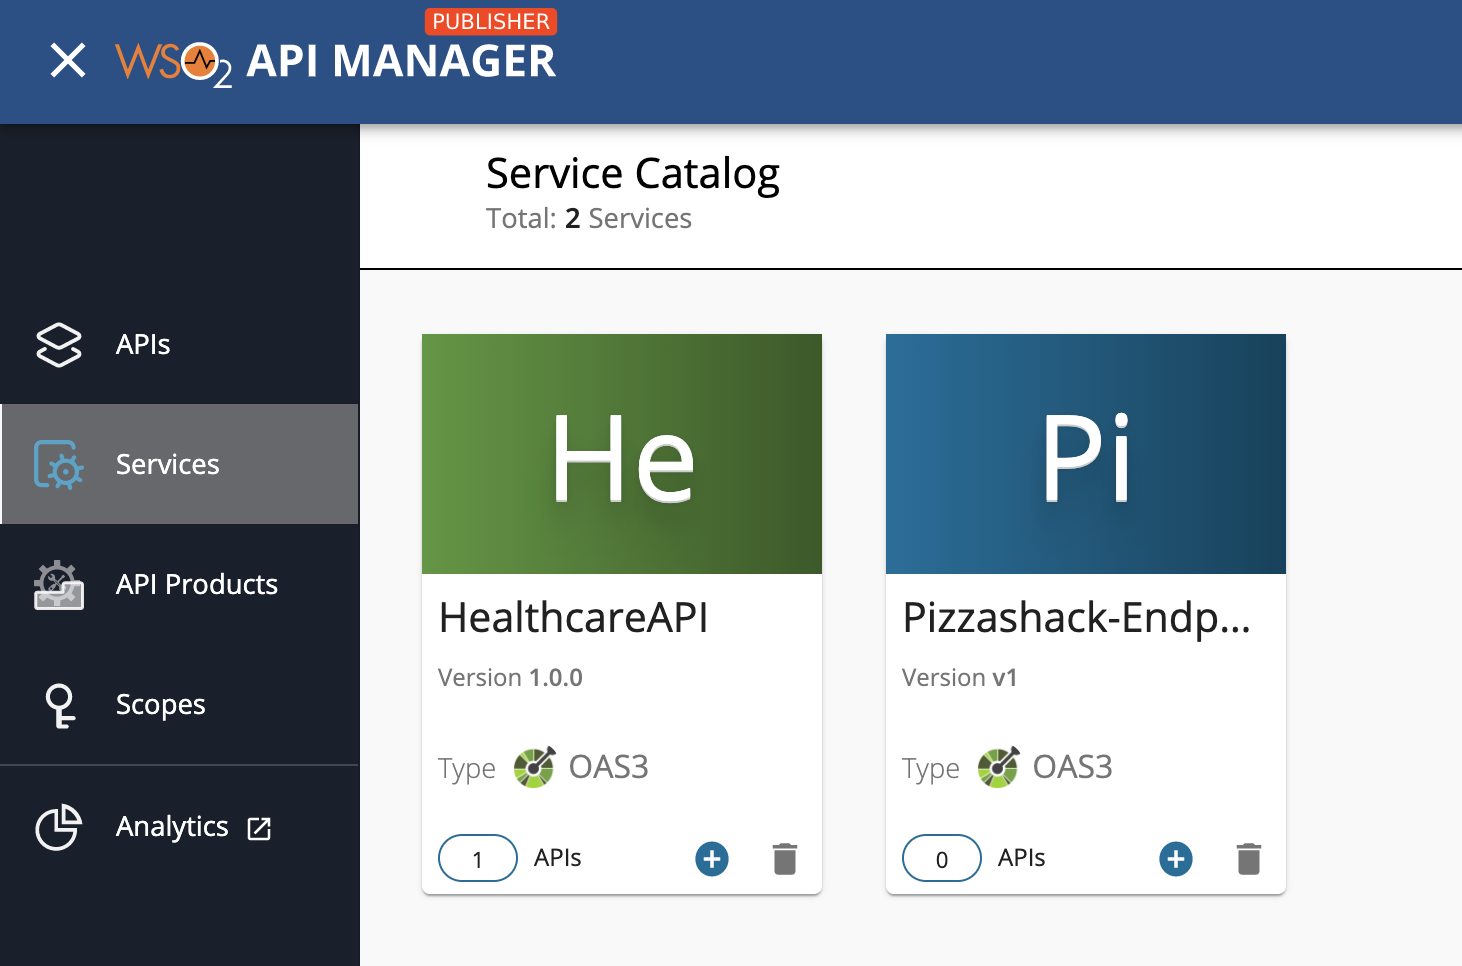
-
Open HealthcareAPI from the above list.
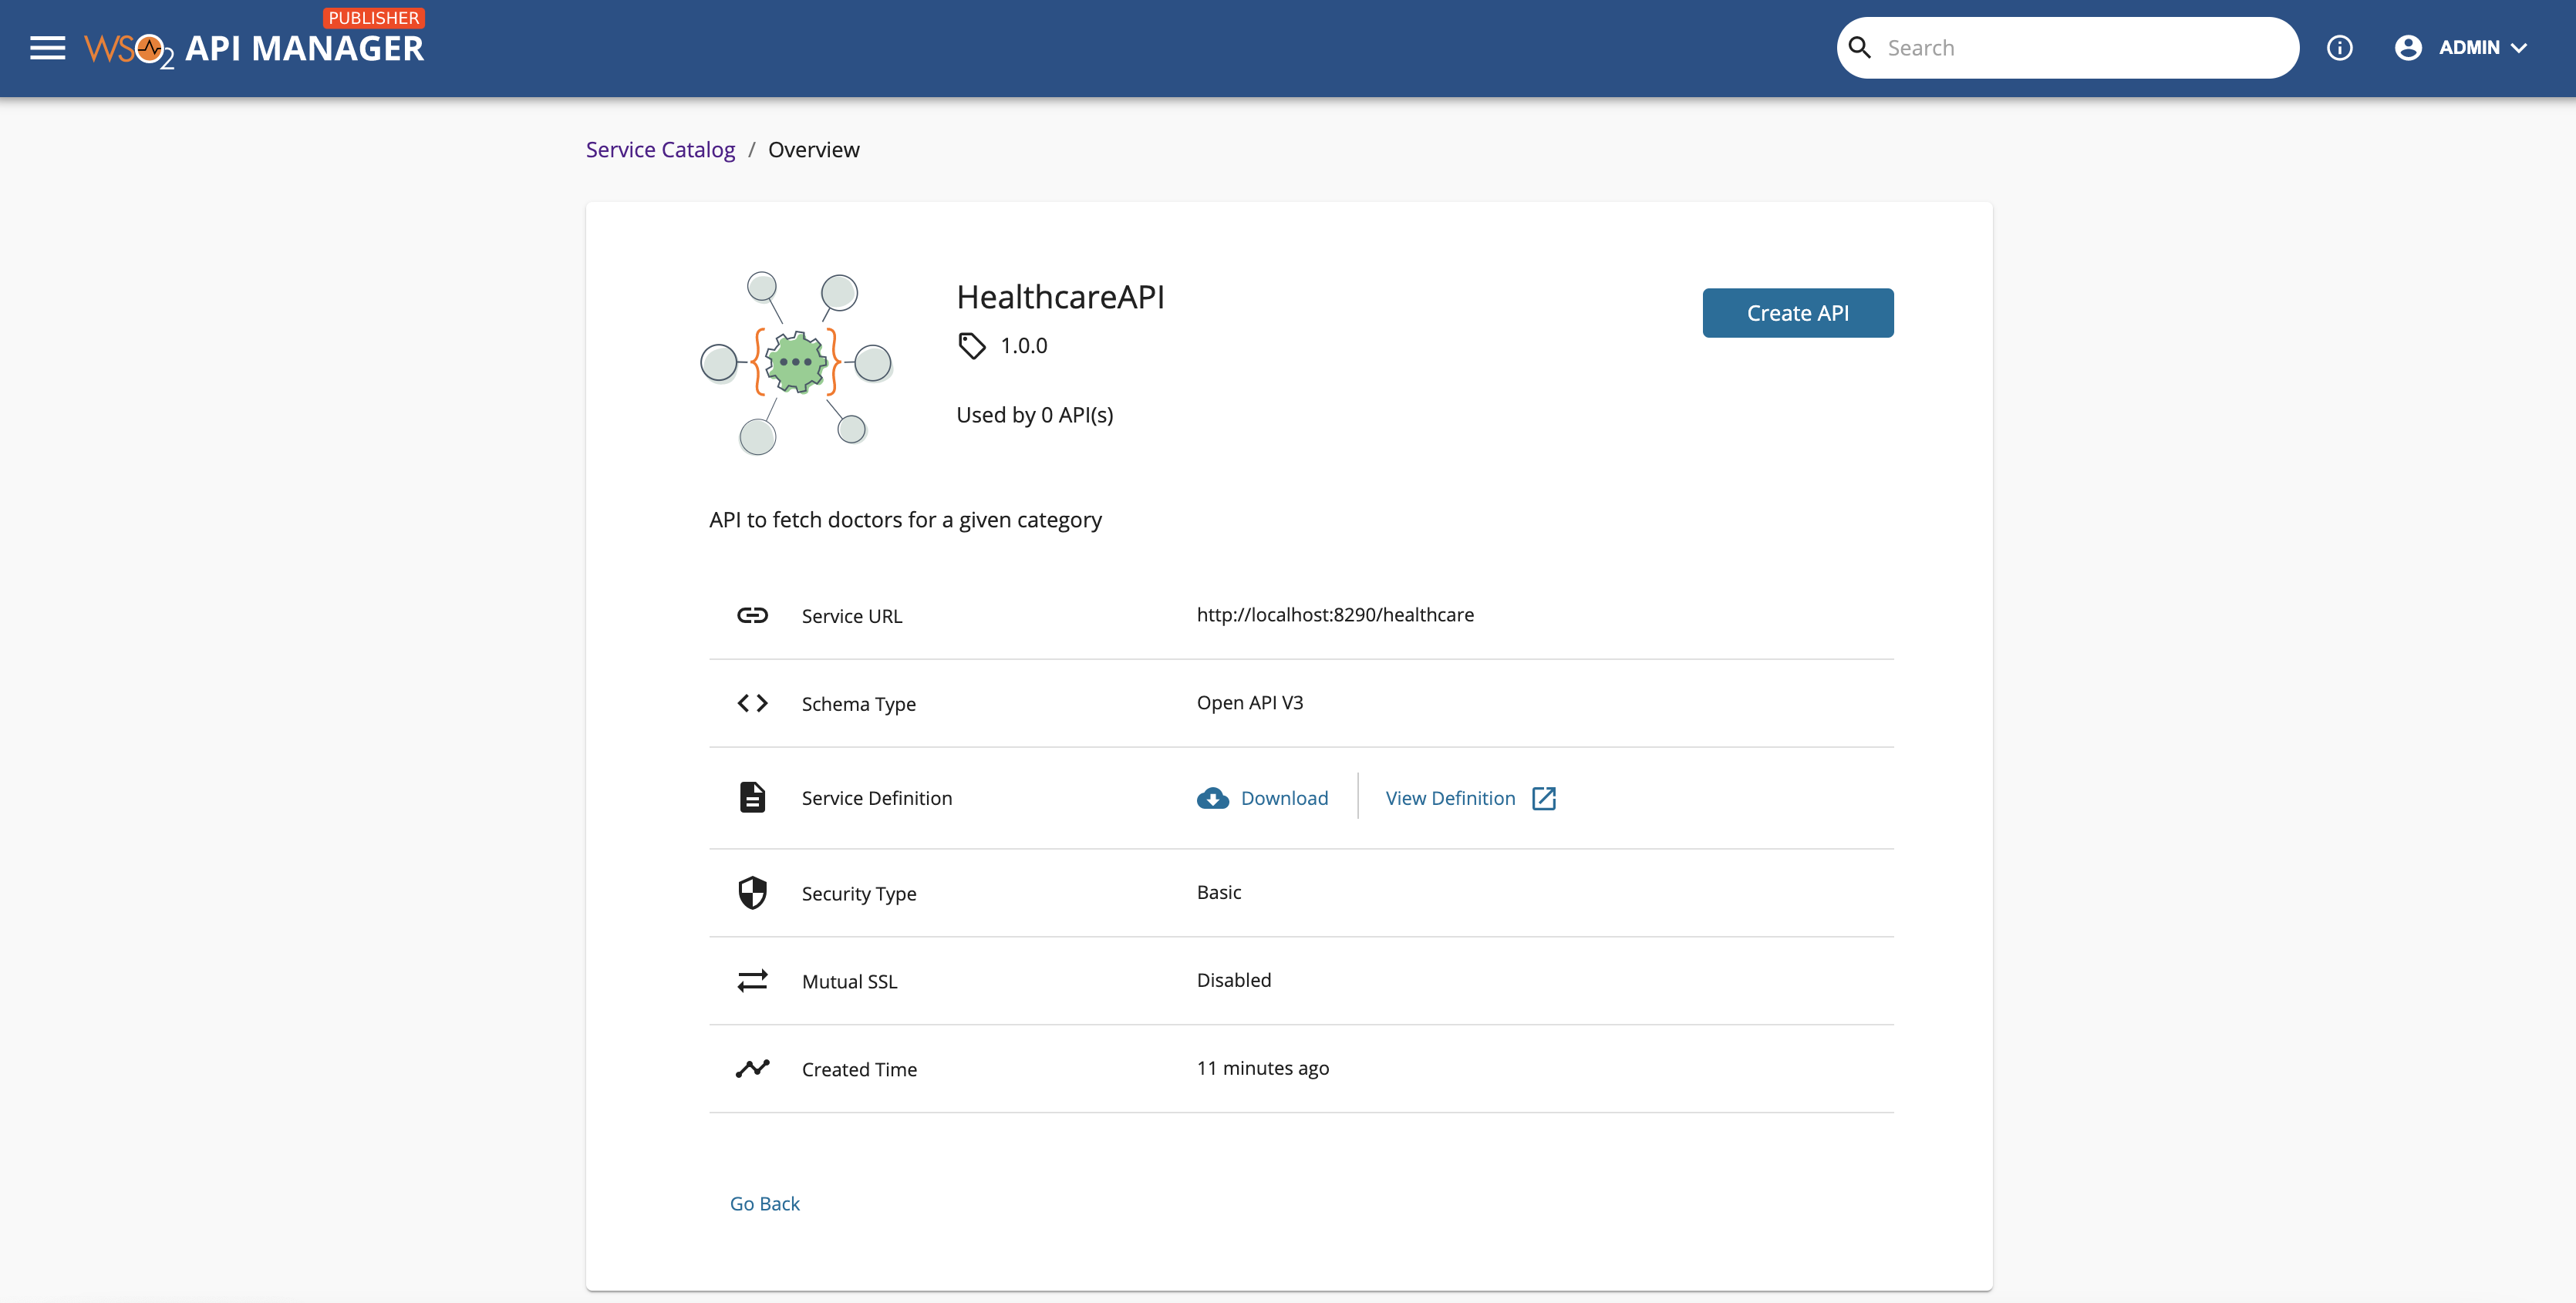
-
Click Create API in the above screen to open the Create API dialog box.
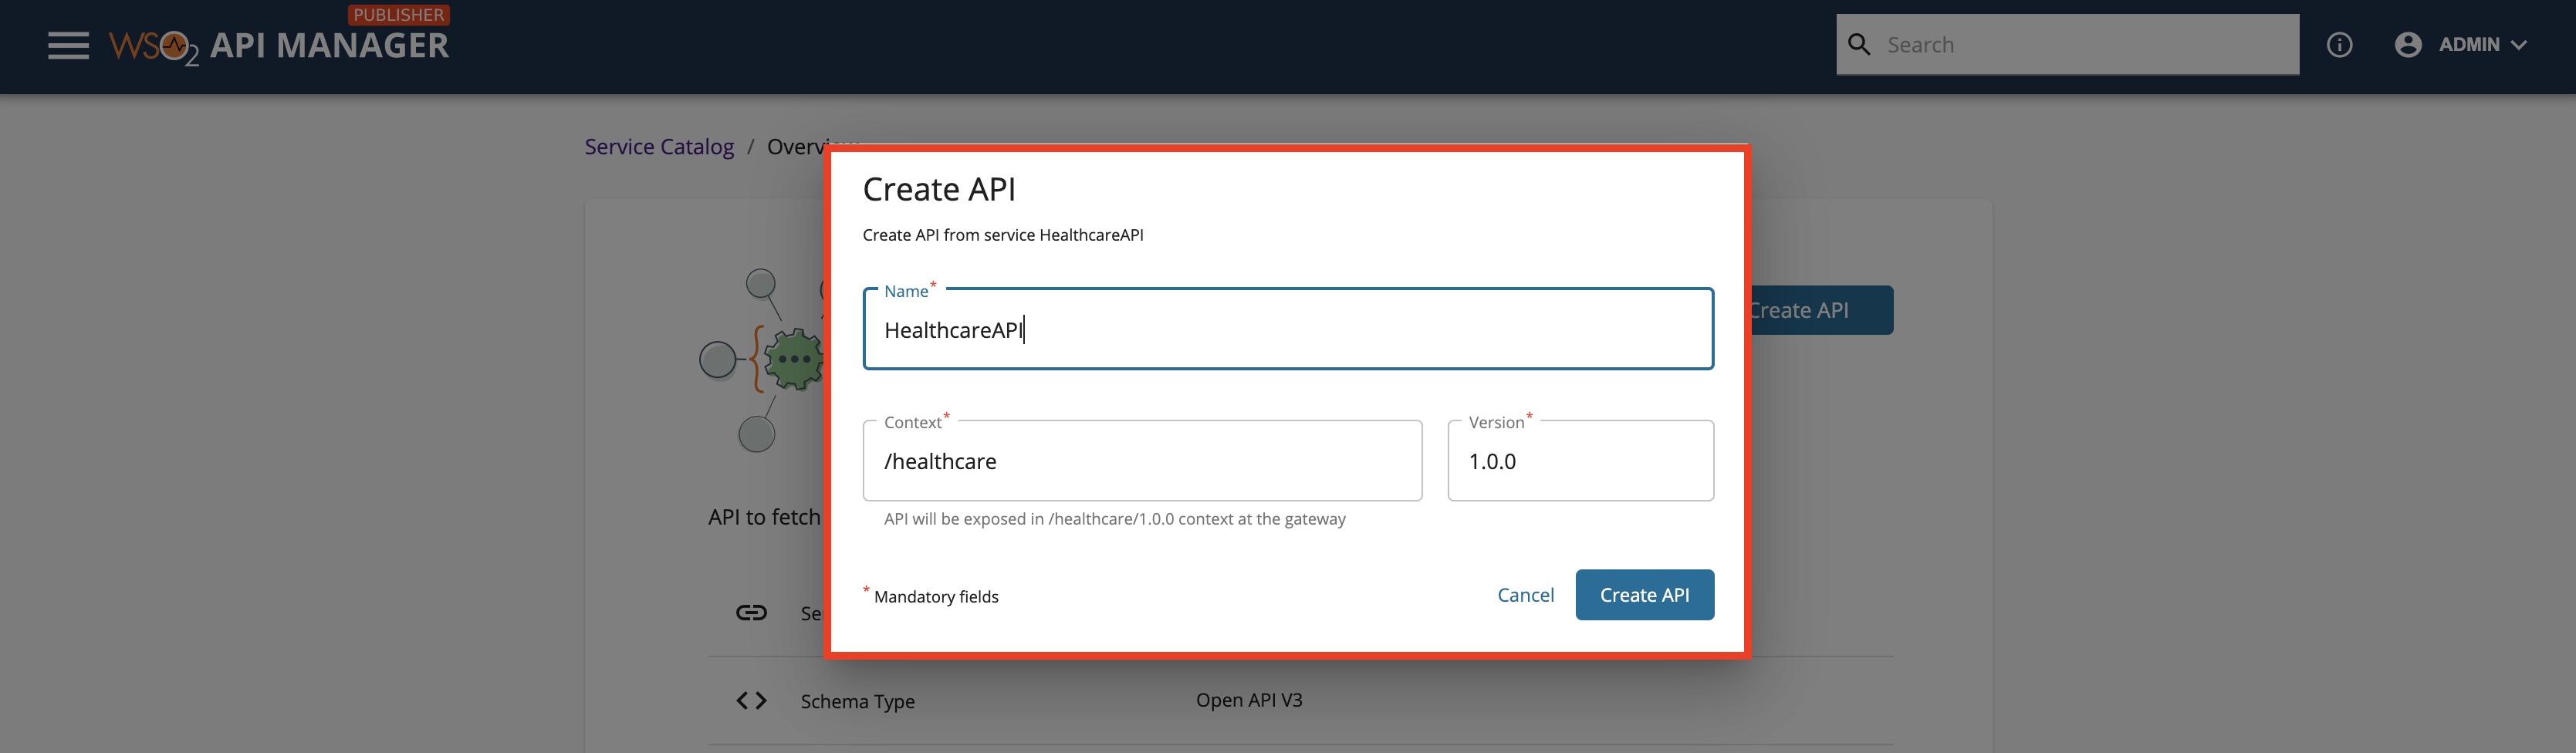
-
Specify an API name, context, and version, and then click Create API.
Tip
You will find these values already populated based on the information in the integration service.
You can now see the new API's overview page.
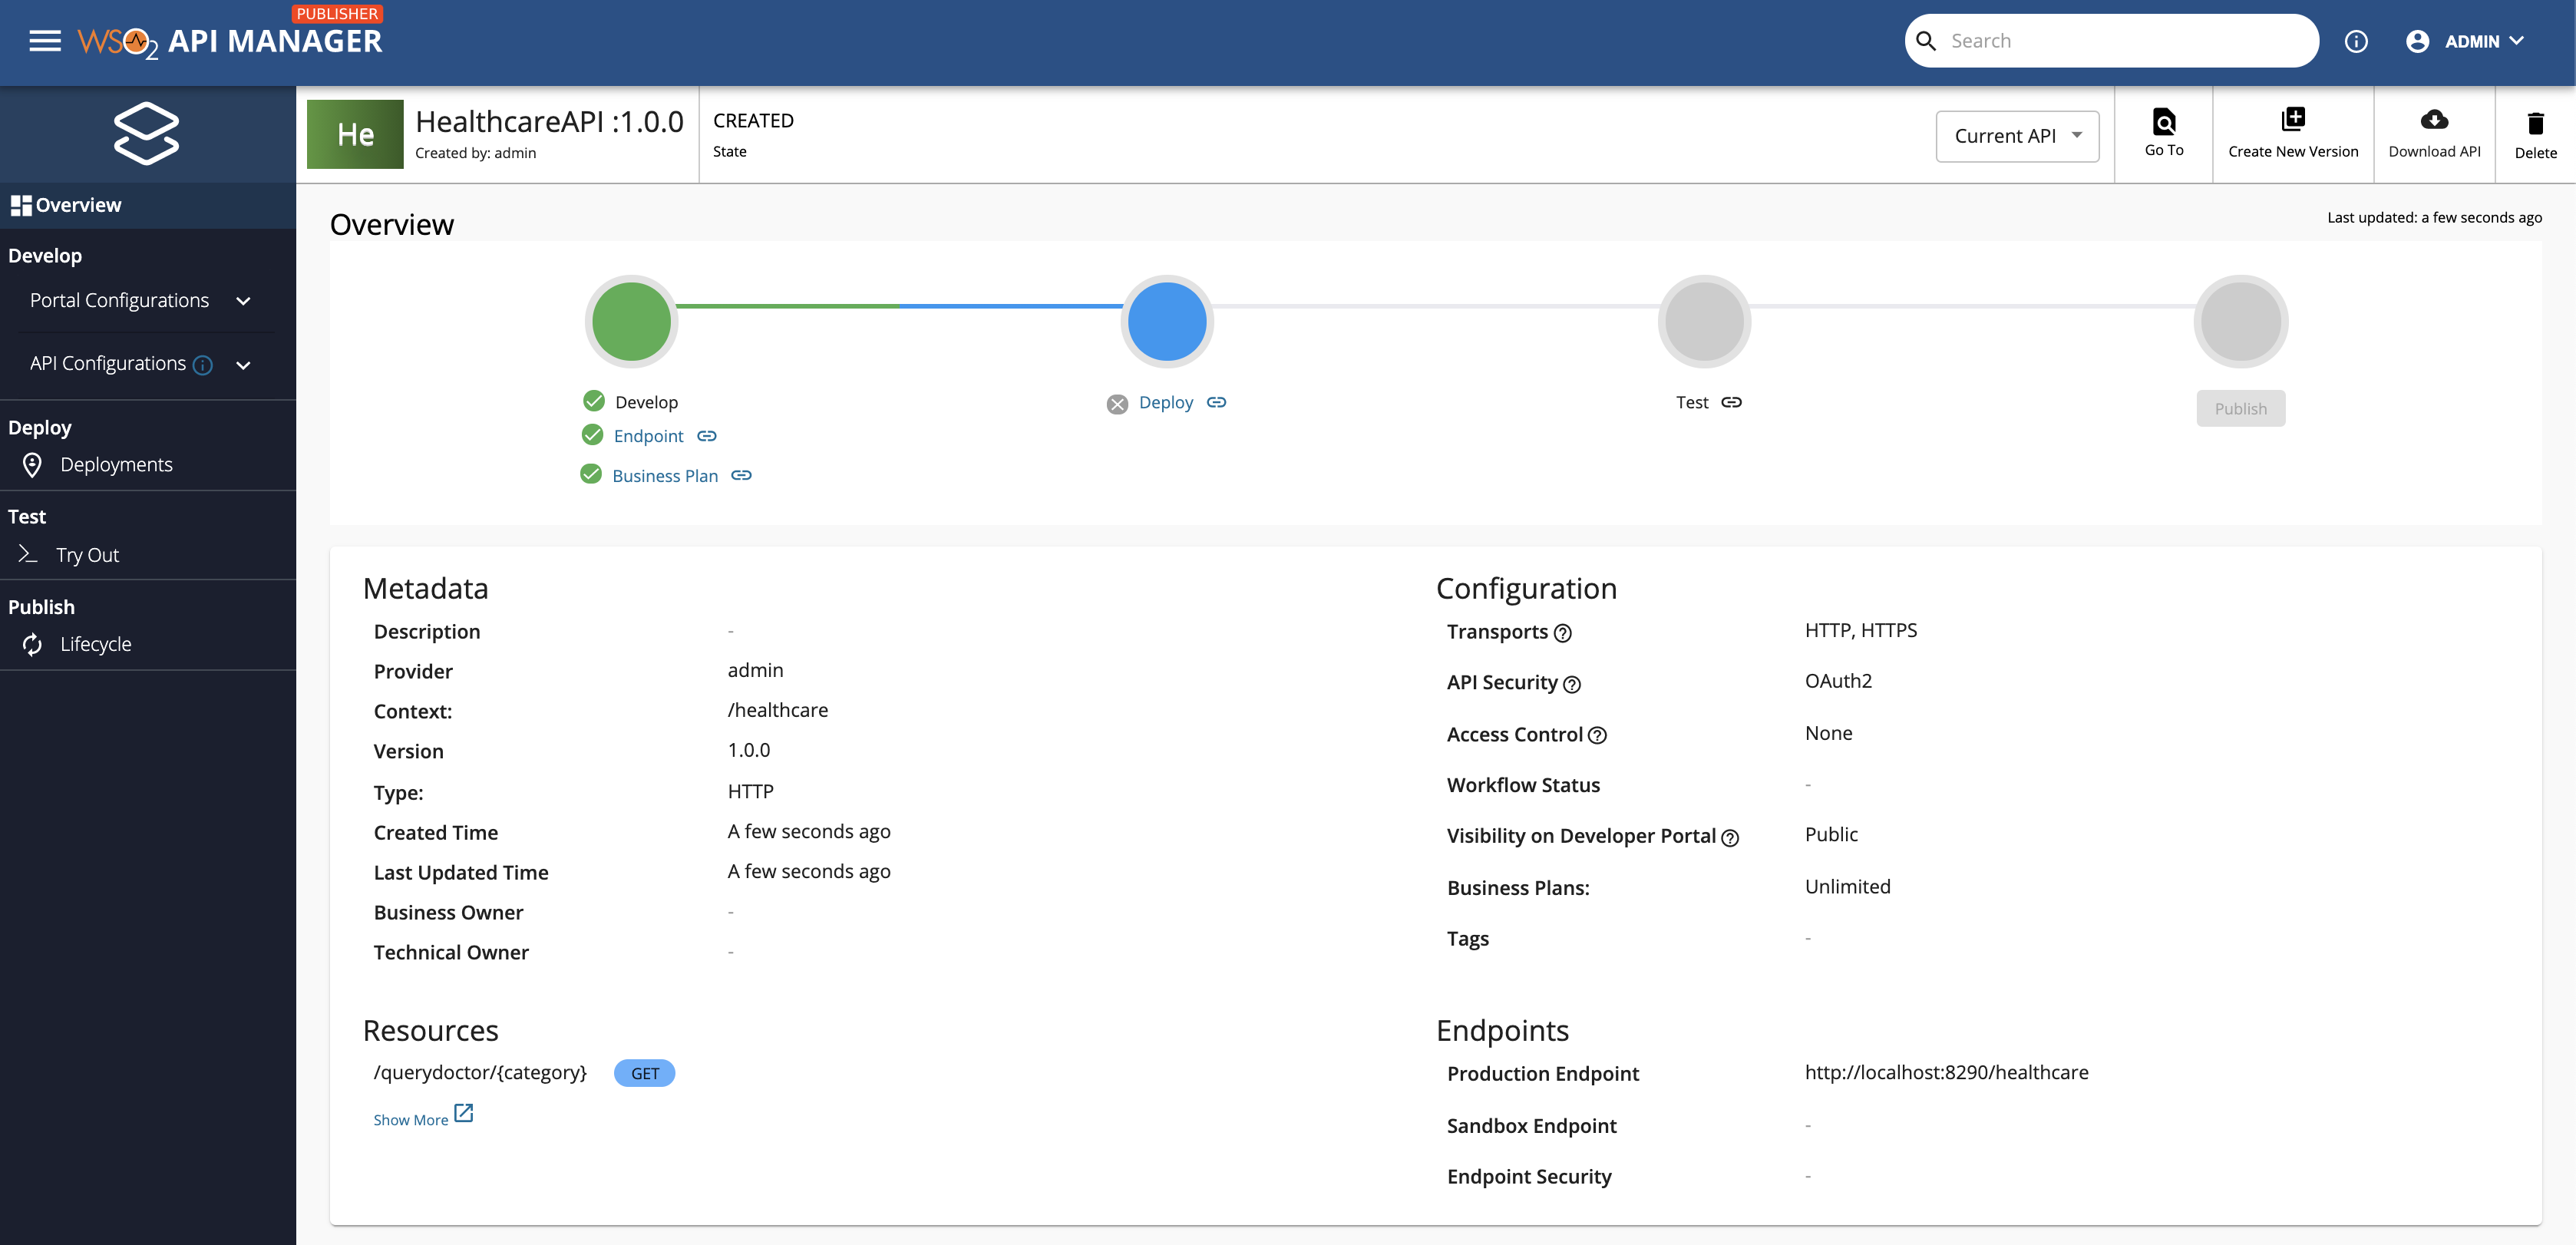
Note
- You can use the left-hand navigation to explore the new API.
-
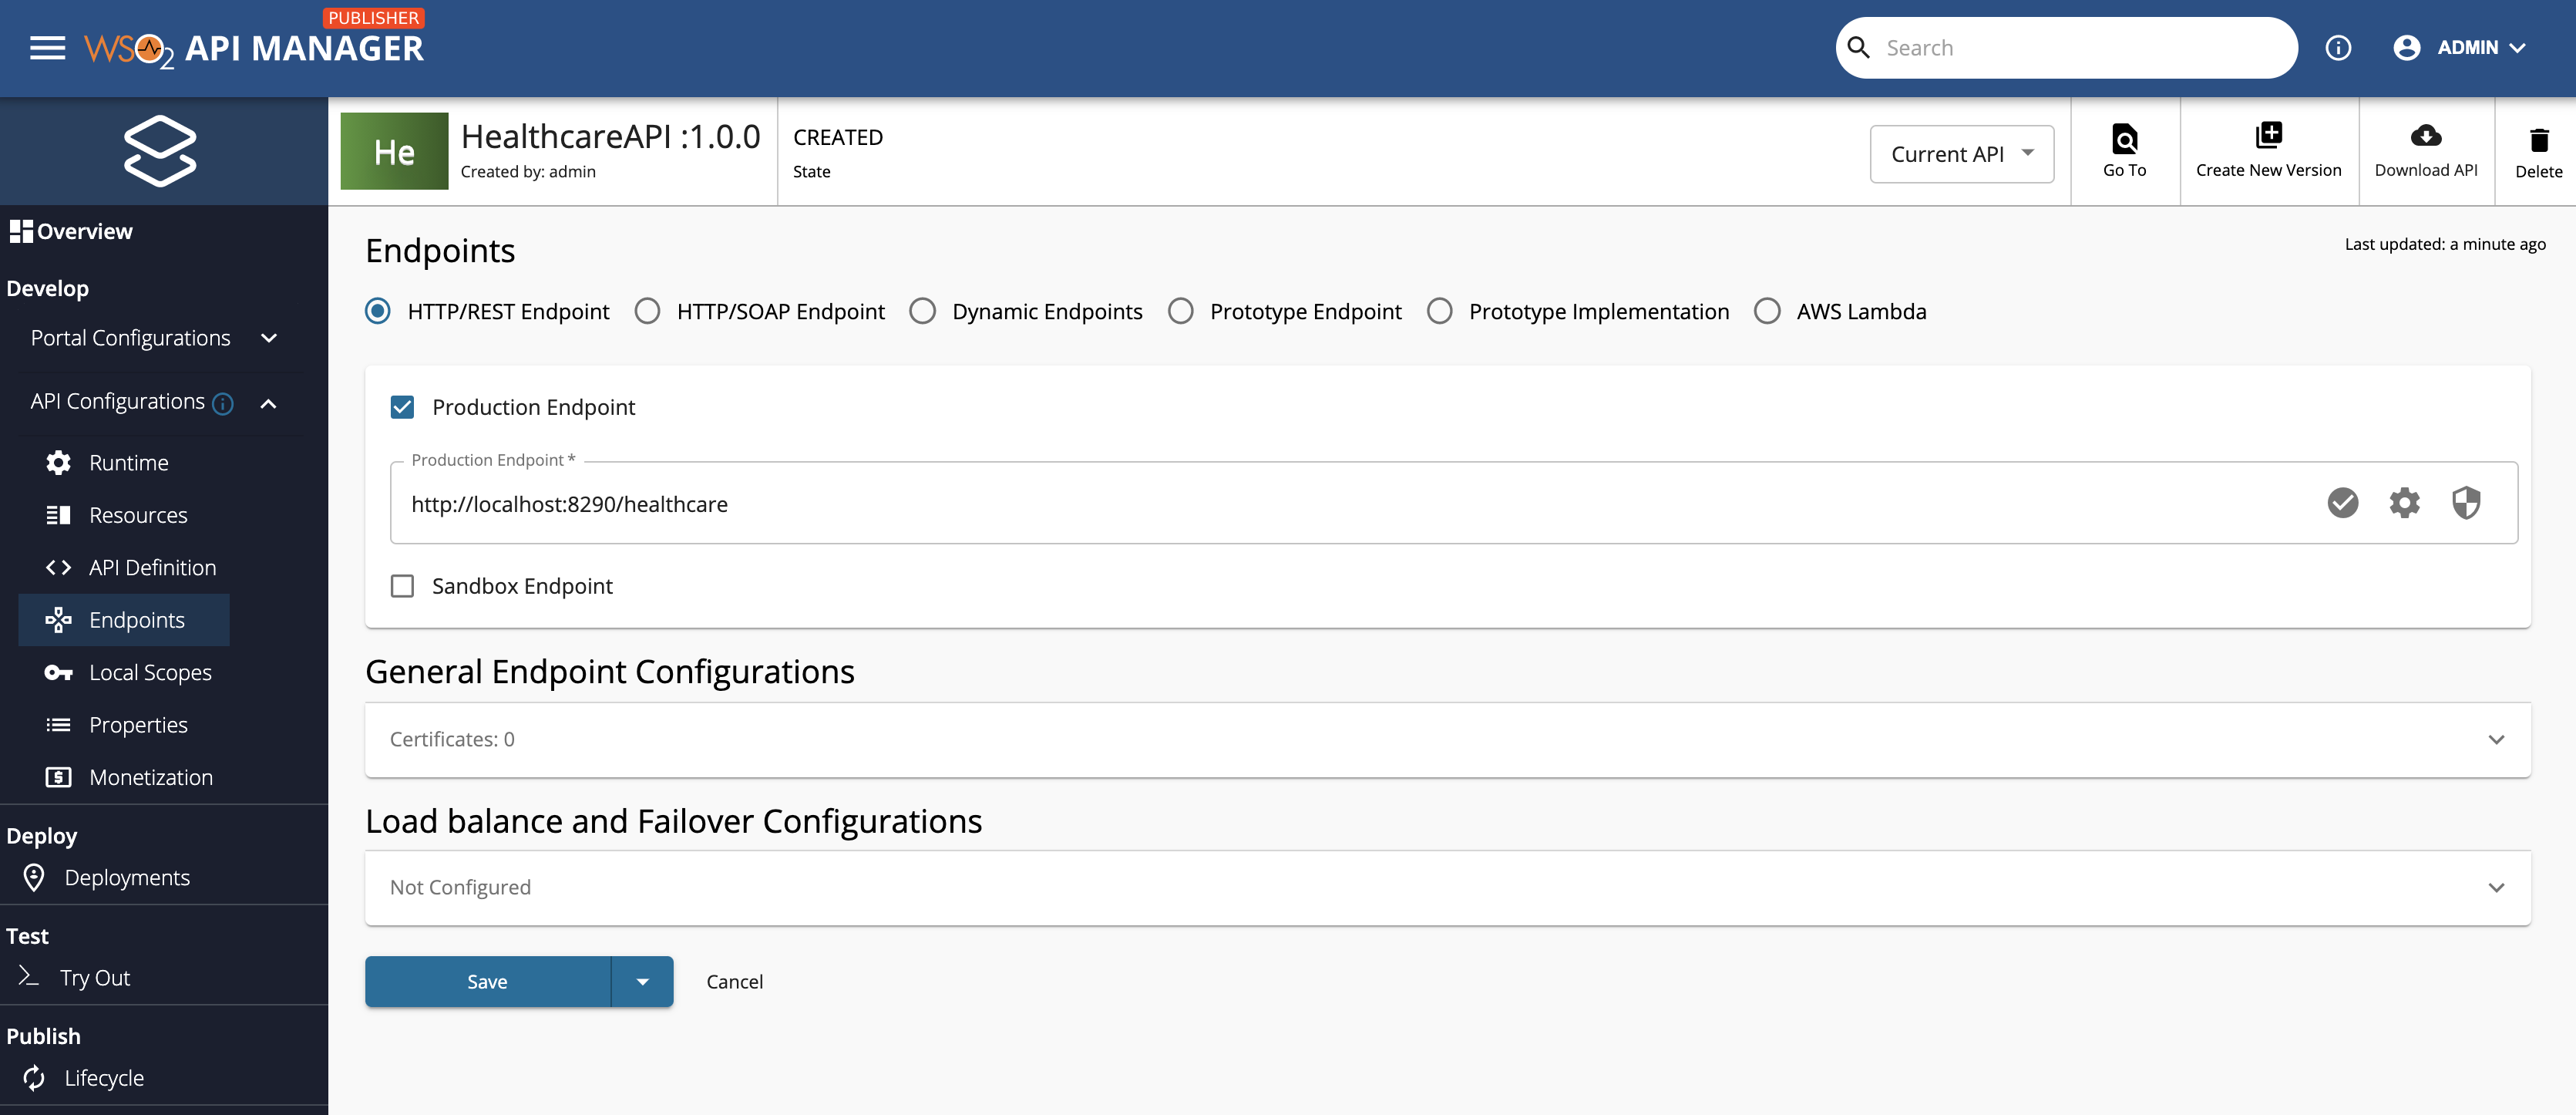
Click Endpoints in the left-hand navigator. You will see that the new API uses the integration service deployed in the Micro Integrator as the endpoint (backend).
Select business plans
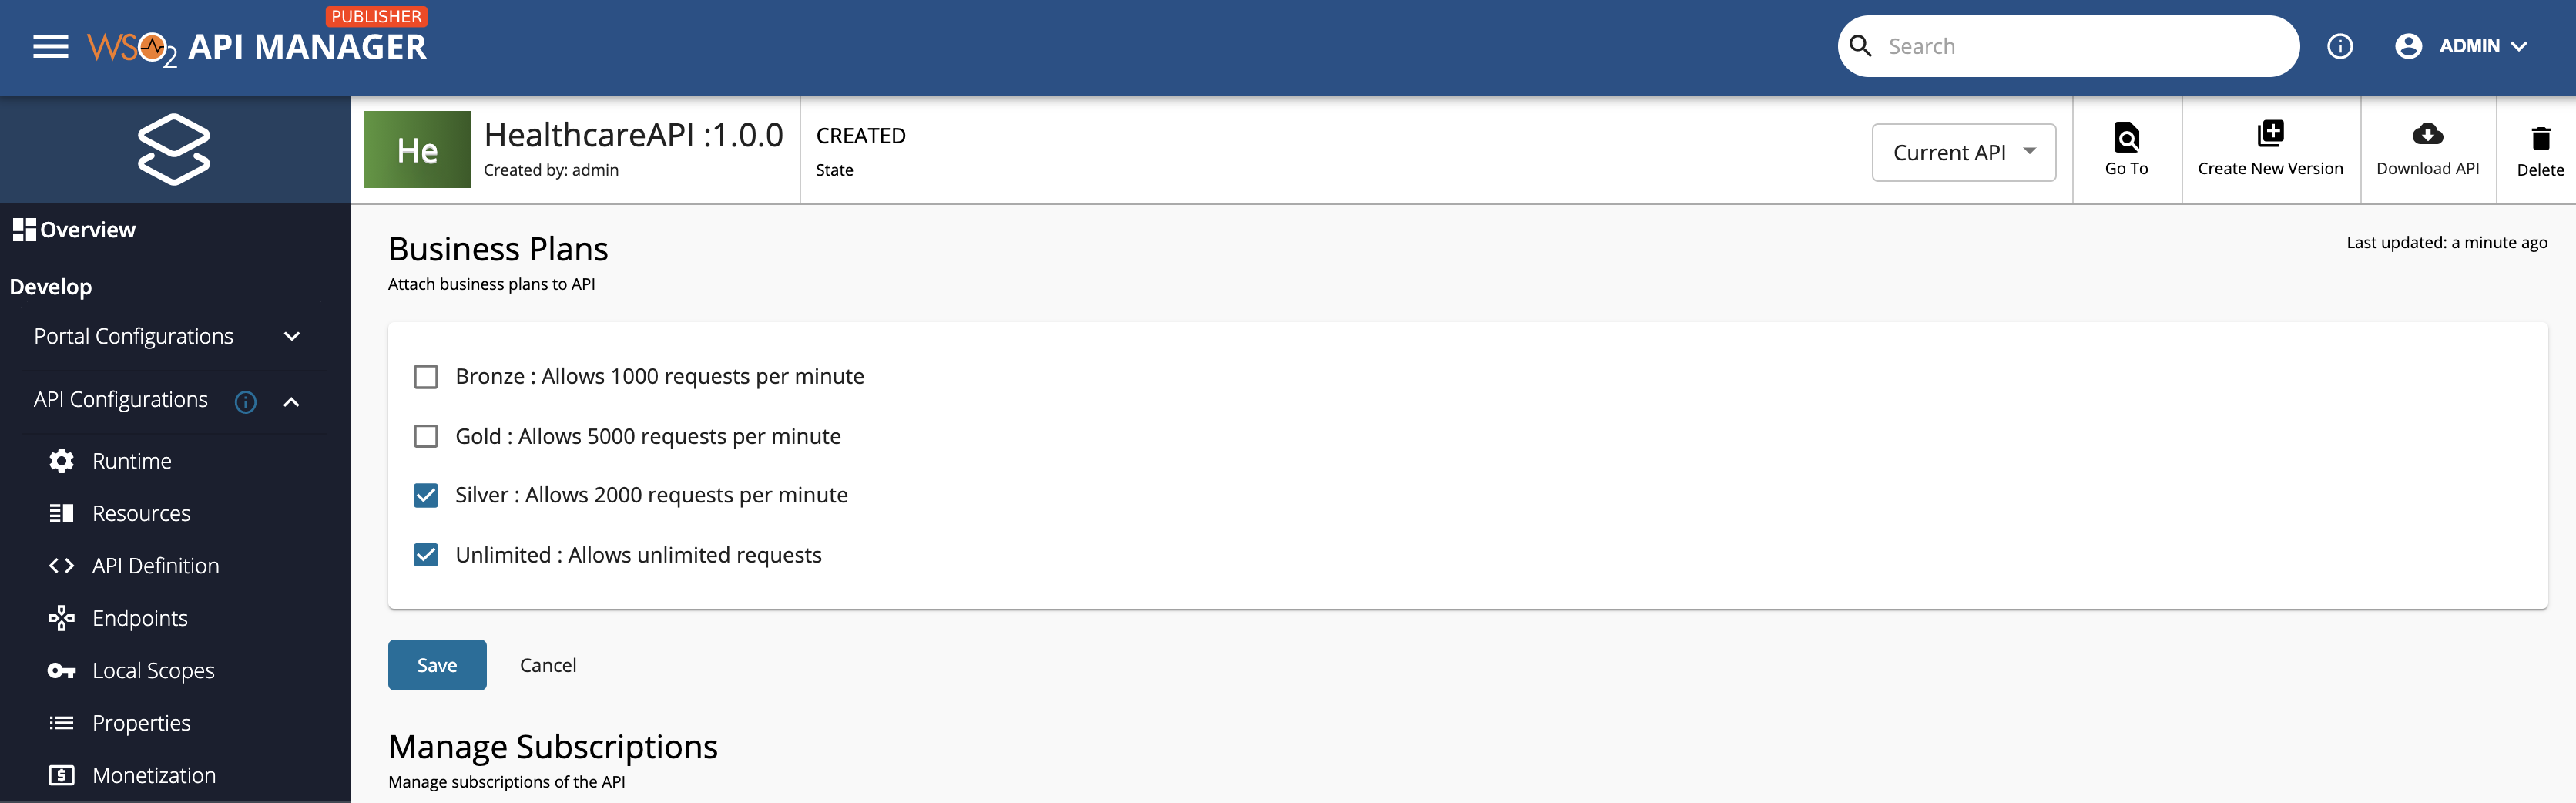
Let's allocate some business plans for the API.
-
Go to the API overview and click Business Plan.

-
Select at least one business plan for the API and save.
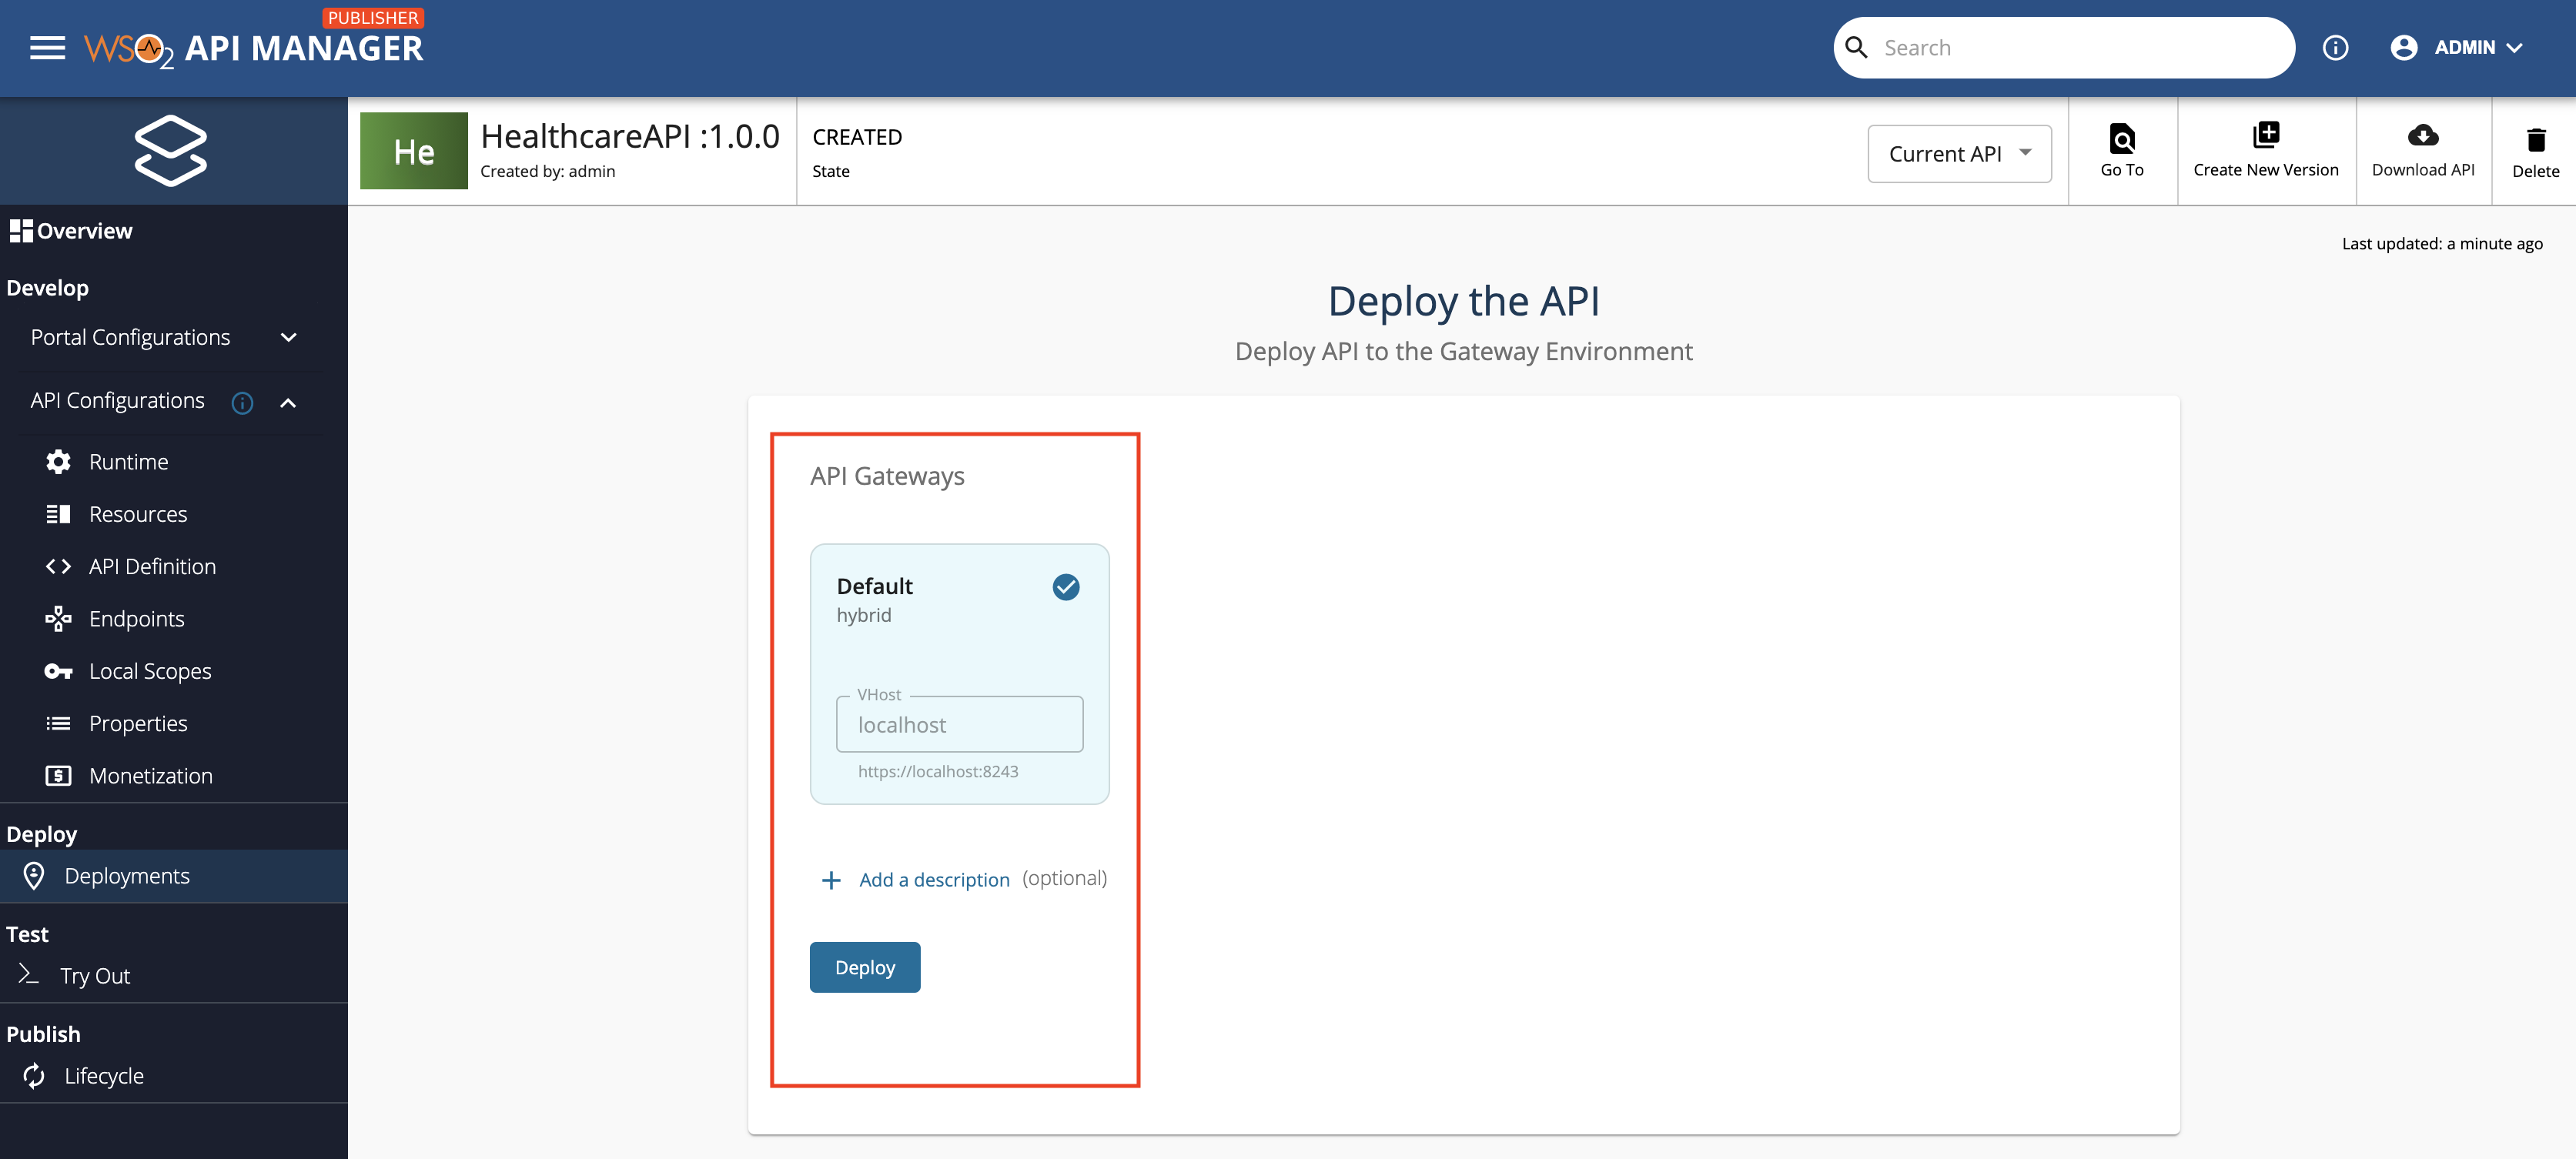
Deploy API in the Gateway
Let's deploy the API in a gateway environment.
-
Go to the API overview and click Deploy.
Tip
This opens the Deployment tab in the left-hand navigator.

-
Click Default to specify the gateway environment and host.
Tip
This setting deploys the API in Production as well as Sandbox gateways. Find out more about gateway environments.
-
Optionally, you can add a description.
-
Click Deploy.
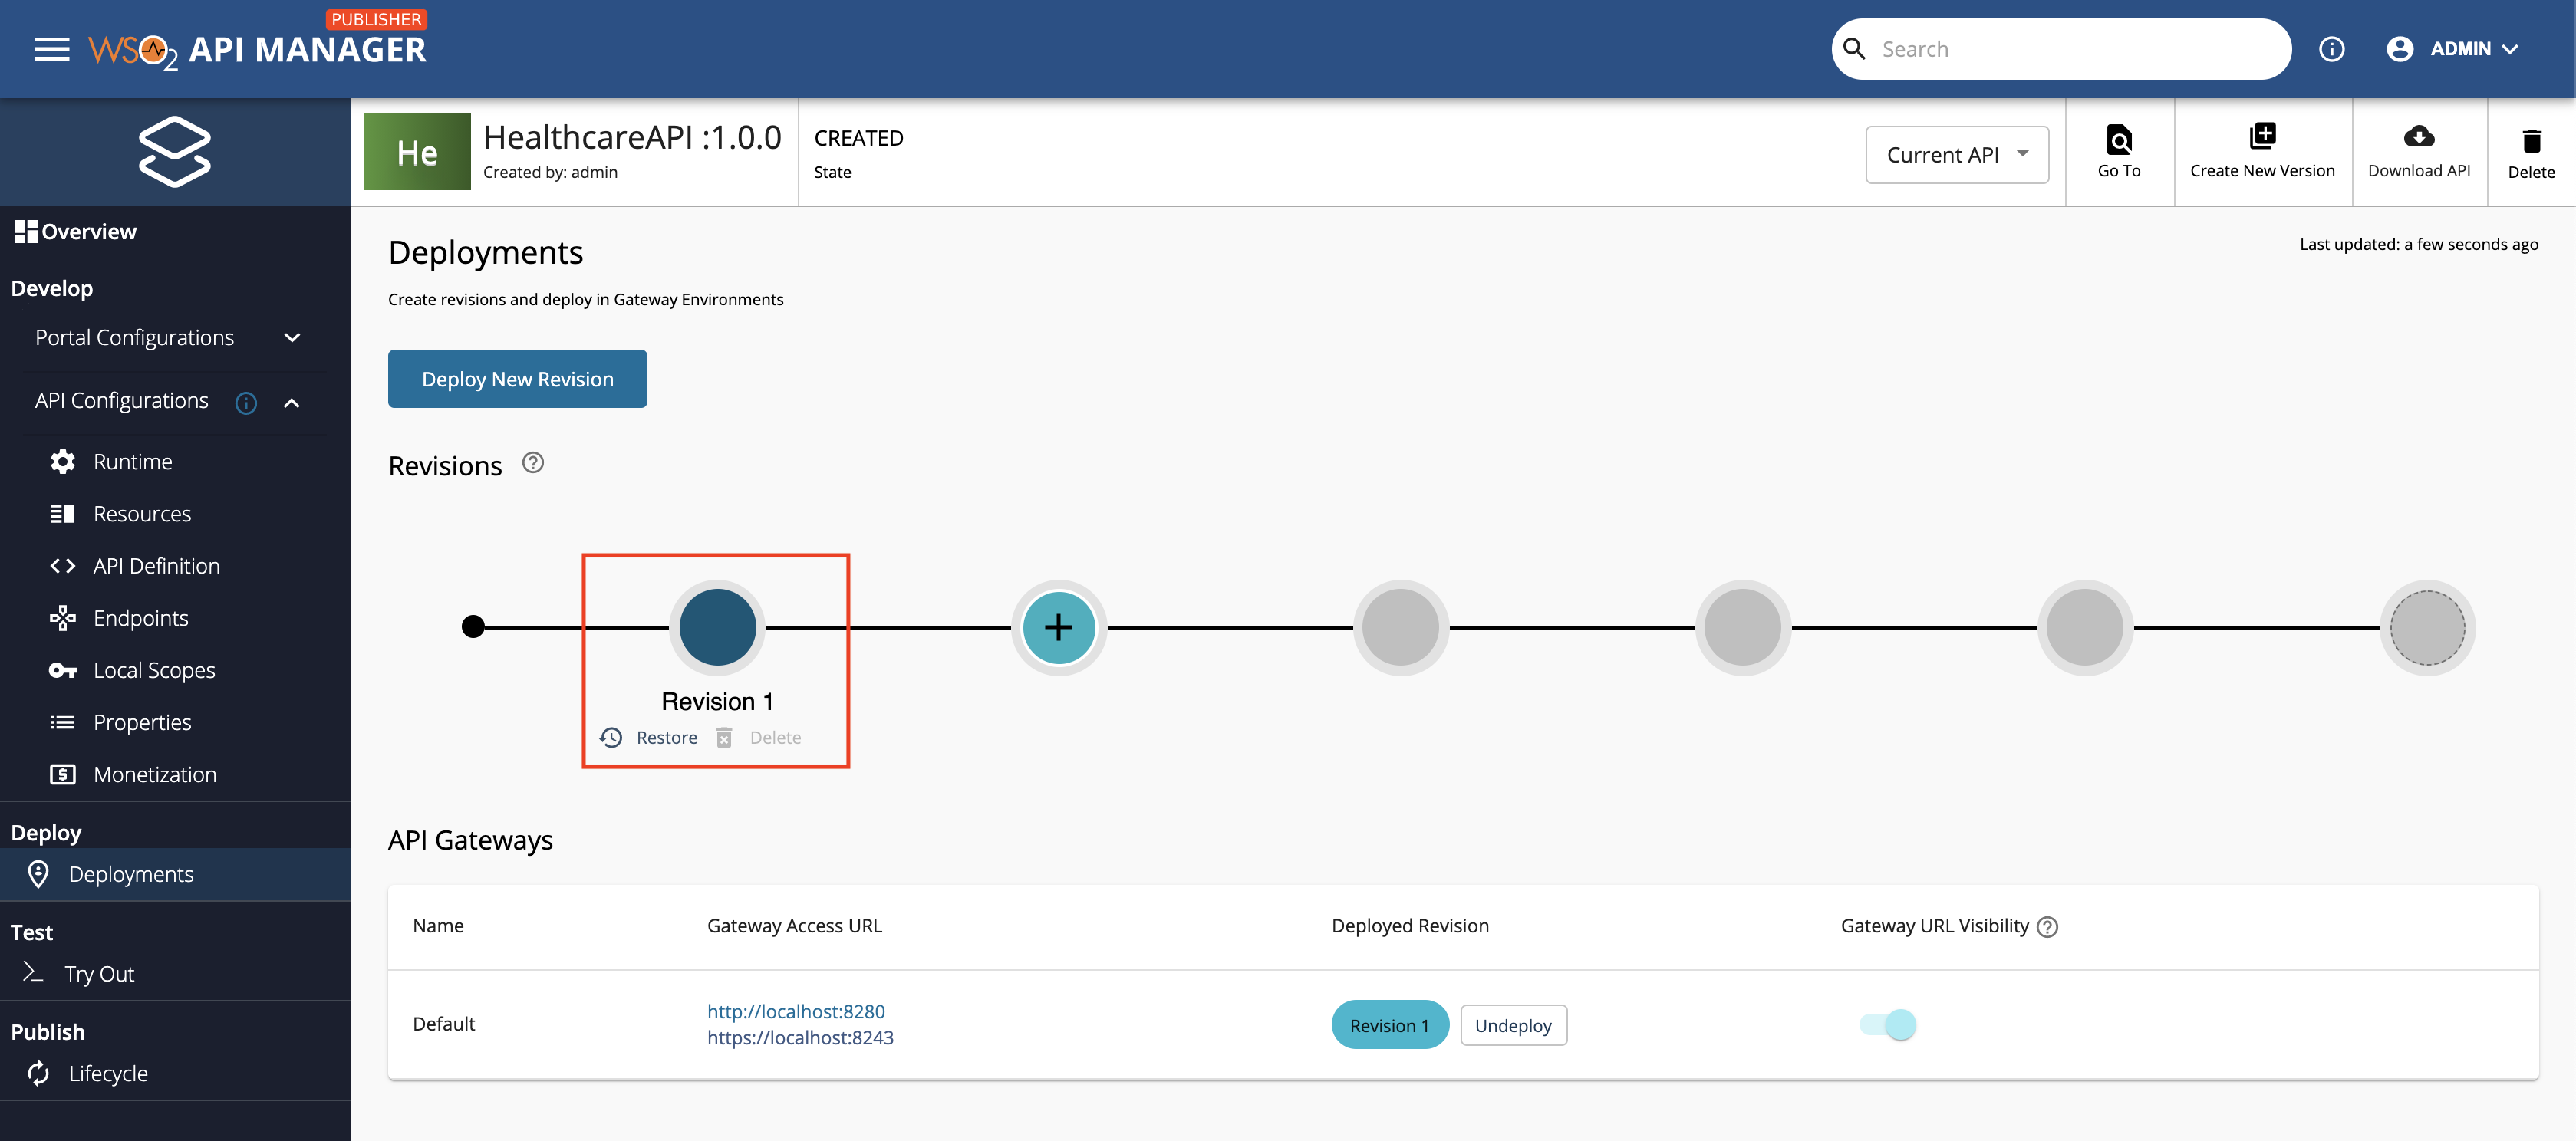
You will now see the deployment as the first revision of the API:
Step 8 - Publish the API
Go to the API overview in the Publisher portal and click Publish for the HealthcareAPI as shown below.

The API is now available in the Developer portal for consumers to access.
Step 9 - Subscribe to the API
Now, let's assume you are an API consumer who wants to use the API. As a consumer, you need to first subscribe to the API.
-
Sign in to the Developer portal:
https://localhost:9443/devportal/apis.Tip
Use
adminas the username and password. -
Go to the API tab. The
HealthcareAPIis listed as shown below.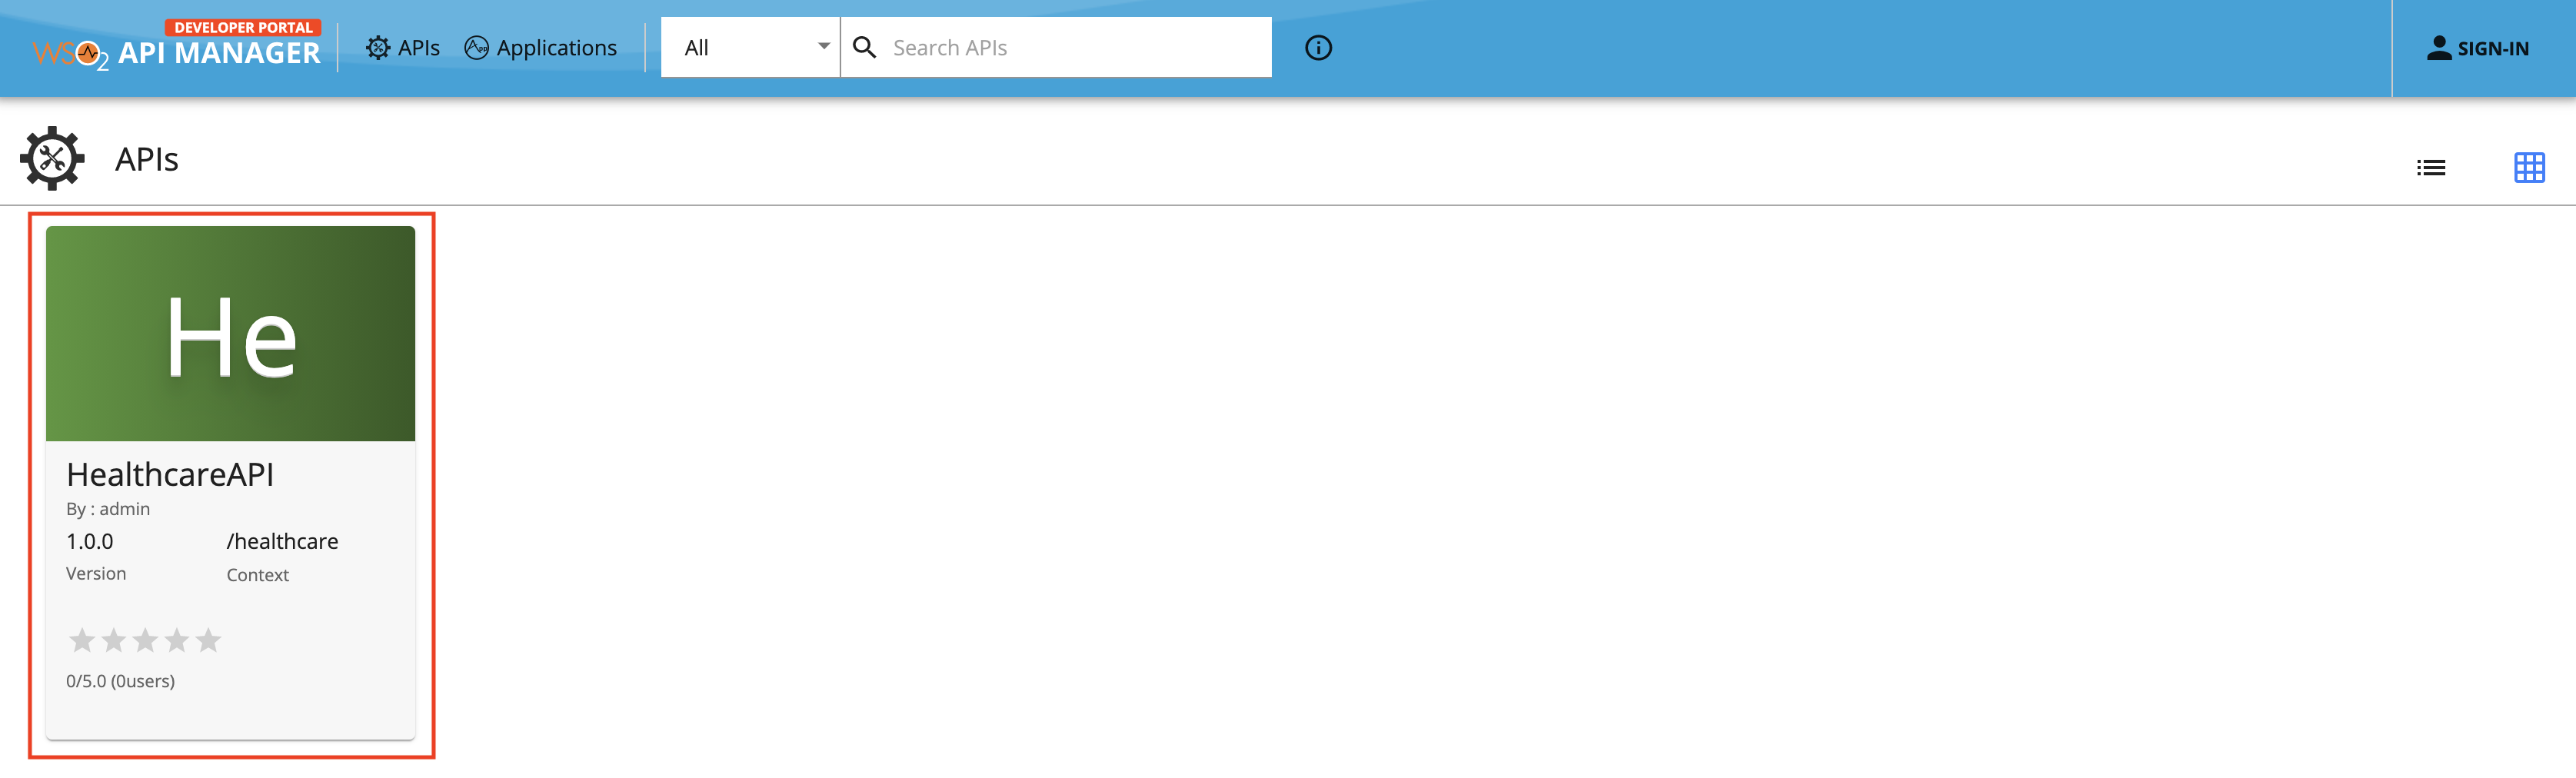
-
Select the
HealthcareAPIto open the API overview.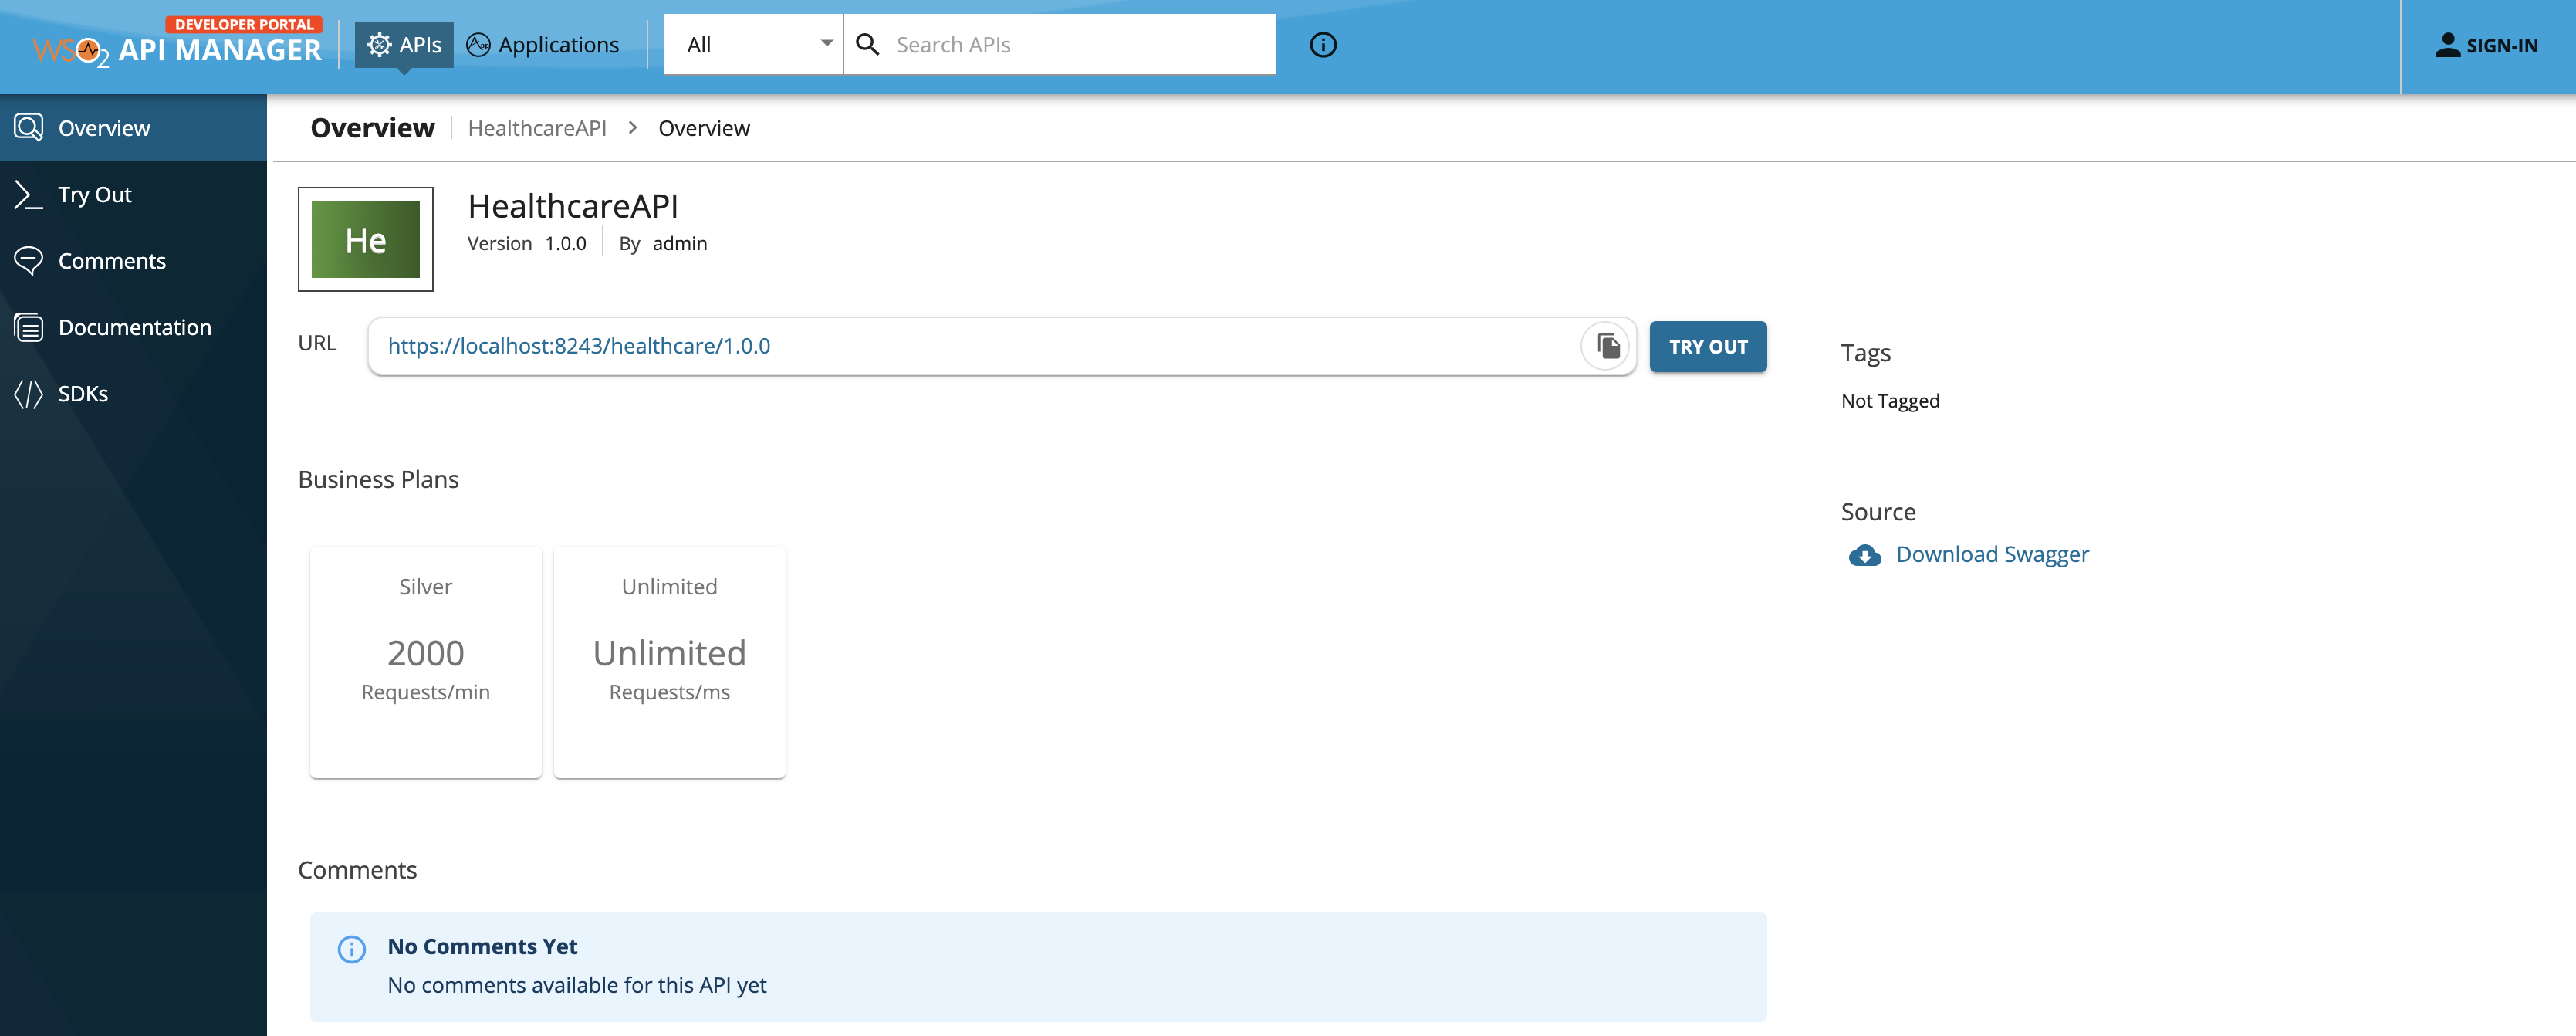
-
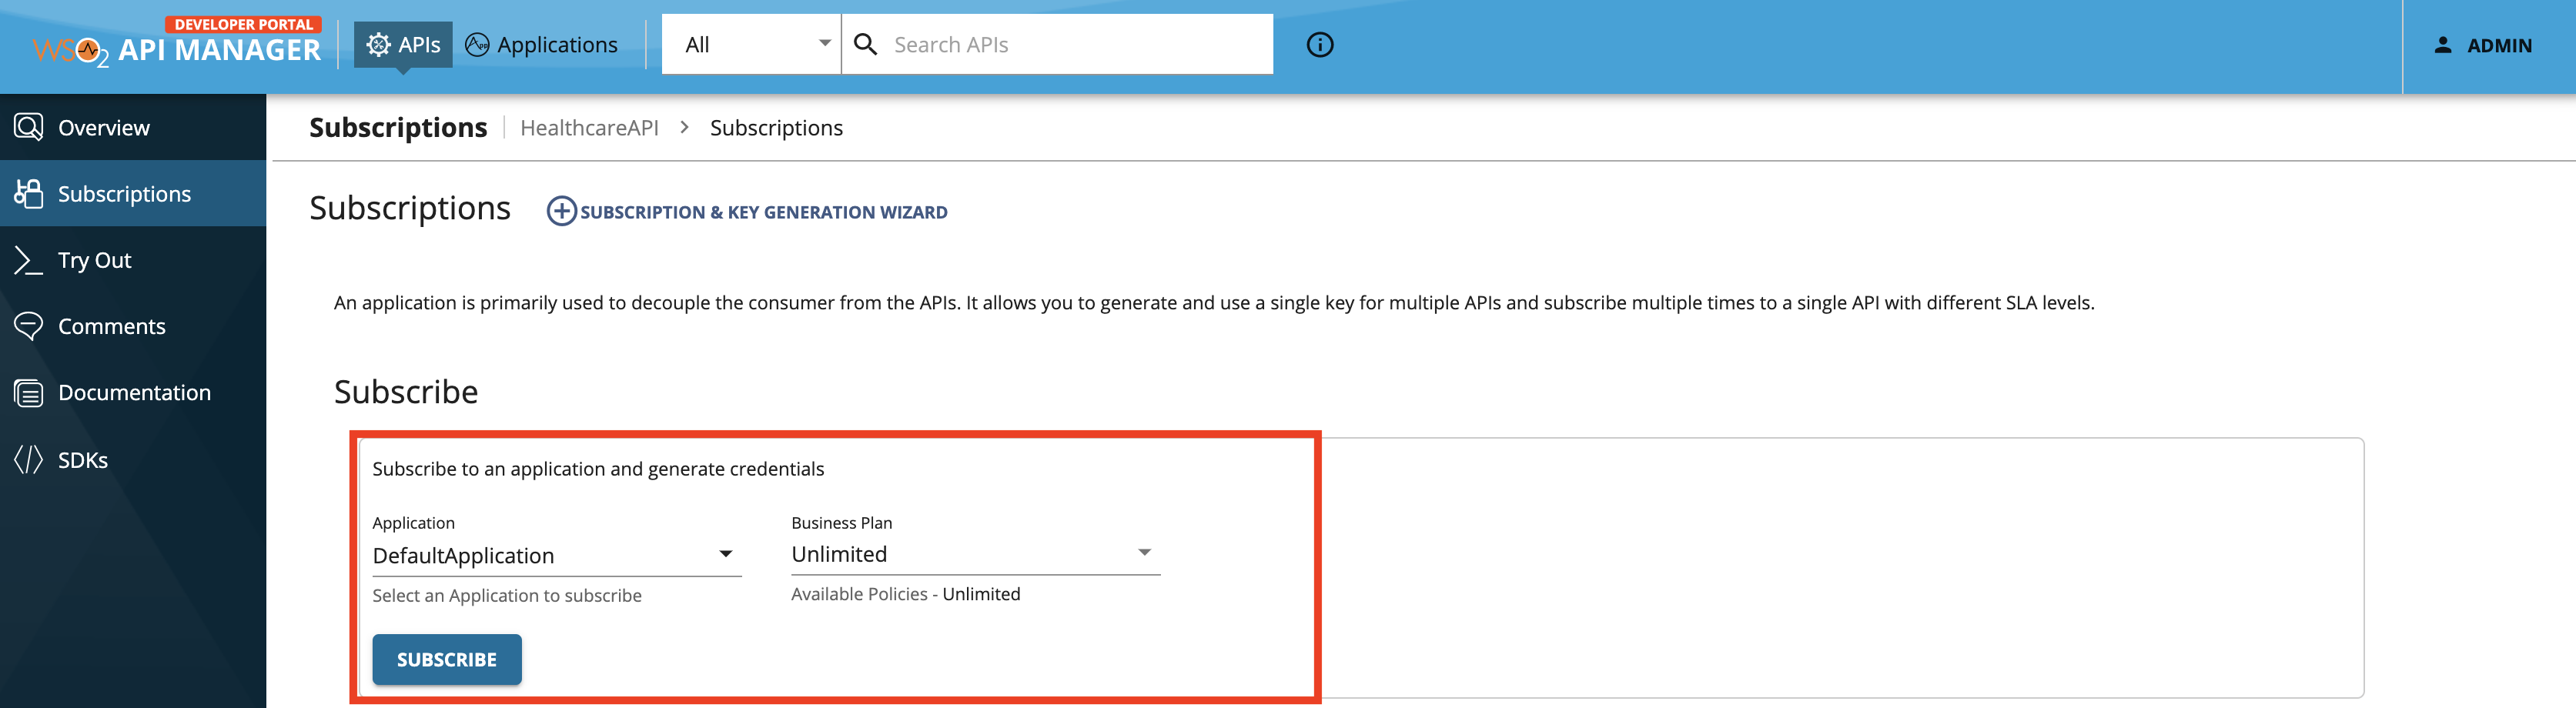
Go to the Subscriptions tab and subscribe using the DefaultApplication as shown below.
Tip
For detailed instructions, see Subscribe to an API.
Step 10 - Use the API
Before you begin
Let's start the back-end hospital service.
- Download the JAR file of the back-end service from here.
- Open a terminal, navigate to the location where you saved the back-end service.
-
Execute the following command to start the service:
java -jar Hospital-Service-JDK11-2.0.0.jar
Generate access token
When you consume an API from the marketplace, your access to the API is authenticated. Therefore, the DefaultApplication that you used for subscribing to the API should get an access token for the gateway environment in which the API is deployed. Since the HealthcareAPI is deployed in the Production gateway, you must generate PROD keys.
- Go to the Subscriptions tab for the
HealthcareAPIin the Developer portal. -
Click PROD KEYS for the DefaultApplication.

-
Click Generate Keys (at the bottom of this view) to apply a consumer key and secret as shown below.
Note
The application may already have a consumer key and secret generated. In this case, you can skip this step.

-
Click Generate Access Token in the above view to generate the access token.
-
Save the generated token.
Try out the service
Now, let's test the use case by sending a simple client request that invokes the service.
-
Click Try Out for the
HealthcareAPIin the Developer portal as shown below.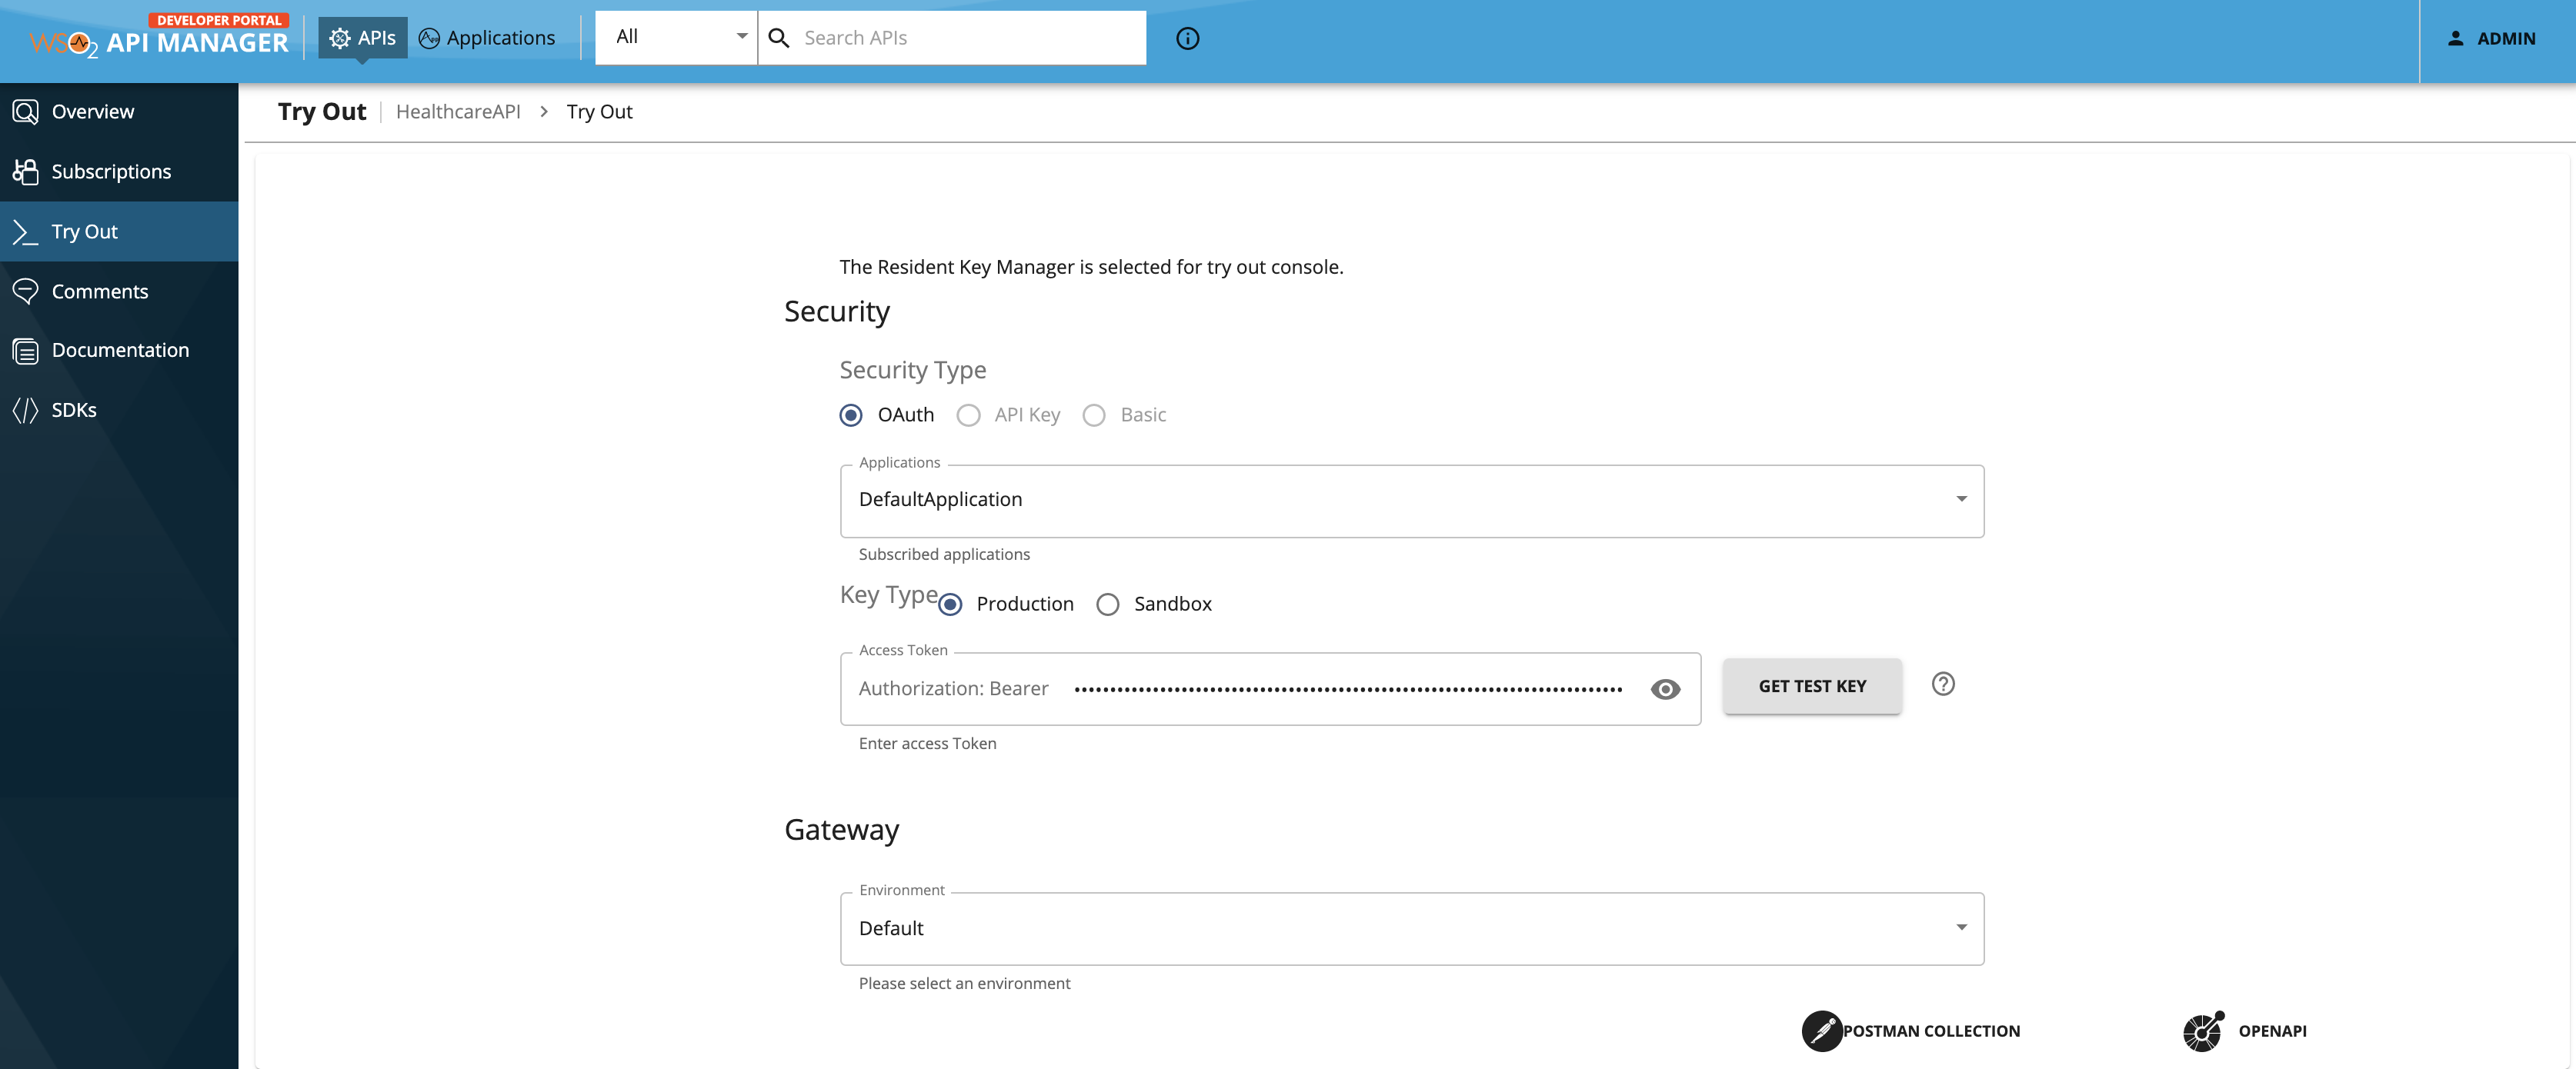
-
Enter the following details.
Security Type Select OAuth as the security type. Applications Select DefaultApplication from the list of application. Key Type Select Production as the key type. This means that the production gateway (environment) is used. access.token Add the access token you generated for the DefaultApplication. You can also click GET TEST KEY to generate a test token. Gateway Select Default as the gateway. -
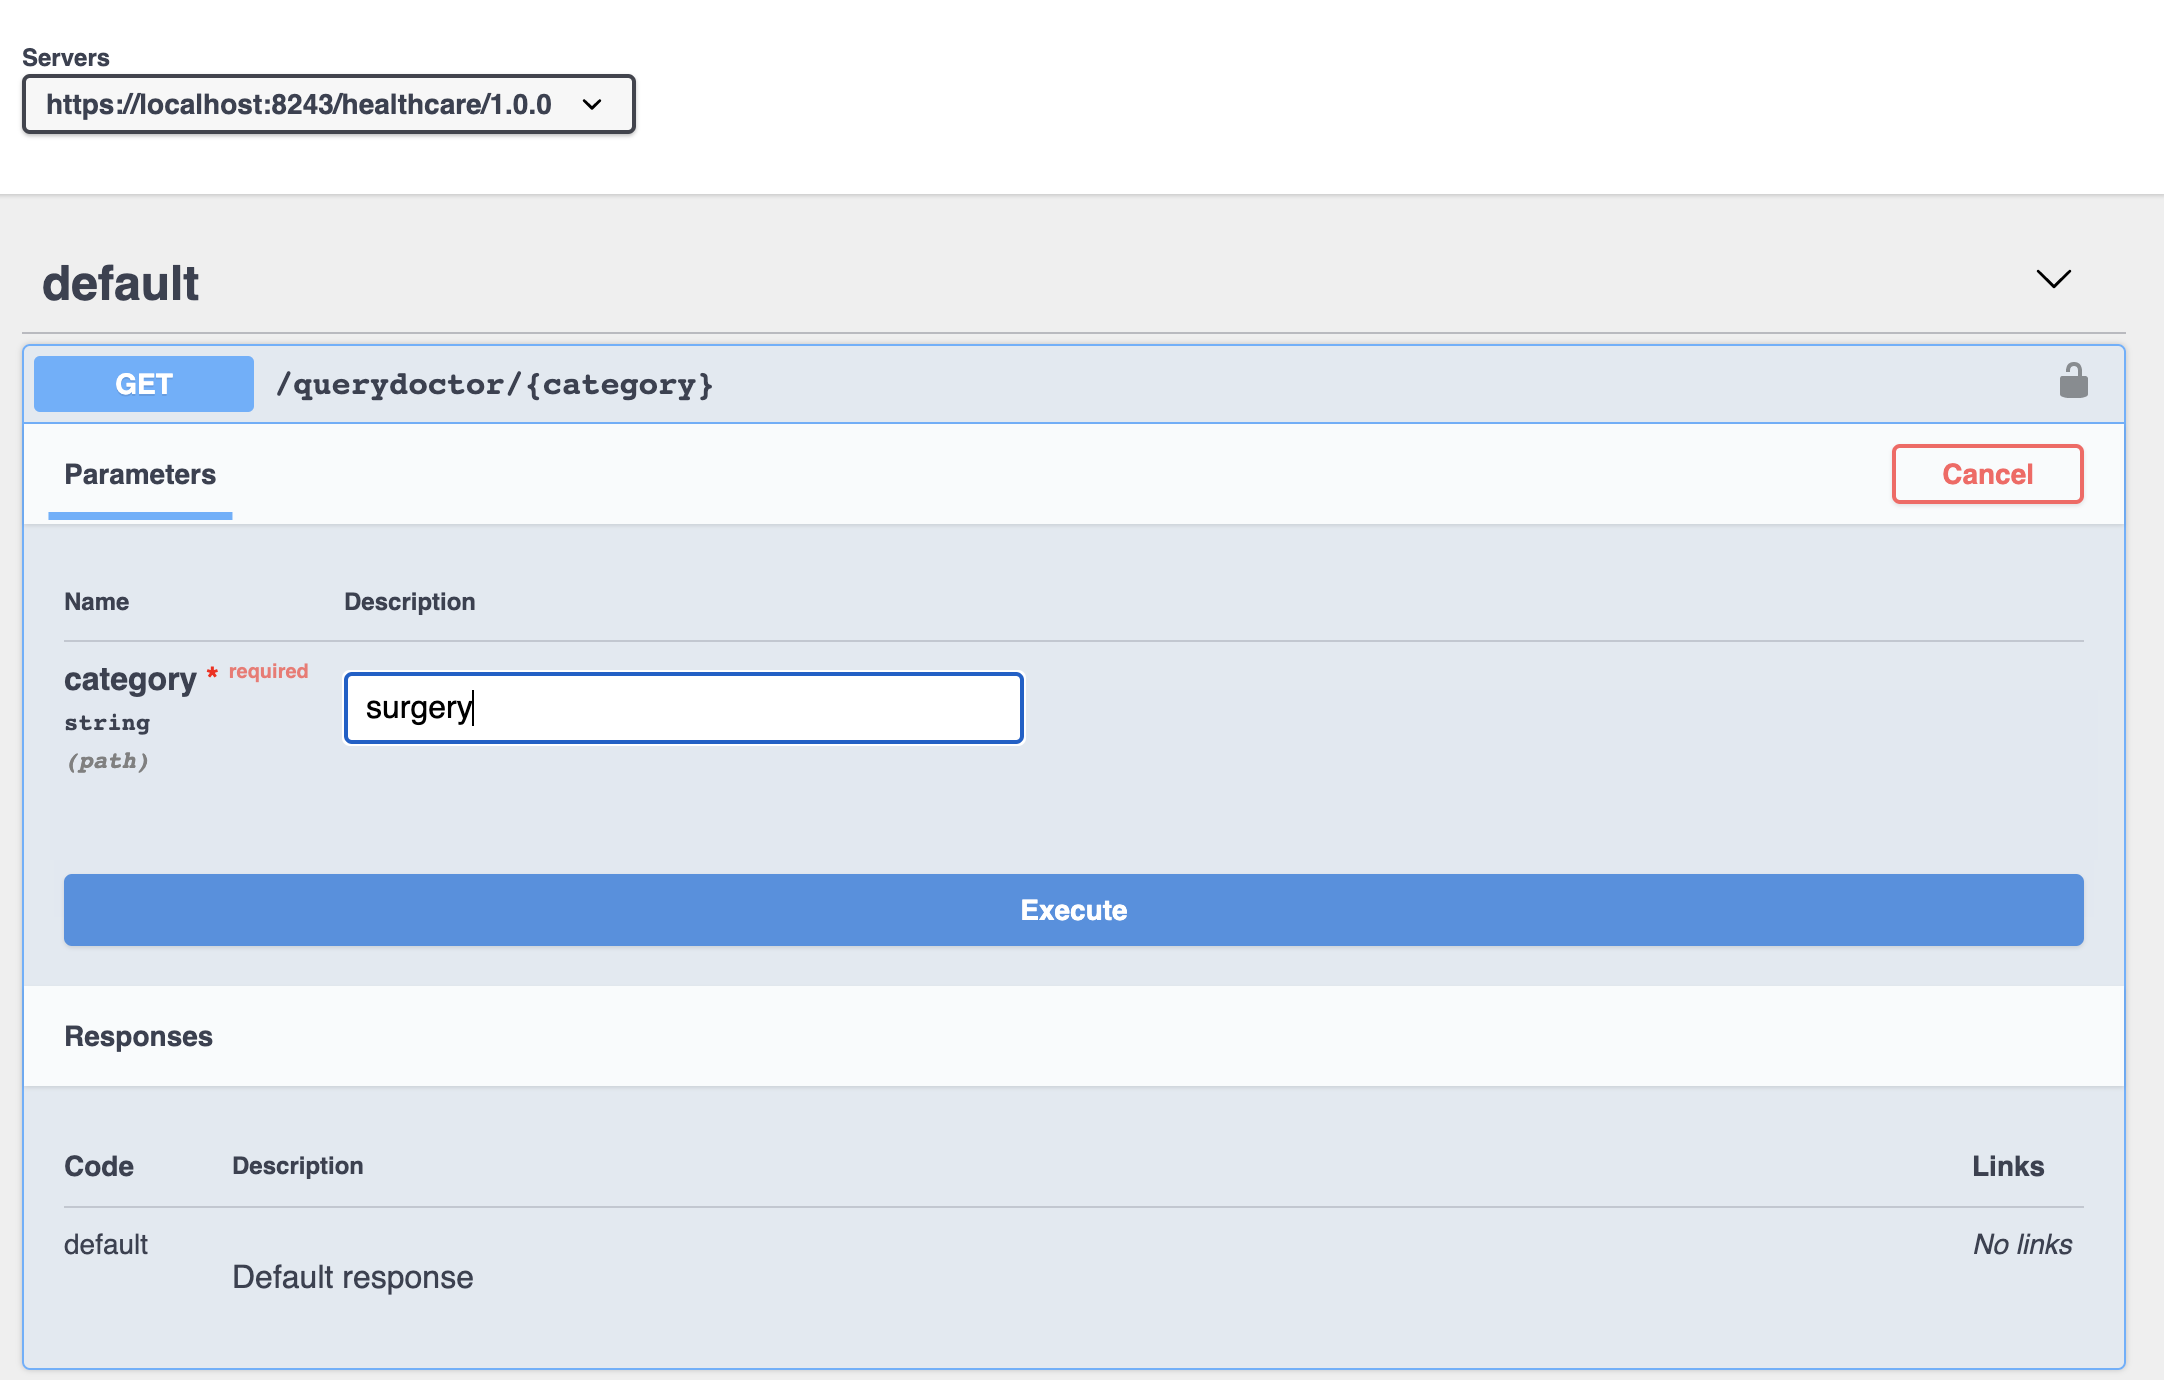
Expand the /querydoctor/{category} resource and click Try it out.
- Let's specify 'surgery' as the doctor category.
-
Click Execute.
You will get the response message from the Healthcare service, if you send the category as surgery:
[
    {
        "name":"thomas collins",
        "hospital":"grand oak community hospital",
        "category":"surgery",
        "availability":"9.00 a.m - 11.00 a.m",
        "fee":7000.0
    },
    {
        "name":"anne clement",
        "hospital":"clemency medical center",
        "category":"surgery",
        "availability":"8.00 a.m - 10.00 a.m",
        "fee":12000.0
    },
    {
        "name":"seth mears",
        "hospital":"pine valley community hospital",
        "category":"surgery",
        "availability":"3.00 p.m - 5.00 p.m",
        "fee":8000.0
    }
]
Now, check the Console tab of WSO2 Integration Studio and you will see the following message:
INFO - LogMediator message = "Welcome to HealthcareService"
Tip
For detailed instructions see Invoke an API using the Integrated API Console.