Avro Message with Kafka Connector Example
Given below is a sample scenario that demonstrates how to send Apache Avro messages to a Kafka broker via Kafka topics. The publishMessages operation allows you to publish messages to the Kafka brokers via Kafka topics.
What you'll build
Given below is a sample API that illustrates how you can connect to a Kafka broker and then use the publishMessages operation to publish messages via the topic. It exposes Kafka functionalities as a RESTful service. Users can invoke the API using HTTP/HTTPS with the required information.
The API has the /publishMessages context. It publishes messages via the topic to the Kafka server.
Set up Kafka
Before you begin,
- Set up Kafka by following the instructions in Setting up Kafka.
- Install the Confluent Platform according to the Kafka version you are using.
Configure the connector in WSO2 Integration Studio
Follow these steps to set up the Integration Project and the Connector Exporter Project.
-
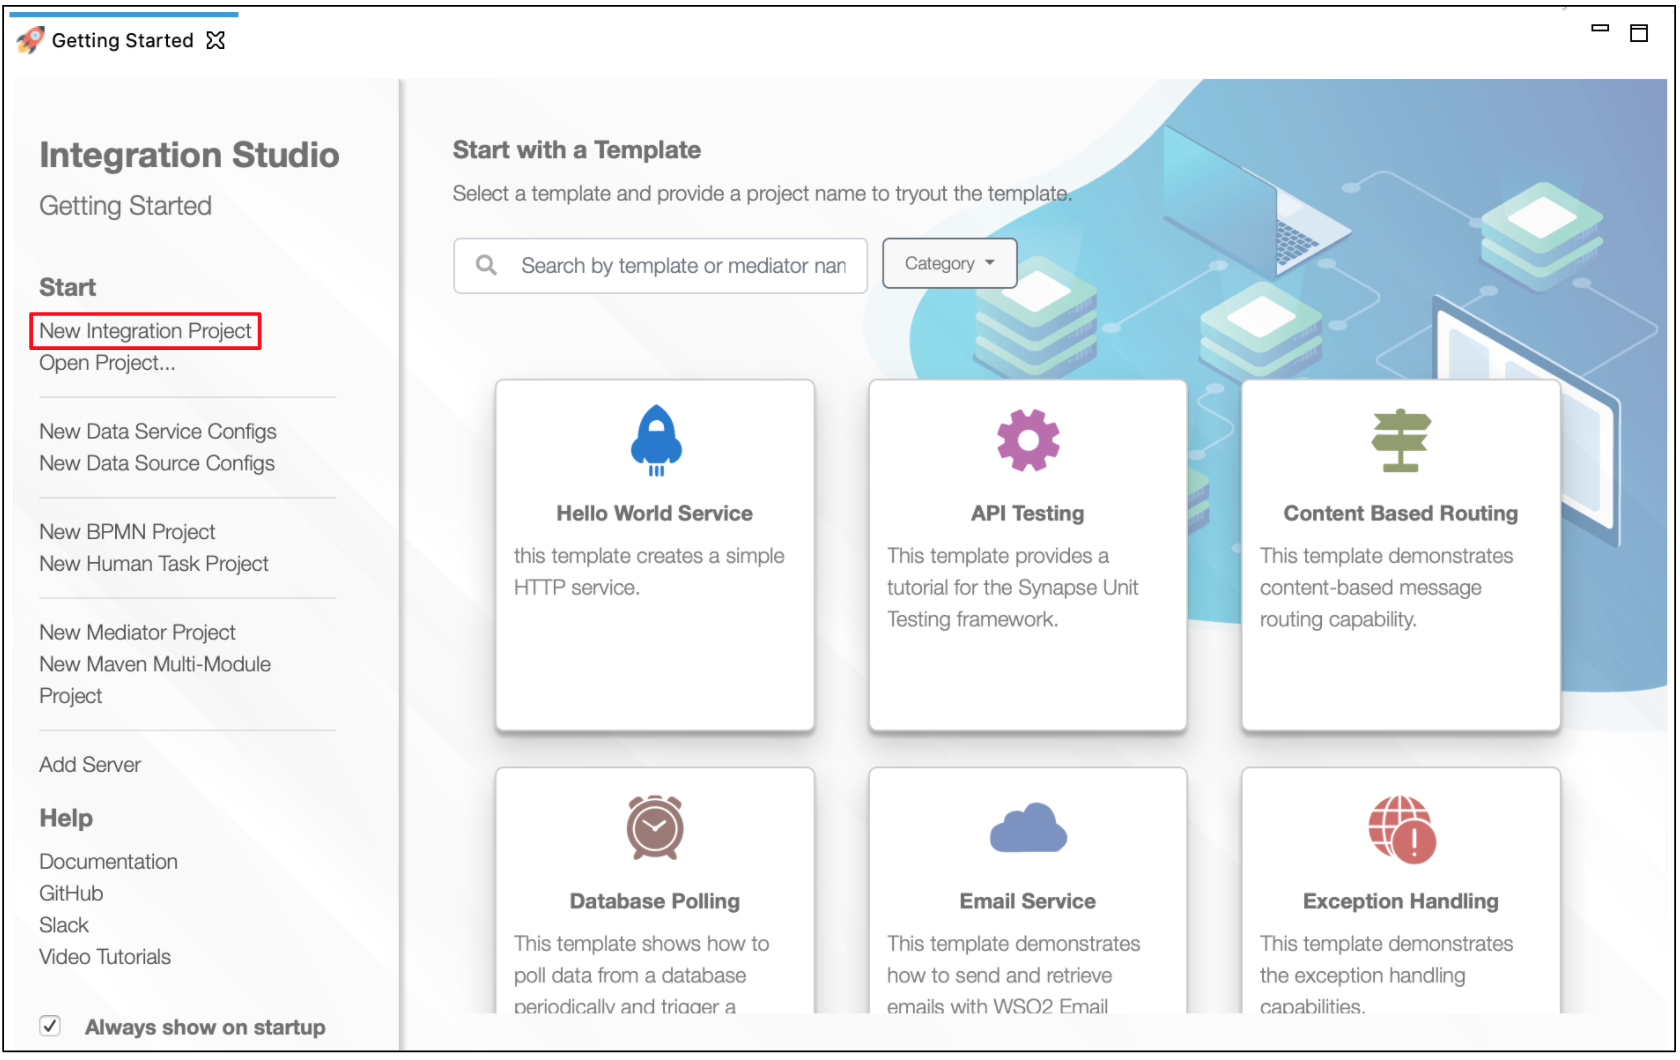
Open WSO2 Integration Studio and select New Integration Project to create an Integration Project.
-
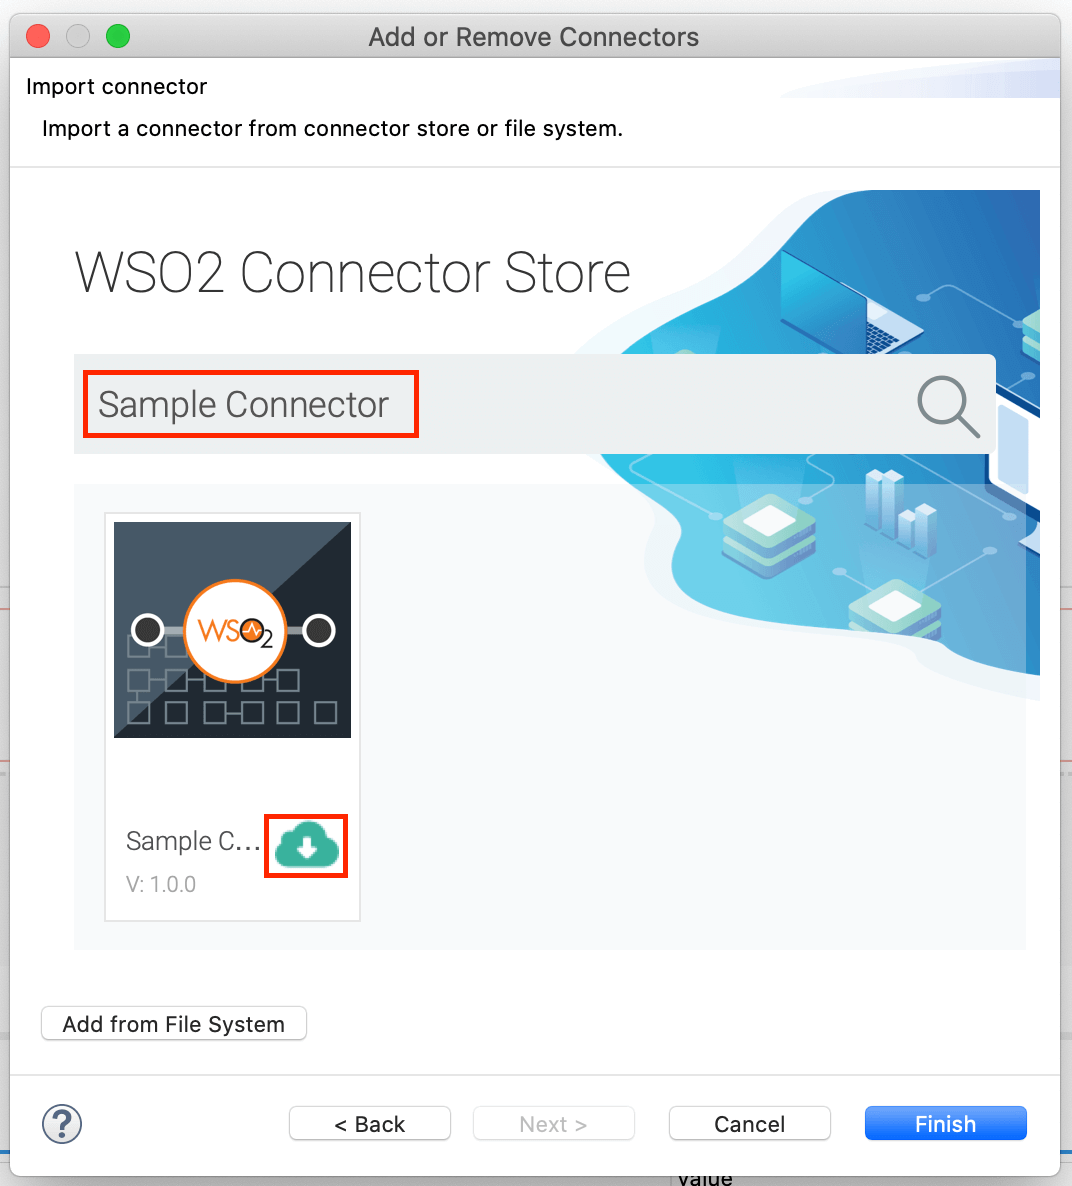
Right-click the project that you created and click on Add or Remove Connector -> Add Connector. You will get directed to the WSO2 Connector Store.
-
Search for the specific connector required for your integration scenario and download it to the workspace.
-
Click Finish, and your Integration Project is ready. The downloaded connector is displayed on the side palette with its operations.
-
You can drag and drop the operations to the design canvas and build your integration logic.

-
Right click on the created Integration Project and select New -> Rest API to create the REST API.
-
Specify the API name as
KafkaTransportand API context as/publishMessages. -
To configure the resource, click on the API Resource and go to Properties view. Select the
POSTmethod. -
Drag and drop the property mediator from the mediator palette to the request path of the API resource.
-
Specify values for the property mediator:
Parameter Value New Property Name valueSchema Property Data Type STRING Property Action set Property Scope default Value json-eval($.test) -
Similarly, drag and drop three more property mediators from the mediator palette to the request path of the API resource and specify values as follows.
Property Name Value value json-eval($.value) key json-eval($.key) topic json-eval($.topic) -
Next drag and drop the
publishMessagesoperation of the KafkaTransport Connector to the Design View as shown below.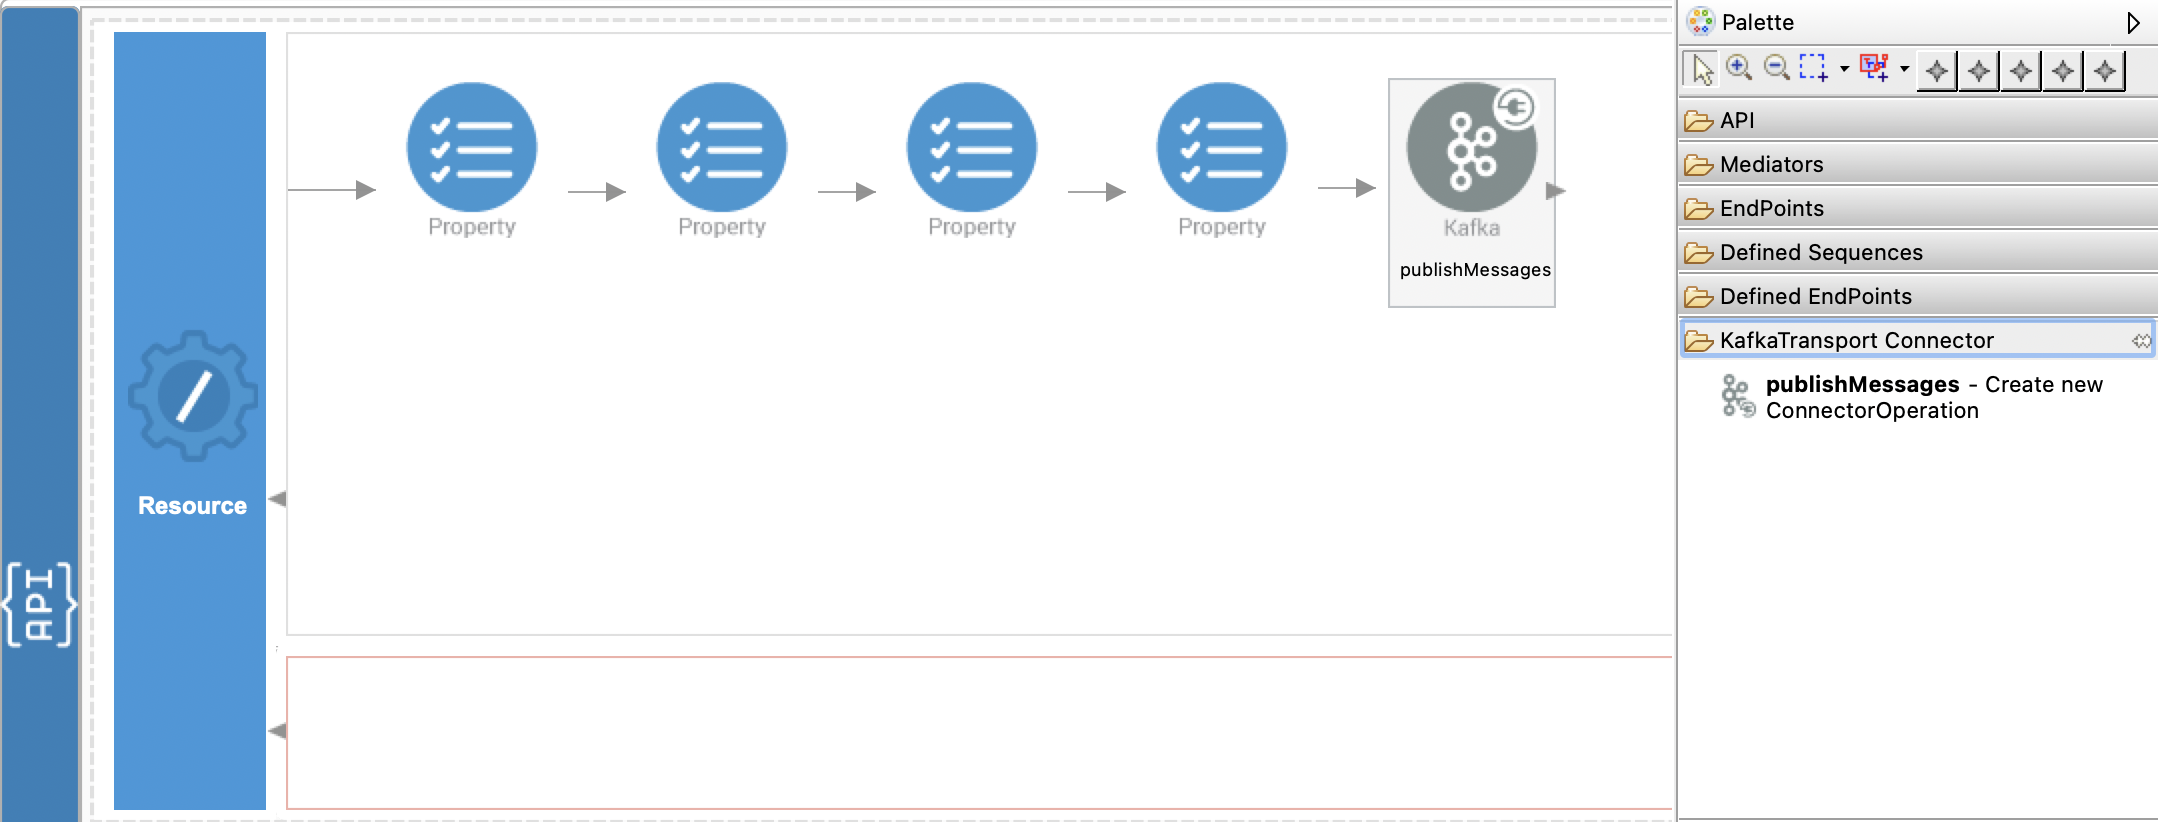
-
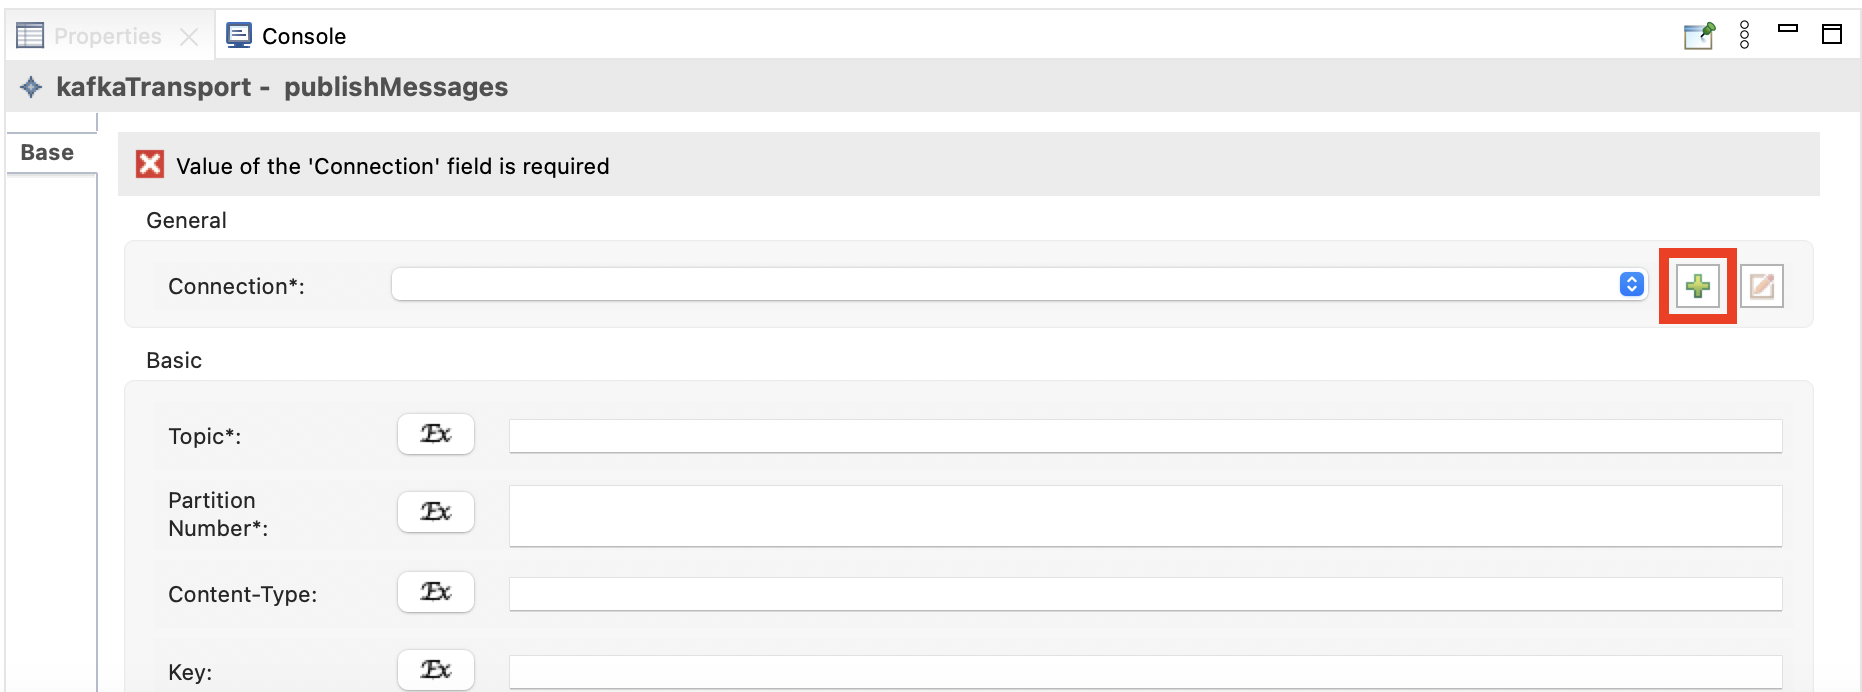
Create a connection from the properties window by clicking on the + icon as shown below.
-
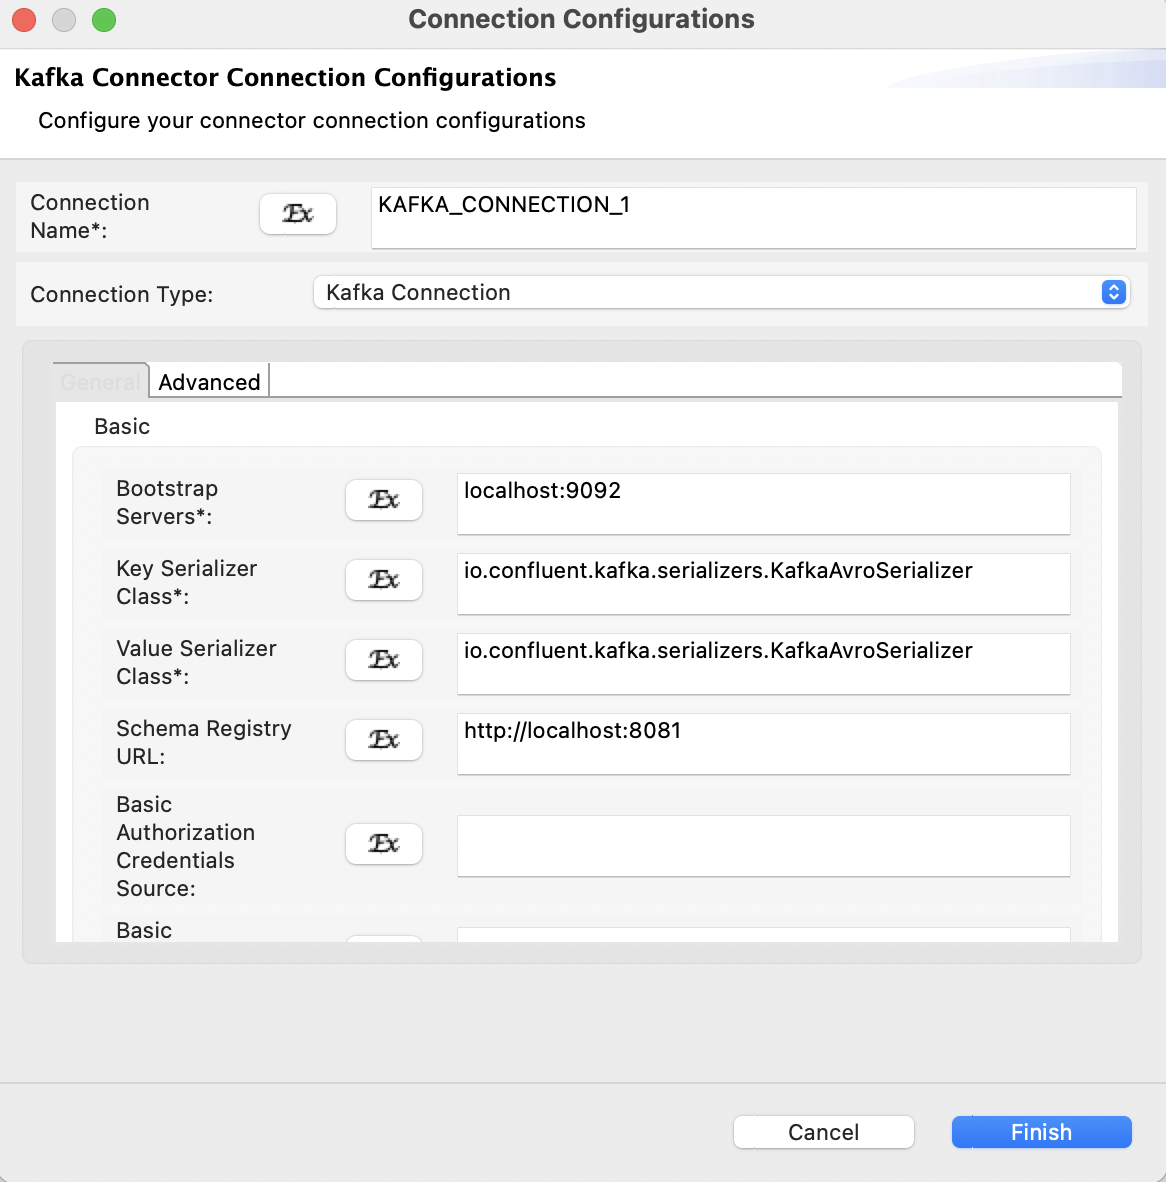
In the popup window, provide the following parameters and click Finish.
Property Name Value Bootstrap Servers localhost:9092 Key Serializer Class io.confluent.kafka.serializers.KafkaAvroSerializer Value Serializer Class io.confluent.kafka.serializers.KafkaAvroSerializer Schema Registry URL http://localhost:8081 -
After the connection is successfully created, select the created connection as Connection from the drop-down menu in the properties window.
-
Next, configure the following parameters in the properties window.
Property Name Value Partition Number 1 Topic $ctx:topic Key $ctx:key Value $ctx:value Value Schema $ctx:valueSchema -
You can find the complete API XML configuration below.
<?xml version="1.0" encoding="UTF-8"?> <api context="/publishMessages" name="KafkaTransport" xmlns="http://ws.apache.org/ns/synapse"> <resource methods="POST"> <inSequence> <property expression="json-eval($.test)" name="valueSchema" scope="default" type="STRING"/> <property expression="json-eval($.value)" name="value" scope="default" type="STRING"/> <property expression="json-eval($.key)" name="key" scope="default" type="STRING"/> <property expression="json-eval($.topic)" name="topic" scope="default" type="STRING"/> <kafkaTransport.publishMessages configKey="KAFKA_CONNECTION_1"> <topic>{$ctx:topic}</topic> <partitionNo>0</partitionNo> <key>{ctx:key}</key> <valueSchema>{ctx:valueSchema}</valueSchema> <value>{ctx:value}</value> </kafkaTransport.publishMessages> </inSequence> <outSequence/> <faultSequence/> </resource> </api> -
The following is the generated
KAFKA_CONNECTION_1.xmlwhich has been created in local-entries.<?xml version="1.0" encoding="UTF-8"?> <localEntry key="KAFKA_CONNECTION_1" xmlns="http://ws.apache.org/ns/synapse"> <kafkaTransport.init> <name>KAFKA_CONNECTION_1</name> <valueSerializerClass>io.confluent.kafka.serializers.KafkaAvroSerializer</valueSerializerClass> <connectionType>kafka</connectionType> <keySerializerClass>io.confluent.kafka.serializers.KafkaAvroSerializer</keySerializerClass> <bootstrapServers>localhost:9092</bootstrapServers> <poolingEnabled>false</poolingEnabled> <schemaRegistryUrl>http://localhost:8081</schemaRegistryUrl> </kafkaTransport.init> </localEntry>
Now we can export the imported connector and the API into a single CAR application. The CAR application needs to be deployed during server runtime.
Exporting Integration Logic as a CApp
CApp (Carbon Application) is the deployable artifact on the integration runtime. Let us see how we can export integration logic we developed into a CApp along with the connector.
Creating Connector Exporter Project
To bundle a Connector into a CApp, a Connector Exporter Project is required.
-
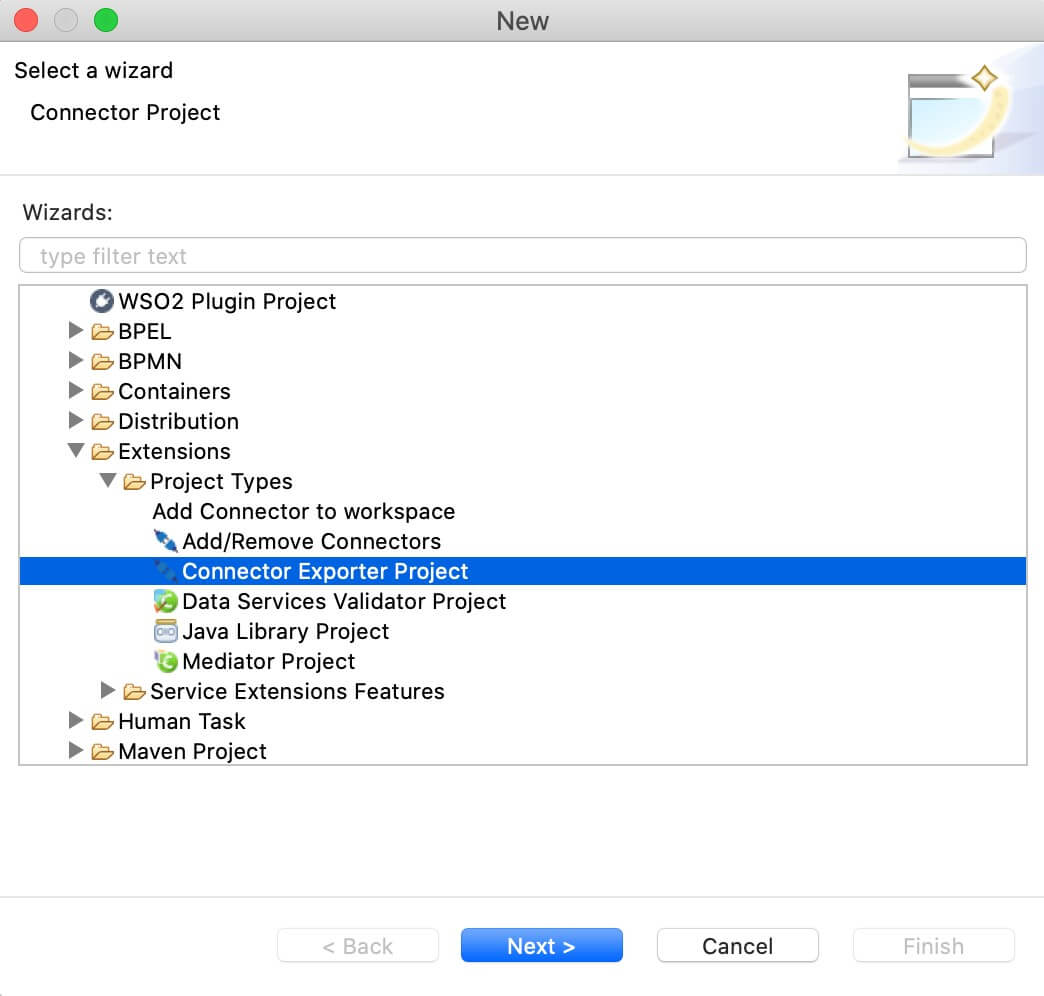
Navigate to File -> New -> Other -> WSO2 -> Extensions -> Project Types -> Connector Exporter Project.
-
Enter a name for the Connector Exporter Project.
-
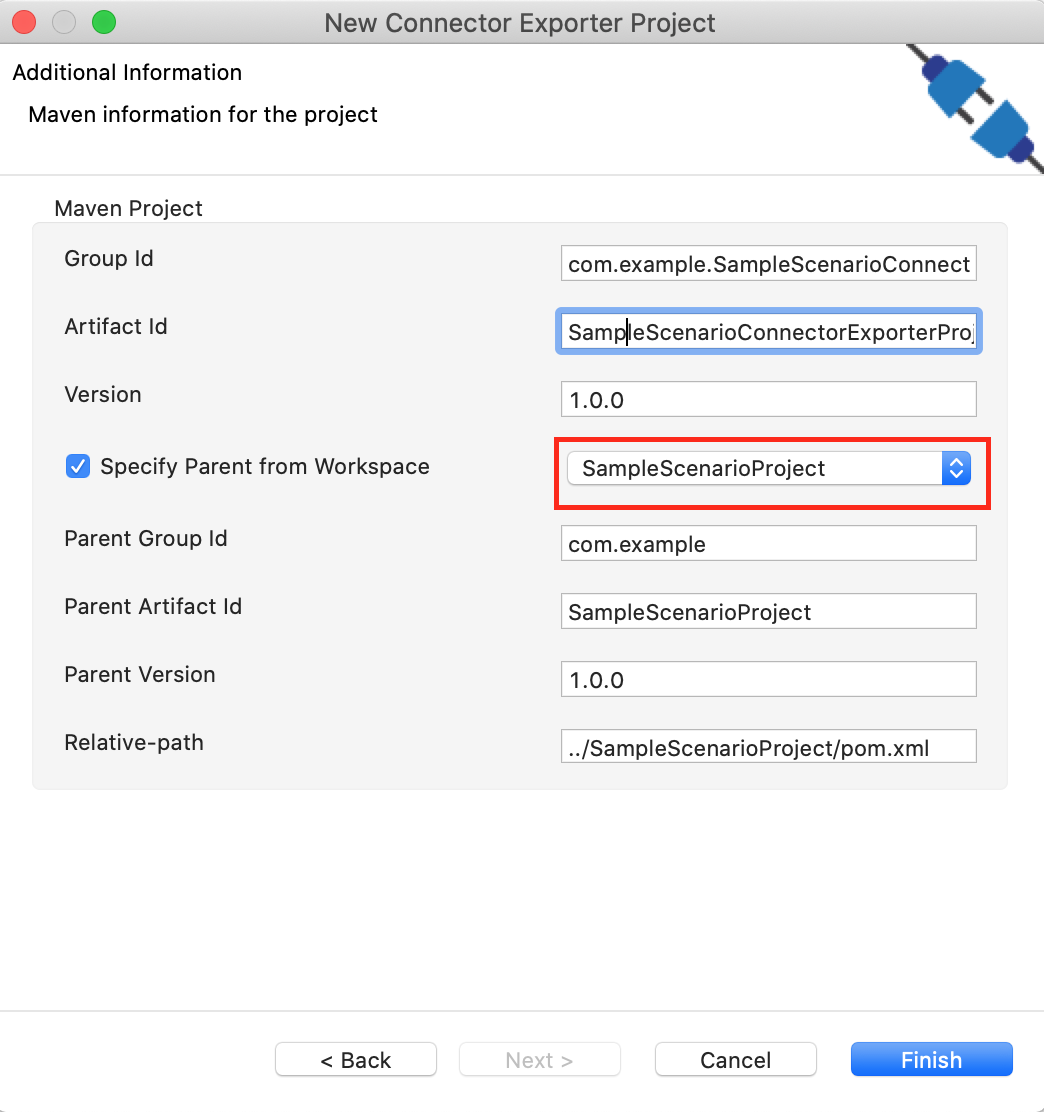
In the next screen select, Specify the parent from workspace and select the specific Integration Project you created from the dropdown.
-
Now you need to add the Connector to Connector Exporter Project that you just created. Right-click the Connector Exporter Project and select, New -> Add Remove Connectors -> Add Connector -> Add from Workspace -> Connector.
-
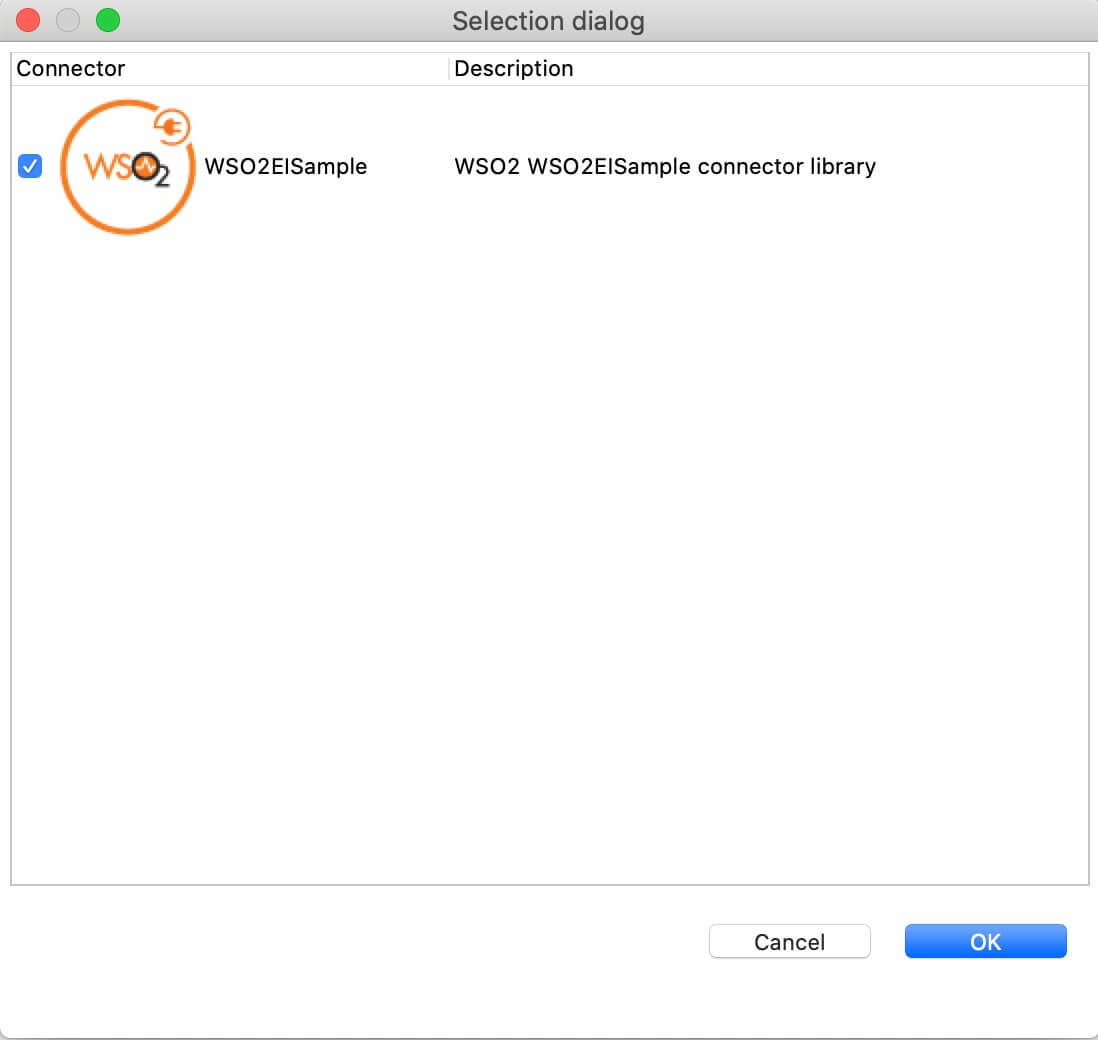
Once you are directed to the workspace, it displays all the connectors that exist in the workspace. You can select the relevant connector and click Ok.
Creating a Composite Application Project
To export the Integration Project as a CApp, a Composite Application Project needs to be created. Usually, when an Integration project is created, this project can be created as part of that project by Integration Studio. If not, you can specifically create it by navigating to File -> New -> Other -> WSO2 -> Distribution -> Composite Application Project.
Exporting the Composite Application Project
-
Right-click the Composite Application Project and click Export Composite Application Project.

-
Select an Export Destination where you want to save the .car file.
-
In the next Create a deployable CAR file screen, select both the created Integration Project and the Connector Exporter Project to save and click Finish. The CApp is created at the specified location provided at the previous step.
Deployment
Follow these steps to deploy the exported CApp in the Enterprise Integrator Runtime.
Deploying on Micro Integrator
You can copy the composite application to the <PRODUCT-HOME>/repository/deployment/server/carbonapps folder and start the server. Micro Integrator will be started and the composite application will be deployed.
You can further refer the application deployed through the CLI tool. See the instructions on managing integrations from the CLI.
Click here for instructions on deploying on WSO2 Enterprise Integrator 6
-
You can copy the composite application to the
<PRODUCT-HOME>/repository/deployment/server/carbonappsfolder and start the server. -
WSO2 EI server starts and you can login to the Management Console via the
https://localhost:9443/carbon/URL. Provide login credentials. The default credentials will be admin/admin. -
You can see that the API is deployed under the API section.
Testing
Invoke the API (http://localhost:8290/publishMessages) with the following payload,
{
   "test": {
       "type": "record",
       "name": "myrecord",
       "fields": [
           {
               "name": "f1",
               "type": ["string", "int"]
           }
       ]
   },
   "value": {
       "f1": "sampleValue"
   },
   "key": "sampleKey",
   "topic": "myTopic"
}
Expected Response:
Run the following command to verify the messages:
[confluent_home]/bin/kafka-avro-console-consumer --topic myTopic --bootstrap-server localhost:9092 --property print.key=true --from-beginning
{"f1":{"string":"sampleValue"}}
<?xml version="1.0" encoding="UTF-8"?>
<api context="/publishMessages" name="KafkaTransport" xmlns="http://ws.apache.org/ns/synapse">
    <resource methods="POST">
        <inSequence>
            <property name="valueSchema"
                      expression="json-eval($.test)"
                      scope="default"
                      type="STRING"/>
            <property name="value"
                      expression="json-eval($.value)"
                      scope="default"
                      type="STRING"/>
            <property name="key"
                      expression="json-eval($.key)"
                      scope="default"
                      type="STRING"/>
            <property name="topic"
                      expression="json-eval($.topic)"
                      scope="default"
                      type="STRING"/>
           <kafkaTransport.publishMessages configKey="KAFKA_CONNECTION_1">
               <topic>{$ctx:topic}</topic>
               <partitionNo>0</partitionNo>
               <key>{$ctx:key}</key>
               <value>{$ctx:value}</value>
               <valueSchema>{$ctx:valueSchema}</valueSchema>
            </kafkaTransport.publishMessages>
        </inSequence>
        <outSequence/>
        <faultSequence/>
    </resource>
</api>
<?xml version="1.0" encoding="UTF-8"?>
<localEntry key="KAFKA_CONNECTION_1" xmlns="http://ws.apache.org/ns/synapse">
    <kafkaTransport.init>
        <name>KAFKA_CONNECTION_1</name>
        <connectionType>kafka</connectionType>
        <bootstrapServers>localhost:9092</bootstrapServers>
        <valueSerializerClass>io.confluent.kafka.serializers.KafkaAvroSerializer</valueSerializerClass>
        <keySerializerClass>io.confluent.kafka.serializers.KafkaAvroSerializer</keySerializerClass>
        <schemaRegistryUrl>http://localhost:8081</schemaRegistryUrl>
        <poolingEnabled>false</poolingEnabled>
        <basicAuthCredentialsSource>USER_INFO</basicAuthCredentialsSource>
        <basicAuthUserInfo>admin:admin</basicAuthUserInfo>
    </kafkaTransport.init>
</localEntry>
<basicAuthCredentialsSource>URL</basicAuthCredentialsSource>
Then, the schemaRegistryUrl parameter should be configured as shown below.
<schemaRegistryUrl>http://admin:admin@localhost:8081</schemaRegistryUrl>
This demonstrates how the Kafka connector publishes Avro messages to Kafka brokers.
What's next
- To customize this example for your own scenario, see Kafka Connector Configuration documentation.
