Creating a Message Store
Follow the instructions given below to create a new Message Store artifact in WSO2 Integration Studio.
Instructions
Creating the Message Store artifact
-
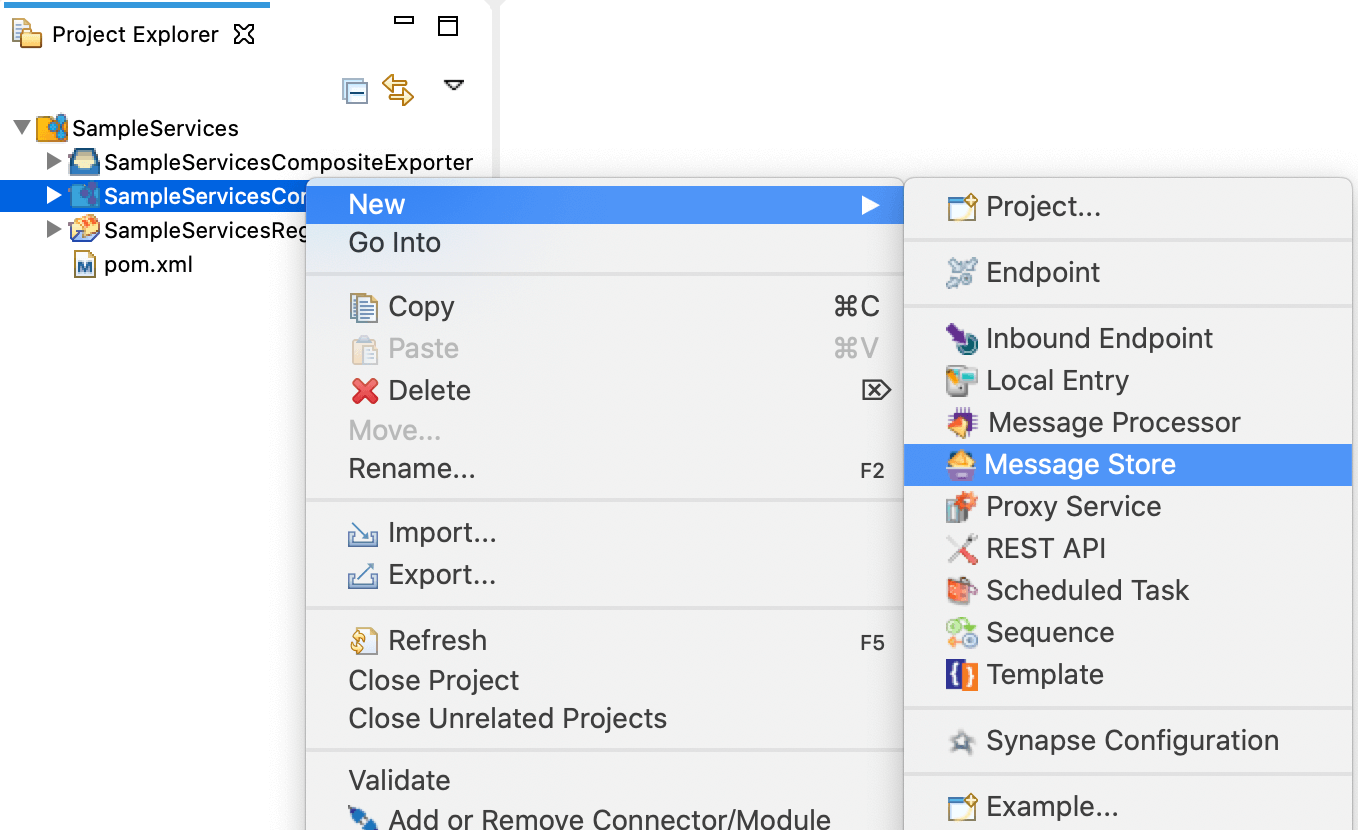
Right-click the ESB Config project and go to New → Message Store to open the New Message Store Artifact dialog box.
-
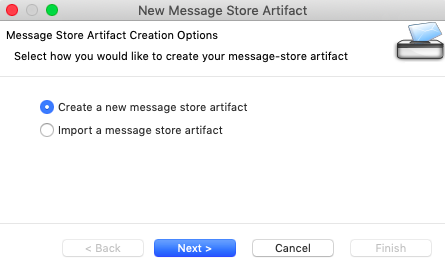
Select the Create a new message-store artifact option and click Next.
-
Enter a unique name for the message store, and then select the type of message store you are creating.
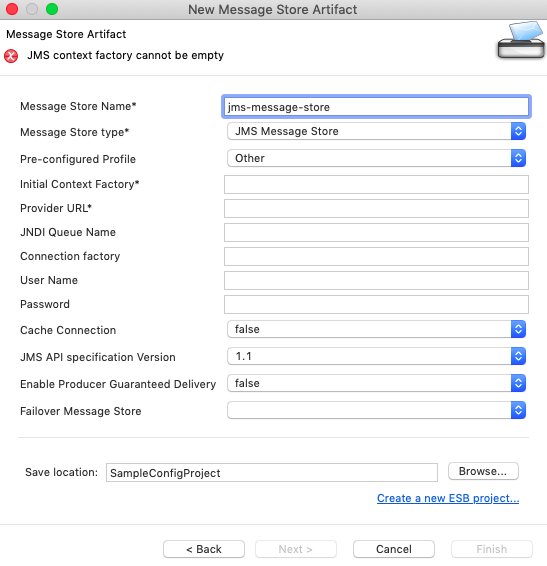
See the links given below for descriptions of message store properties for each store type:
-
Do one of the following to save the artifact:
- To save the message store in an existing ESB Config project in your workspace, click Browse and select that project.
- To save the message store in a new ESB Config project, click Create new Project and create the new project.
-
Click Finish.
The message store is created in the src/main/synapse-config/message-stores folder under the ESB Config project you specified.
Designing the integration
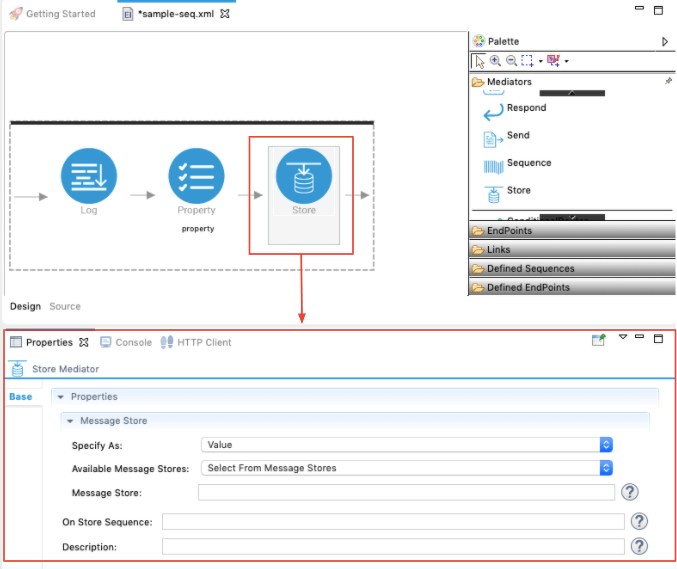
To add a message store to the integration sequence, use the Store Mediator:
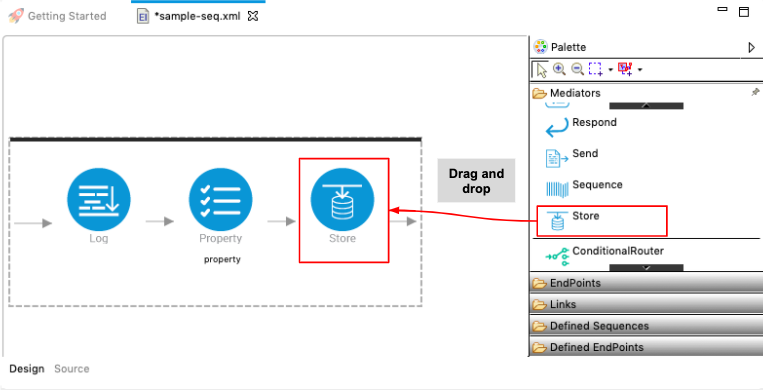
- Open to the Design View of your mediation sequence.
-
Drag the Store Mediator from the Palette and drop it to the relevant position in the mediation sequence:
-
Double-click the Store Mediator to open the Properties tab:
-
Select your message store artifact from the list in the Available Message Stores field as shown above.
The message store is now linked to your integration sequence.
Updating the properties
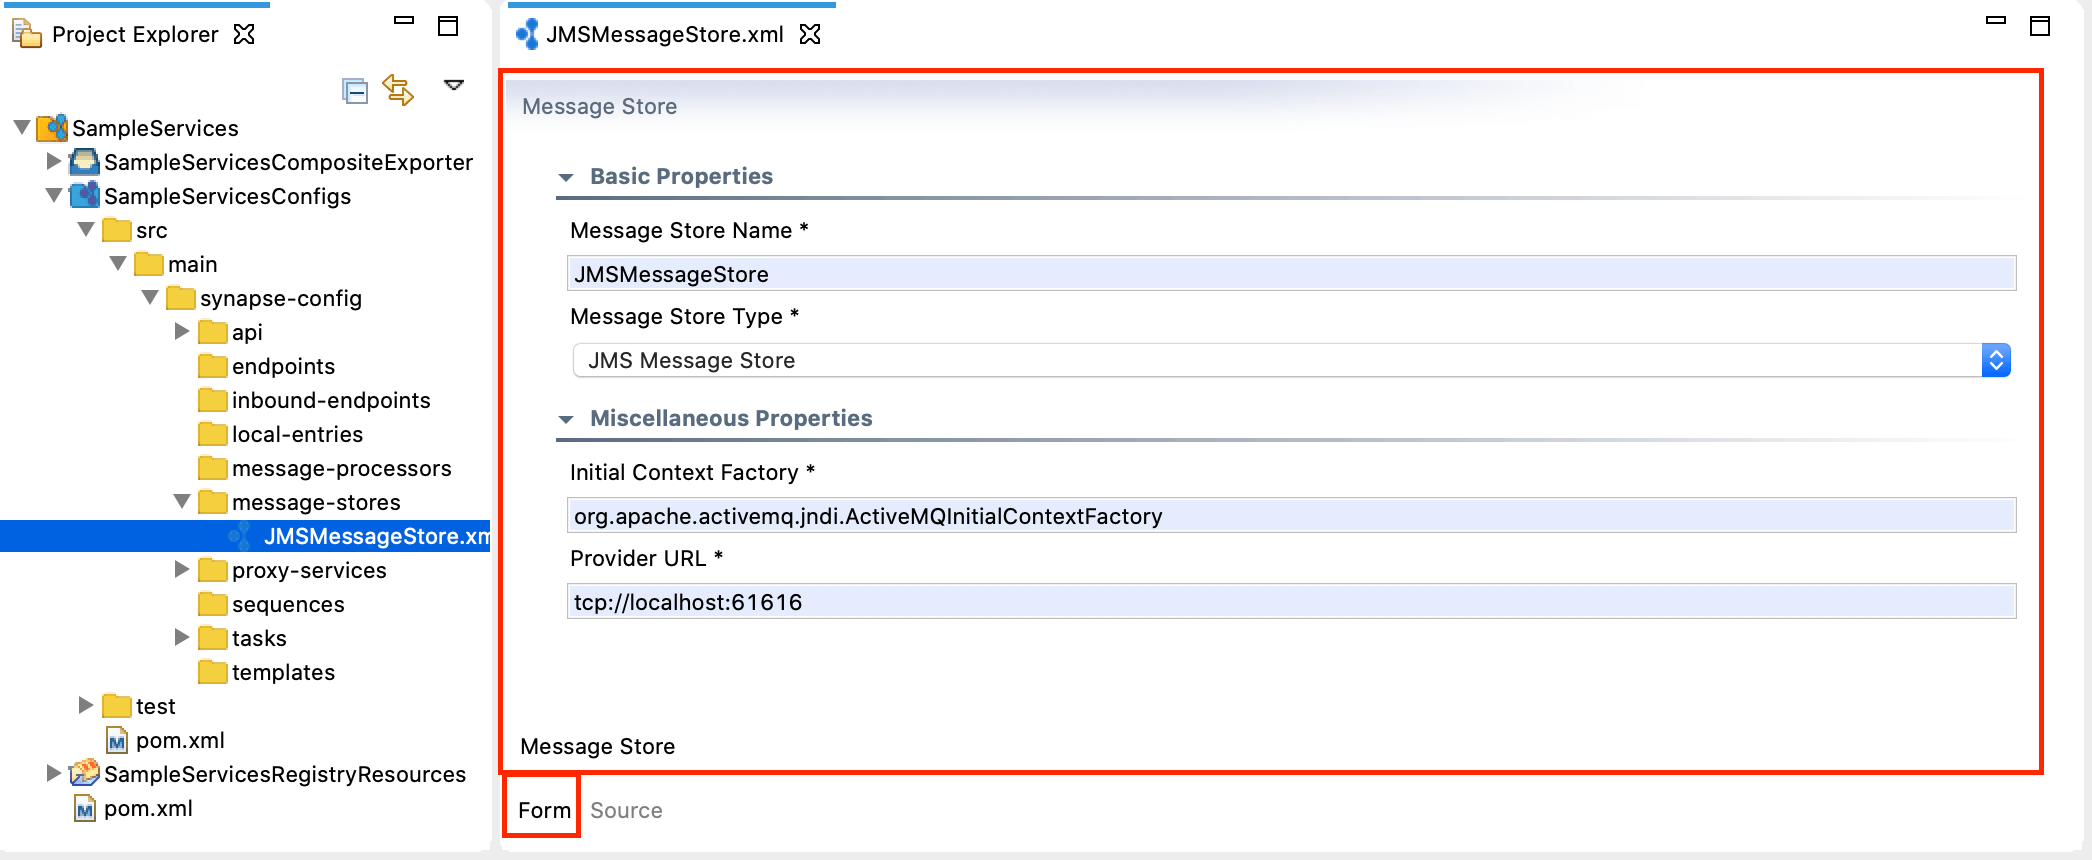
Open the new message store artifact from the project explorer. You can use the Form view or the Source view to update message store properties.
Examples
- Introduction to Message Stores and Processors
- JDBC Message Store
- JMS Message Store
- RabbitMQ Message Store
Tutorials
- See the tutorial on using message stores and processors