Periodic Execution of Integration Process
What you'll build
The sections below demonstrate an example of scheduling a task (using the default implementation) to inject an XML message and to print it in the logs of the server.
Let's get started!
Step 1: Set up the workspace
Download the relevant WSO2 Integration Studio based on your operating system.
Step 2: Develop the integration artifacts
Follow the instructions given in this section to create and configure the required artifacts.
Create an Integration Project
An Integration project is a maven multi module project, which will contain all the required modules for the integration solution.
- Open WSO2 Integration Studio.
-
Click New Integration Project in the Getting Started tab as shown below.
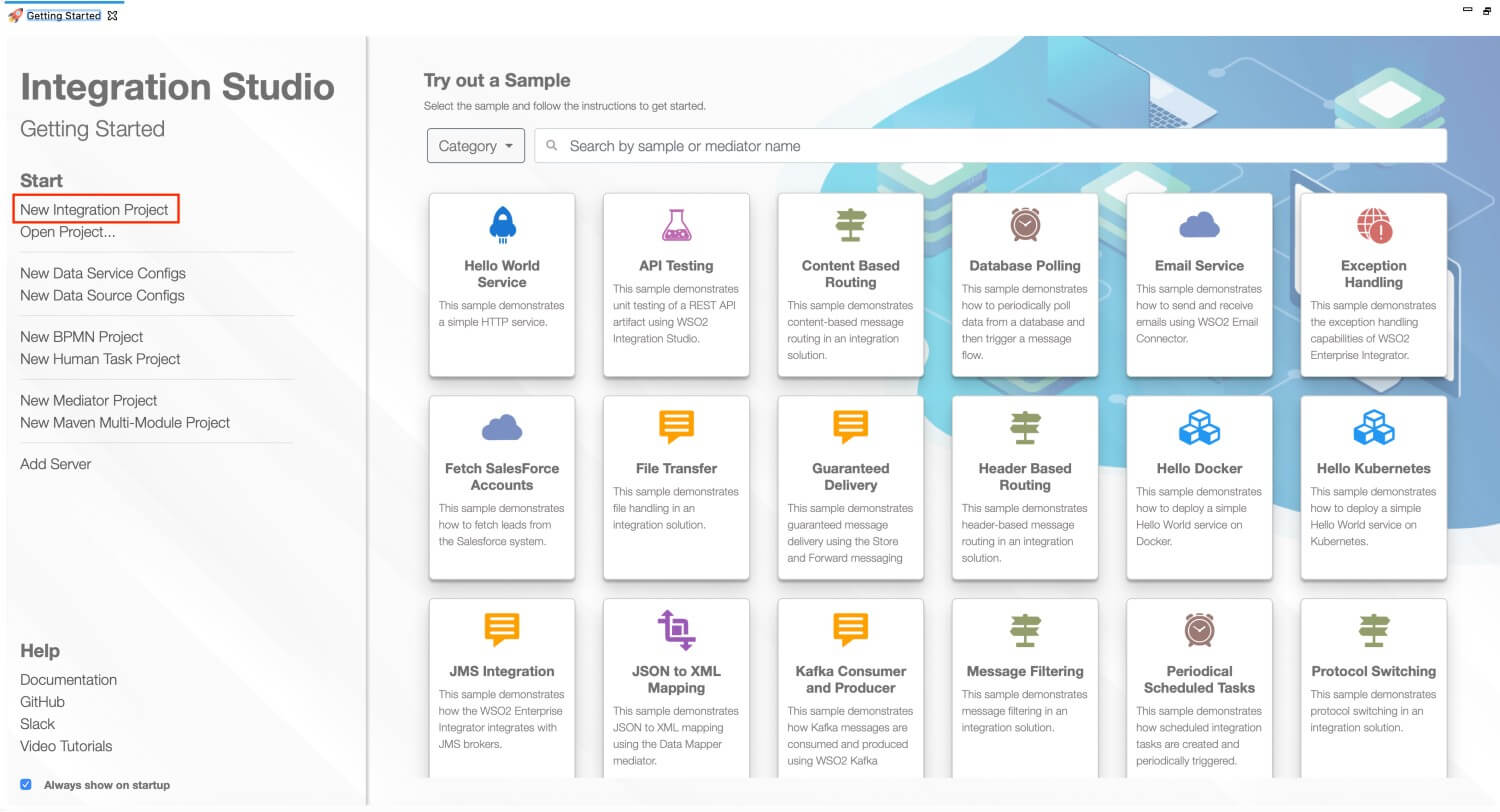
This will open the New Integration Project dialog box.

-
Enter
SampleServicesas the project name and select the following check boxes to create the required modules.- Create ESB Configs
- Create Composite Exporter
-
Click Finish.
You will now see the projects listed in the Project Explorer.
Creating the Sequence
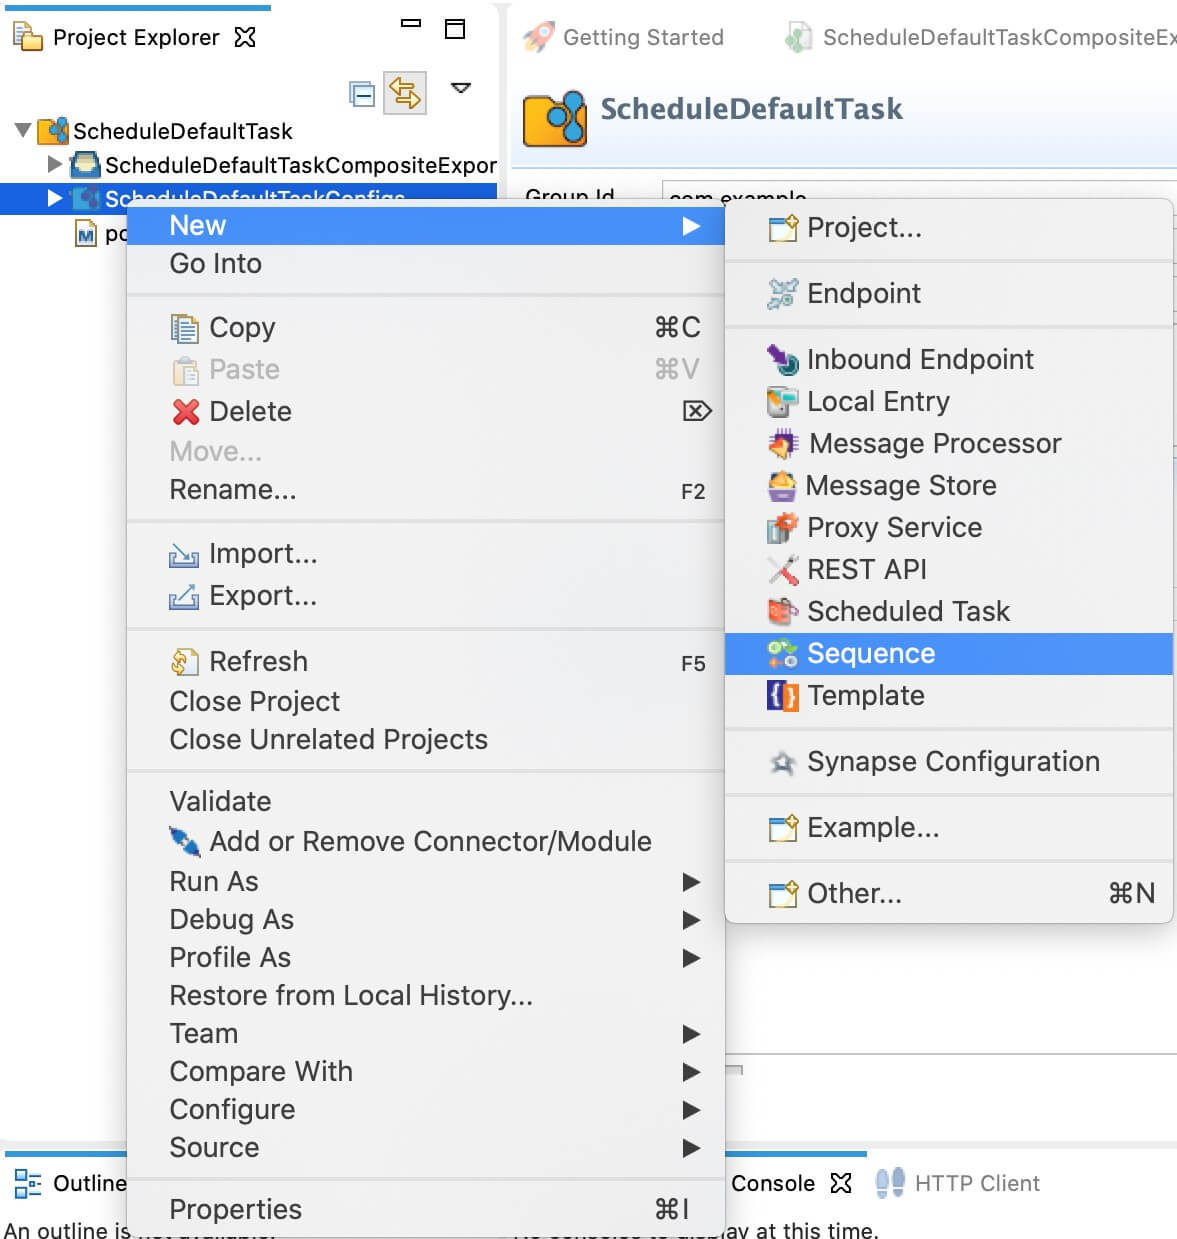
- In the Project Explorer, right click ScheduleDefaultTaskConfigs project, and click New → Sequence.
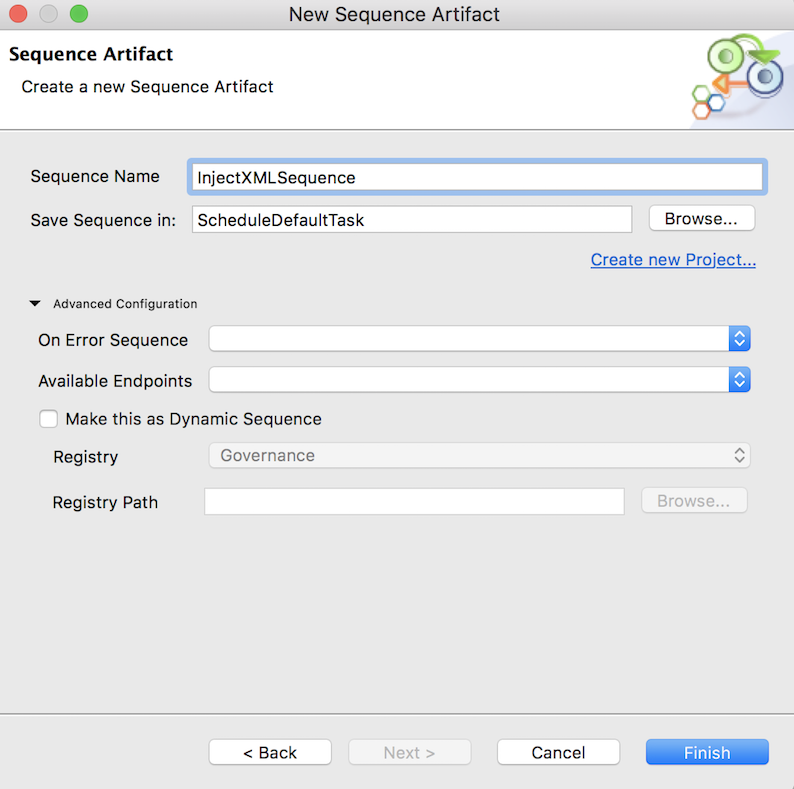
- Click Create New Sequence and click Next.
- Enter InjectXMLSequence as the sequence name and click Finish.
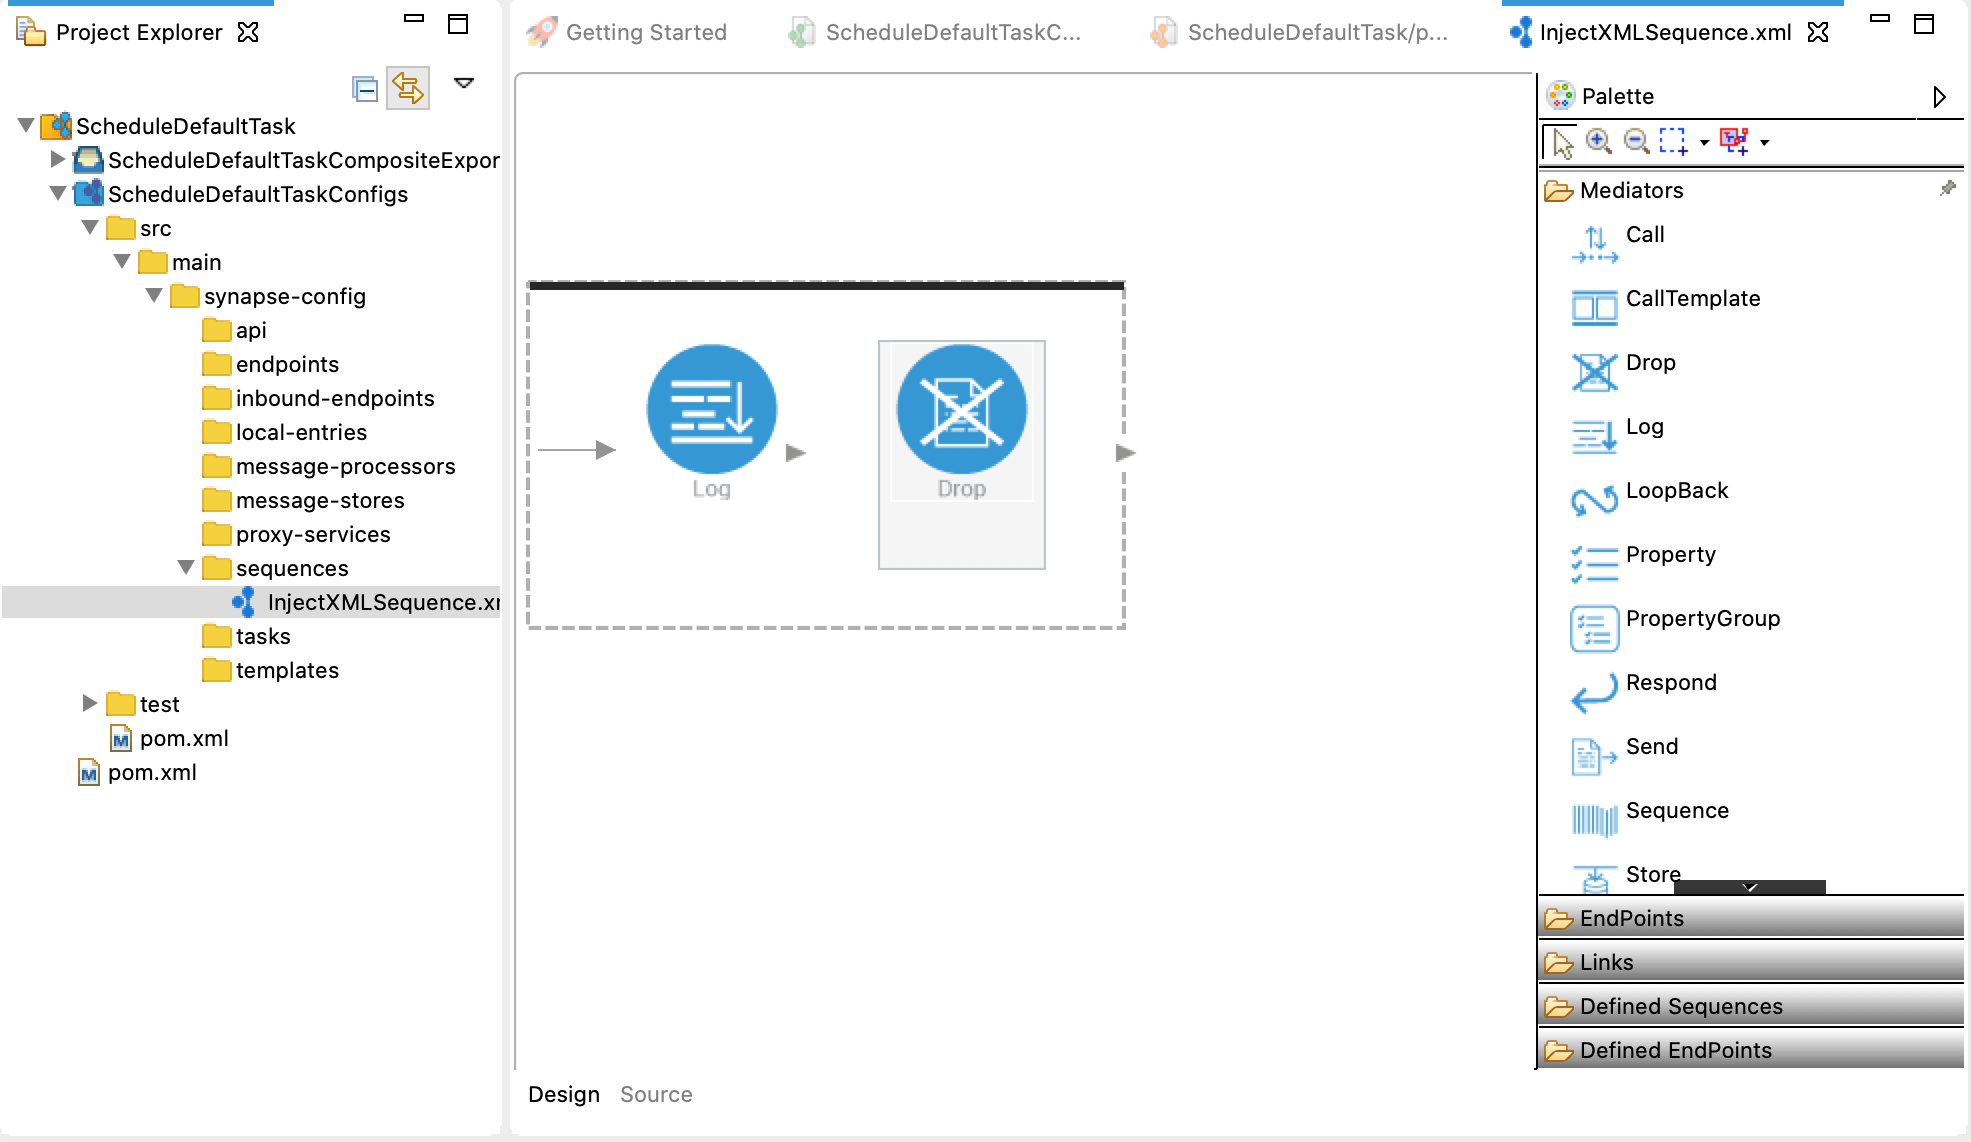
- Drag and drop a Log mediator and a Drop mediator from the Mediators Palette.
- Click the Log mediator and enter the following details in the Properties section.
- Log Category:
INFO - Log Level:
CUSTOM - Add a new property with the following details:
Property Description Property Name City Value Type EXPRESSION Expression //city
- Log Category:
Shown below is the complete source configuration of the Sequence (i.e., the InjectXMLSequence.xml file).
<?xml version="1.0" encoding="UTF-8"?>
<sequence name="InjectXMLSequence" trace="disable" xmlns="http://ws.apache.org/ns/synapse">
   <log level="custom">
       <property expression="//city" name="City"/>
   </log>
   <drop/>
</sequence>
Creating the Scheduled Task
-
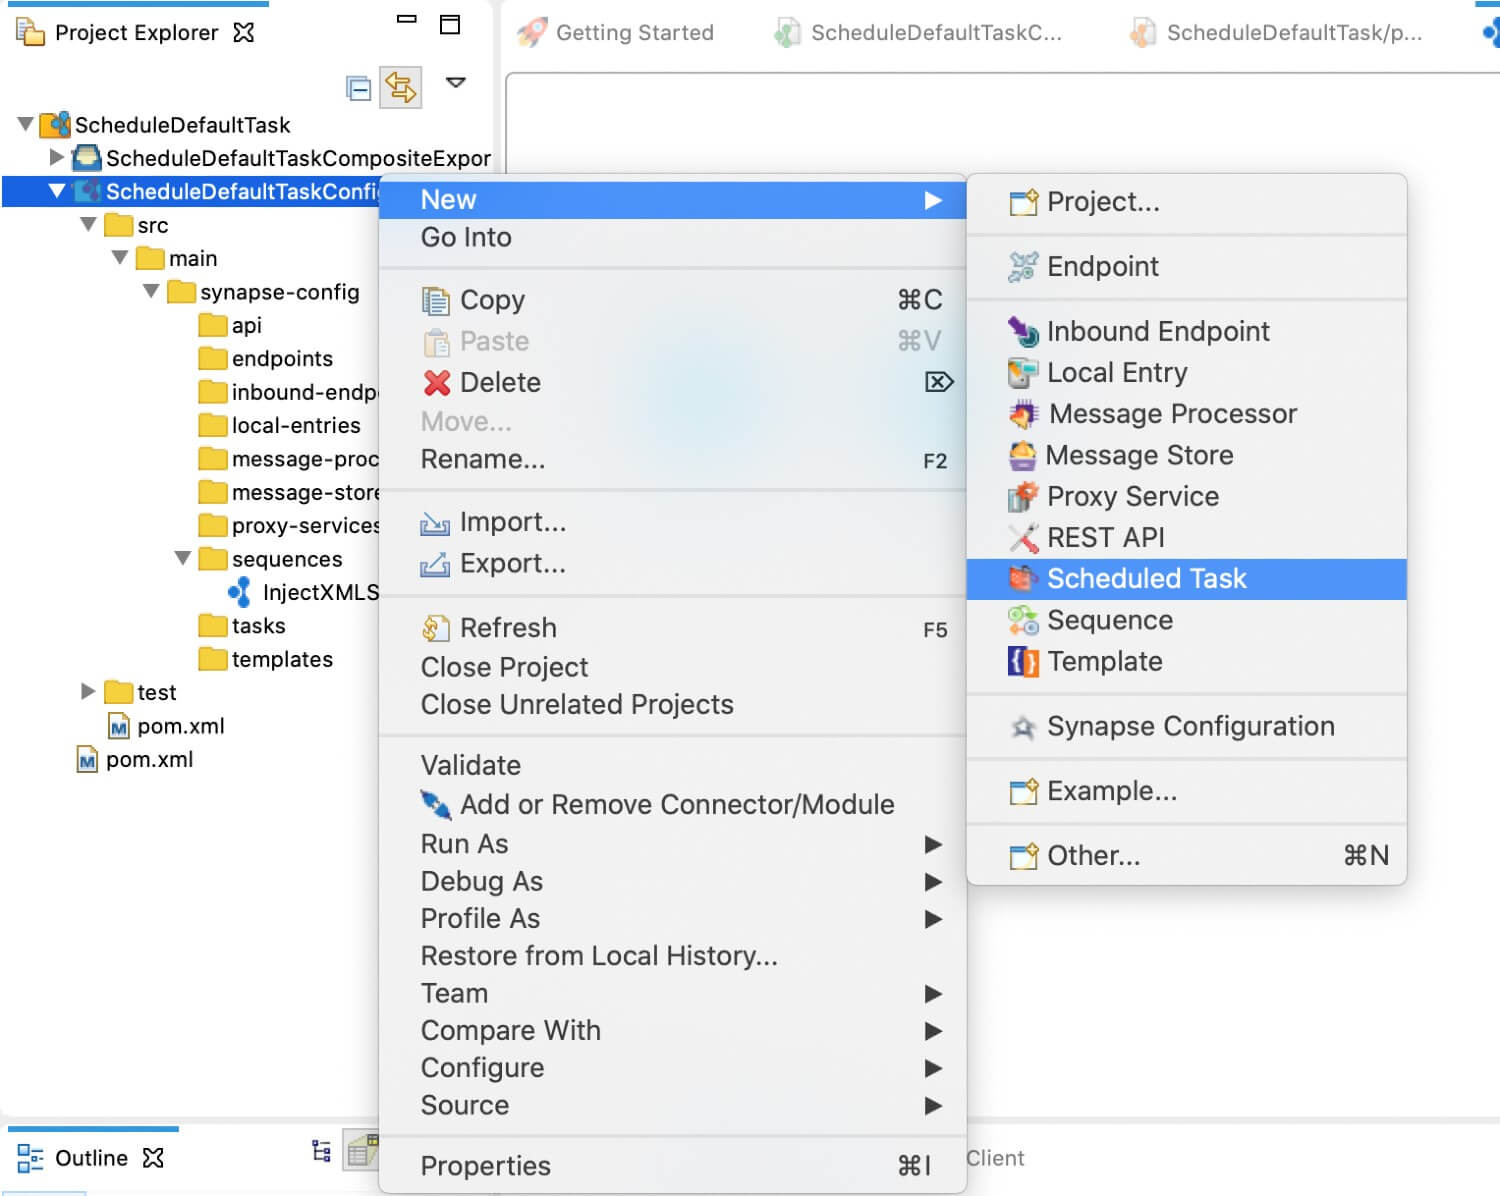
In the Project Explorer, right click ScheduleDefaultTask, and click New → Scheduled Task.
-
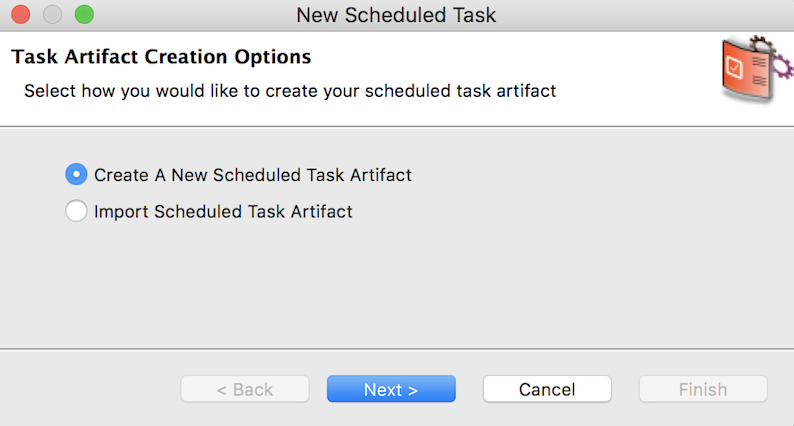
Select Create a New Scheduled Task Artifact and click Next.
-
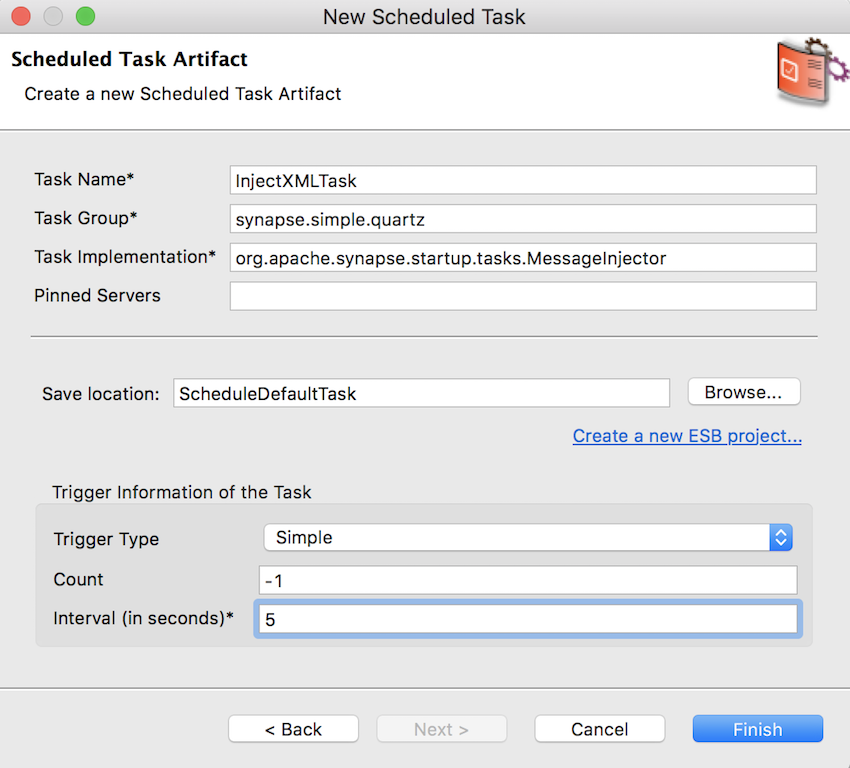
Enter the following details and click Next:
- Task Name:
InjectXMLTask - Count:
-1 - Interval (in seconds): 5
- Task Name:
-
In the Form View of the
InjectXMLTasktask, click Task Implementation Properties.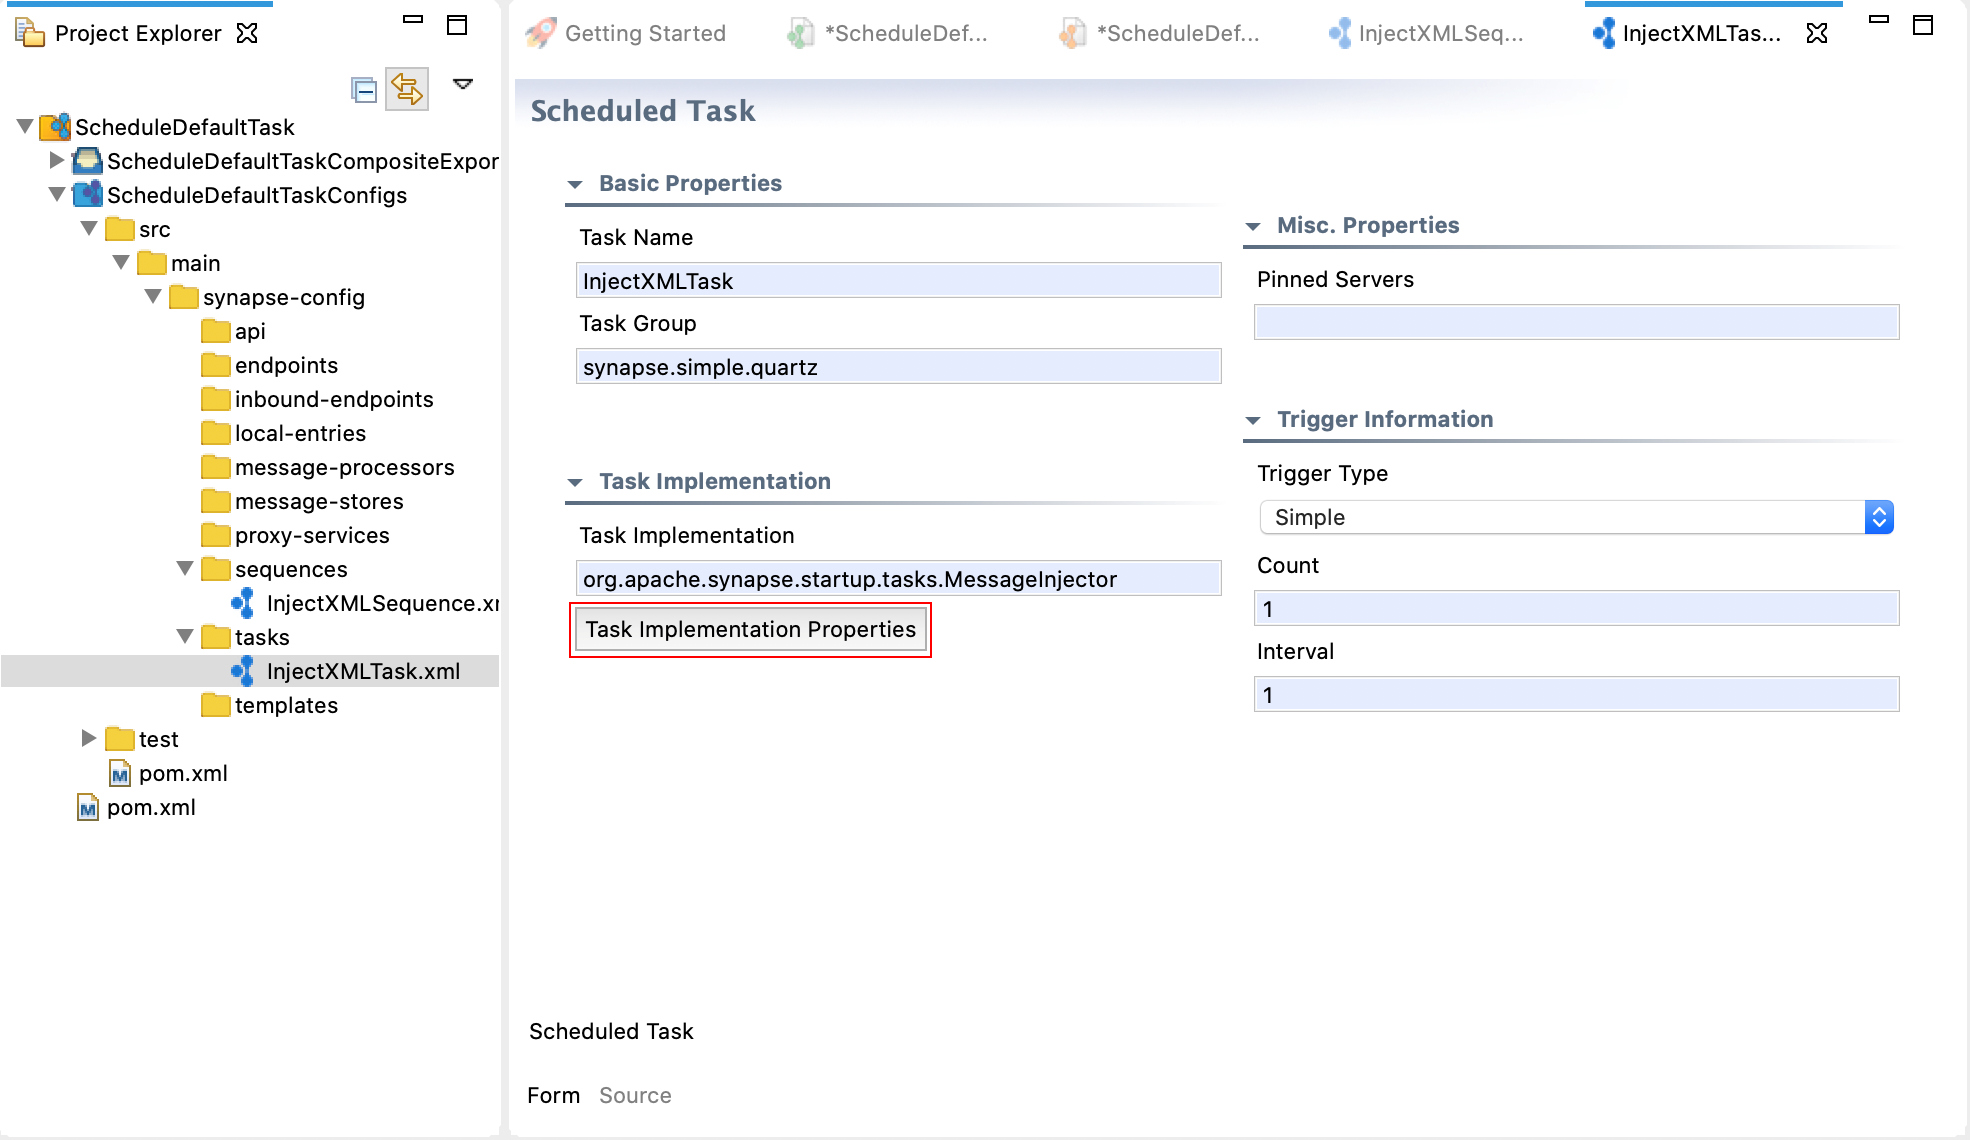
-
Enter the following parameters:
- injectTo:
sequence - sequenceName:
InjectXMLSequence
- injectTo:
-
Select XML as the Parameter Type of the message parameter, and enter the following as the XML message in the Value/Expression field and click OK.
<request xmlns=""> <location> <city>London</city> <country>UK</country> </location> </request>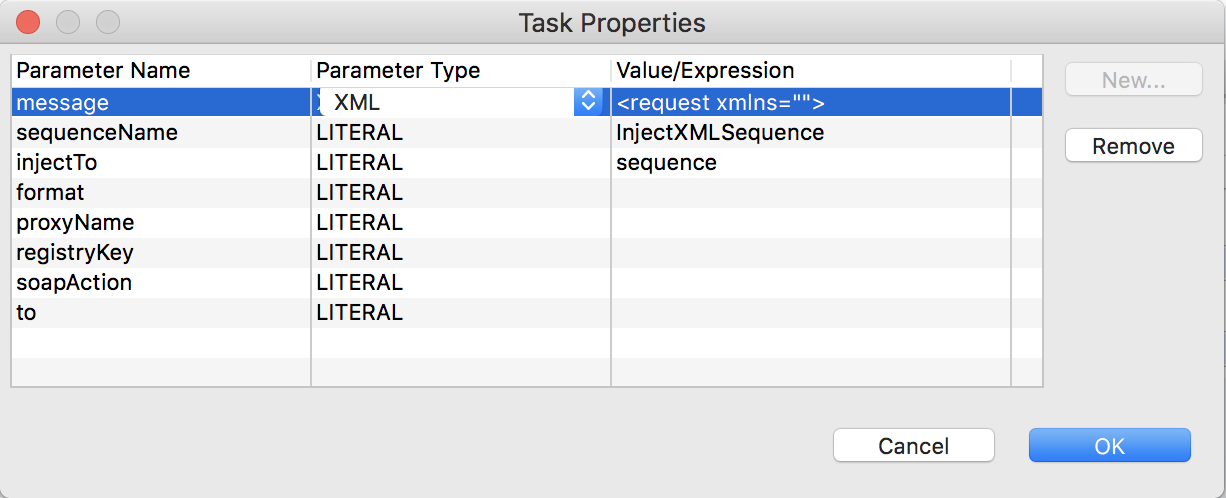
-
Shown below is the complete source configuration of the scheduled task.
<?xml version="1.0" encoding="UTF-8"?>
<task class="org.apache.synapse.startup.tasks.MessageInjector" group="synapse.simple.quartz" name="InjectXMLTask" xmlns="http://ws.apache.org/ns/synapse">
   <trigger interval="5"/>
   <property name="injectTo" value="sequence" xmlns:task="http://www.wso2.org/products/wso2commons/tasks"/>
   <property name="sequenceName" value="InjectXMLSequence" xmlns:task="http://www.wso2.org/products/wso2commons/tasks"/>
   <property name="message" xmlns:task="http://www.wso2.org/products/wso2commons/tasks">
       <request xmlns="">
           <location>
               <city>London</city>
               <country>UK</country>
           </location>
       </request>
   </property>
</task>
Step 3: Package the artifacts
Package the artifacts in your composite application module to be able to deploy the artifacts in the server.
- Open the
pom.xmlfile in the composite exporter module. - Ensure that the relevant artifacts are selected in the POM file.
- Save the changes.
Step 4: Build and run the artifacts
To test the artifacts, deploy the packaged artifacts in the embedded Micro Integrator:
- Right-click the composite exporter module and click Export Project Artifacts and Run.
- In the dialog box that opens, confirm that the required artifacts from the composite exporter module are selected.
- Click Finish.
The artifacts will be deployed in the embedded Micro Integrator and the server will start.
- See the startup log in the Console tab.
- See the URLs of the deployed services and APIs in the Runtime Services tab.
Step 5: Test the use case
You will view the XML message you injected getting printed in the logs of the Micro Integrator every 5 seconds.
[2019-10-10 19:33:00,602]  INFO {org.wso2.micro.integrator.ntask.core.impl.AbstractQuartzTaskManager} - Task scheduled: [-1234][ESB_TASK][InjectXMLTask]
[2019-10-10 19:33:00,671]  INFO {org.apache.synapse.mediators.builtin.LogMediator} - City = London
[2019-10-10 19:33:05,602]  INFO {org.apache.synapse.mediators.builtin.LogMediator} - City = London
[2019-10-10 19:33:10,603]  INFO {org.apache.synapse.mediators.builtin.LogMediator} - City = London
[2019-10-10 19:33:15,605]  INFO {org.apache.synapse.mediators.builtin.LogMediator} - City = London
[2019-10-10 19:33:20,600]  INFO {org.apache.synapse.mediators.builtin.LogMediator} - City = London
[2019-10-10 19:33:25,600]  INFO {org.apache.synapse.mediators.builtin.LogMediator} - City = London
[2019-10-10 19:33:30,601]  INFO {org.apache.synapse.mediators.builtin.LogMediator} - City = London
[2019-10-10 19:33:35,605]  INFO {org.apache.synapse.mediators.builtin.LogMediator} - City = London
[2019-10-10 19:33:40,603]  INFO {org.apache.synapse.mediators.builtin.LogMediator} - City = London
[2019-10-10 19:33:45,600]  INFO {org.apache.synapse.mediators.builtin.LogMediator} - City = London
[2019-10-10 19:33:50,605]  INFO {org.apache.synapse.mediators.builtin.LogMediator} - City = London
[2019-10-10 19:33:55,603]  INFO {org.apache.synapse.mediators.builtin.LogMediator} - City = London
[2019-10-10 19:34:00,605]  INFO {org.apache.synapse.mediators.builtin.LogMediator} - City = London
[2019-10-10 19:34:05,605]  INFO {org.apache.synapse.mediators.builtin.LogMediator} - City = London
[2019-10-10 19:34:10,599]  INFO {org.apache.synapse.mediators.builtin.LogMediator} - City = London
[2019-10-10 19:34:15,607]  INFO {org.apache.synapse.mediators.builtin.LogMediator} - City = London
[2019-10-10 19:34:20,605]  INFO {org.apache.synapse.mediators.builtin.LogMediator} - City = London
[2019-10-10 19:34:25,603]  INFO {org.apache.synapse.mediators.builtin.LogMediator} - City = London