Gmail Configuration
Creating the Client ID and Client Secret
-
Navigate to API Credentials Page and sign in with your Google account.
-
Click on Select a Project and click NEW PROJECT, to create a project.

-
Enter
GmailConnectoras the name of the project and click Create. -
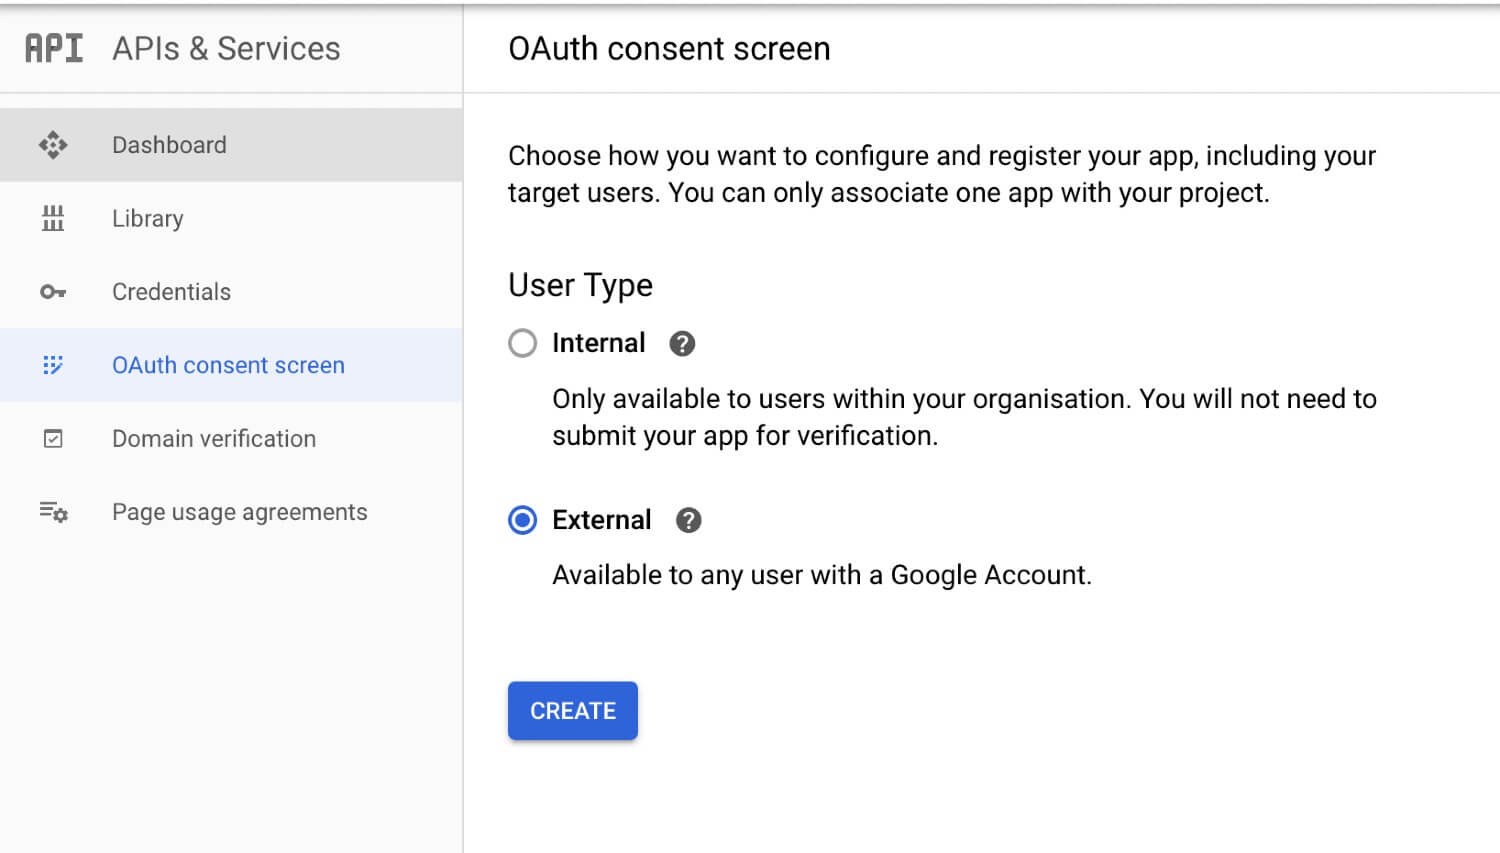
Click Configure consent screen in the next screen.
-
Provide the Application Name as
GmailConnectorin the Consent Screen.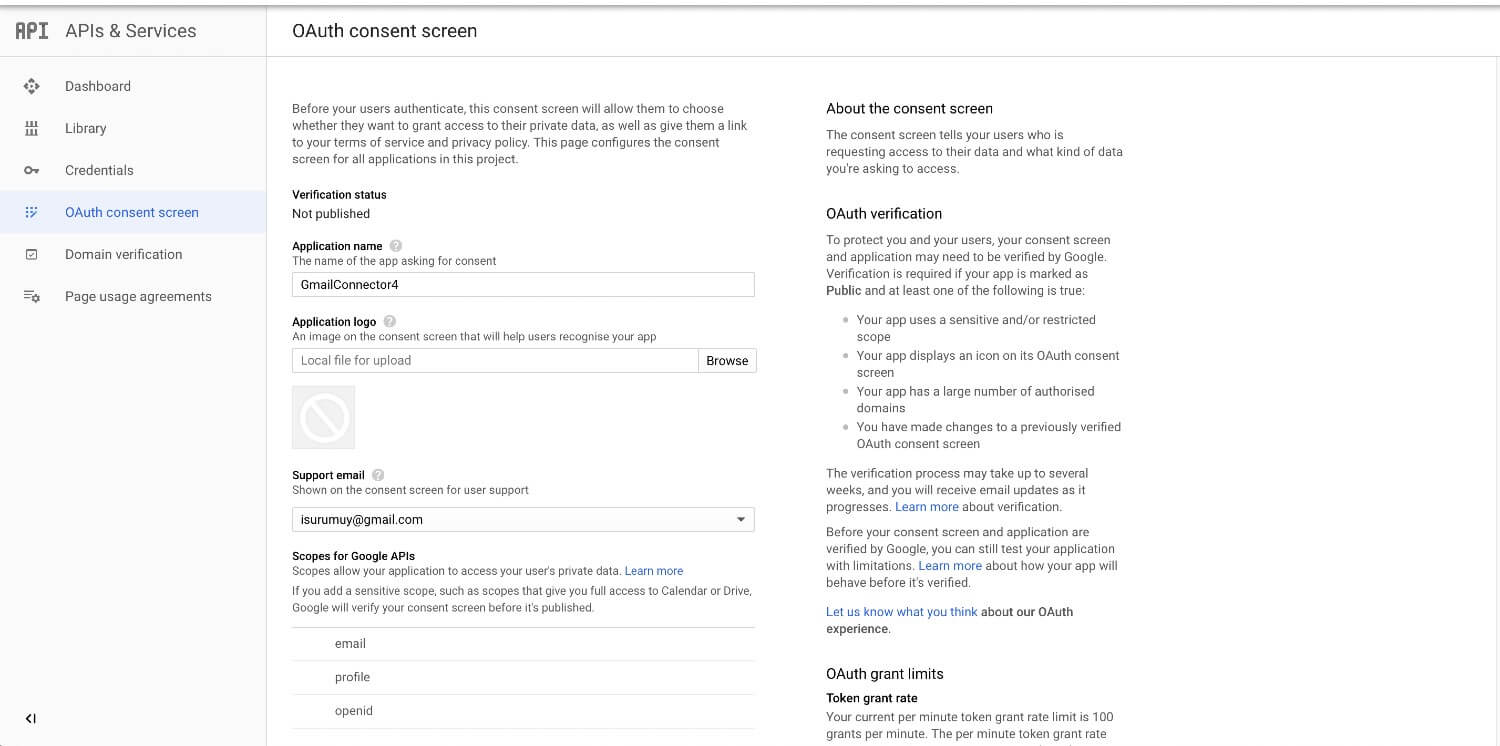
-
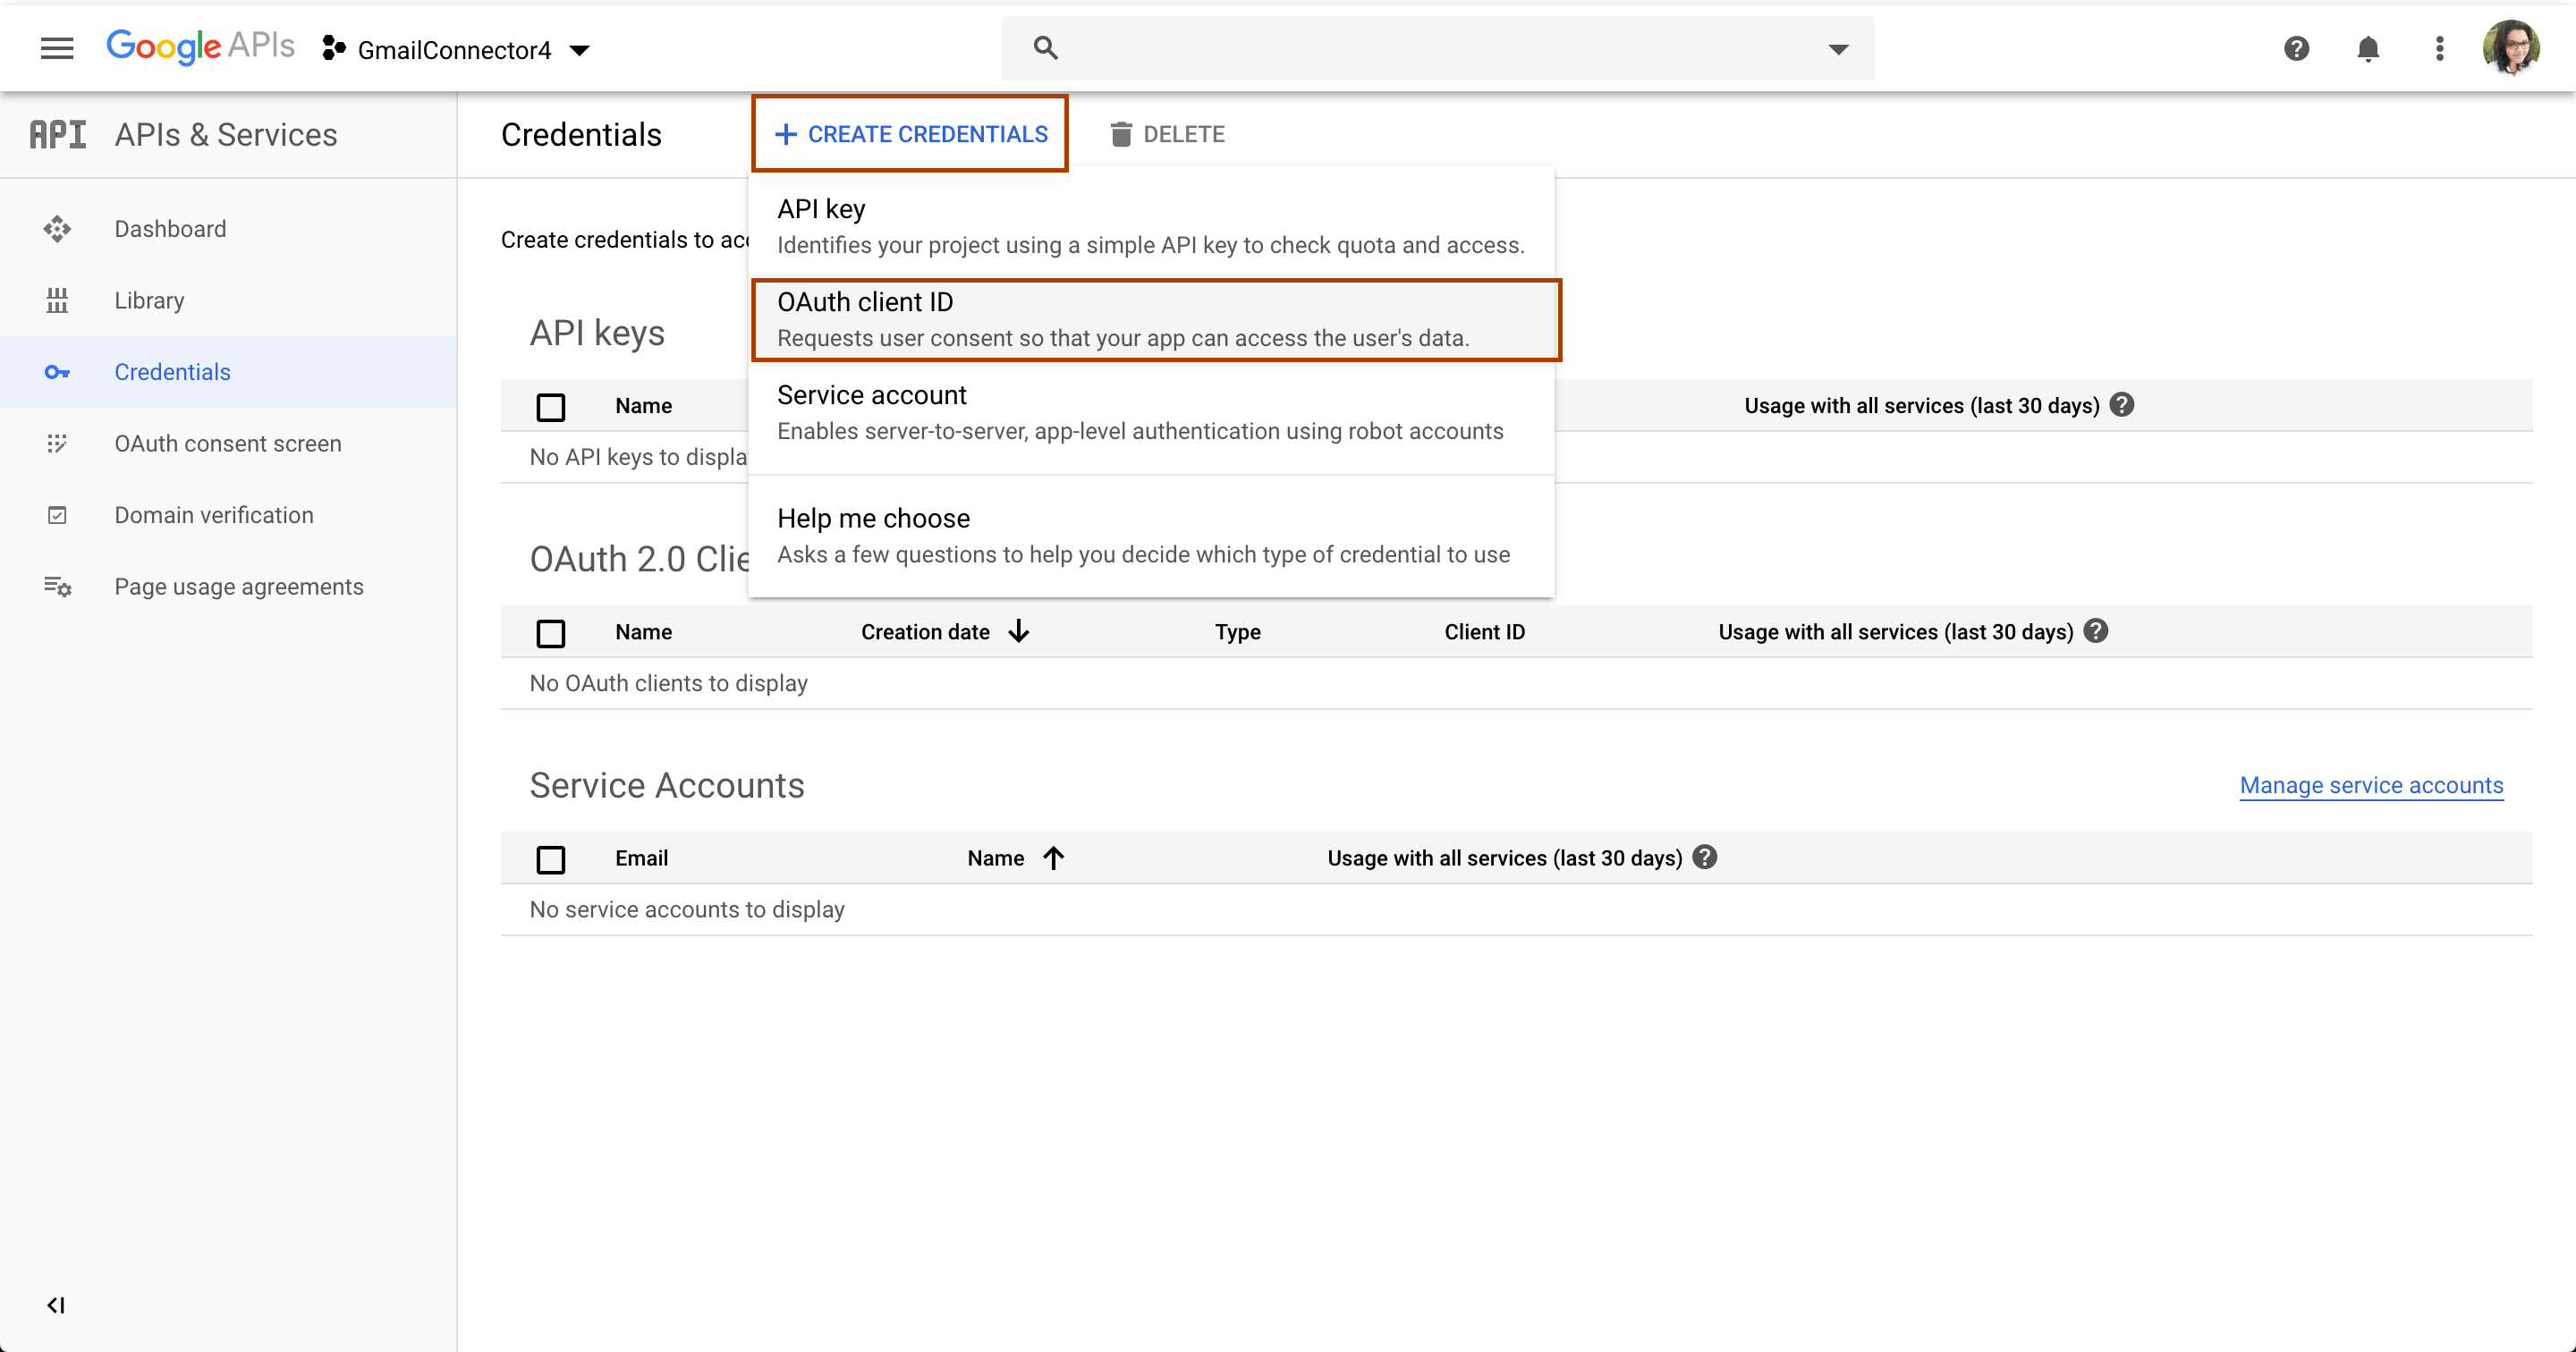
Click Create credentials and click OAuth client ID.
-
Enter the following details in the Create OAuth client ID screen and click Create.
| Type | Name |
|---|---|
| Application type | Web Application |
| Name | GmailConnector |
| Authorized redirect URIs | https://developers.google.com/oauthplayground |
-
A Client ID and a Client Secret are provided. Keep them saved.

-
Click Library on the side menu, search for Gmail API and click on it.
-
Click Enable to enable the Gmail API.
Obtaining Access Token and Refresh Token
-
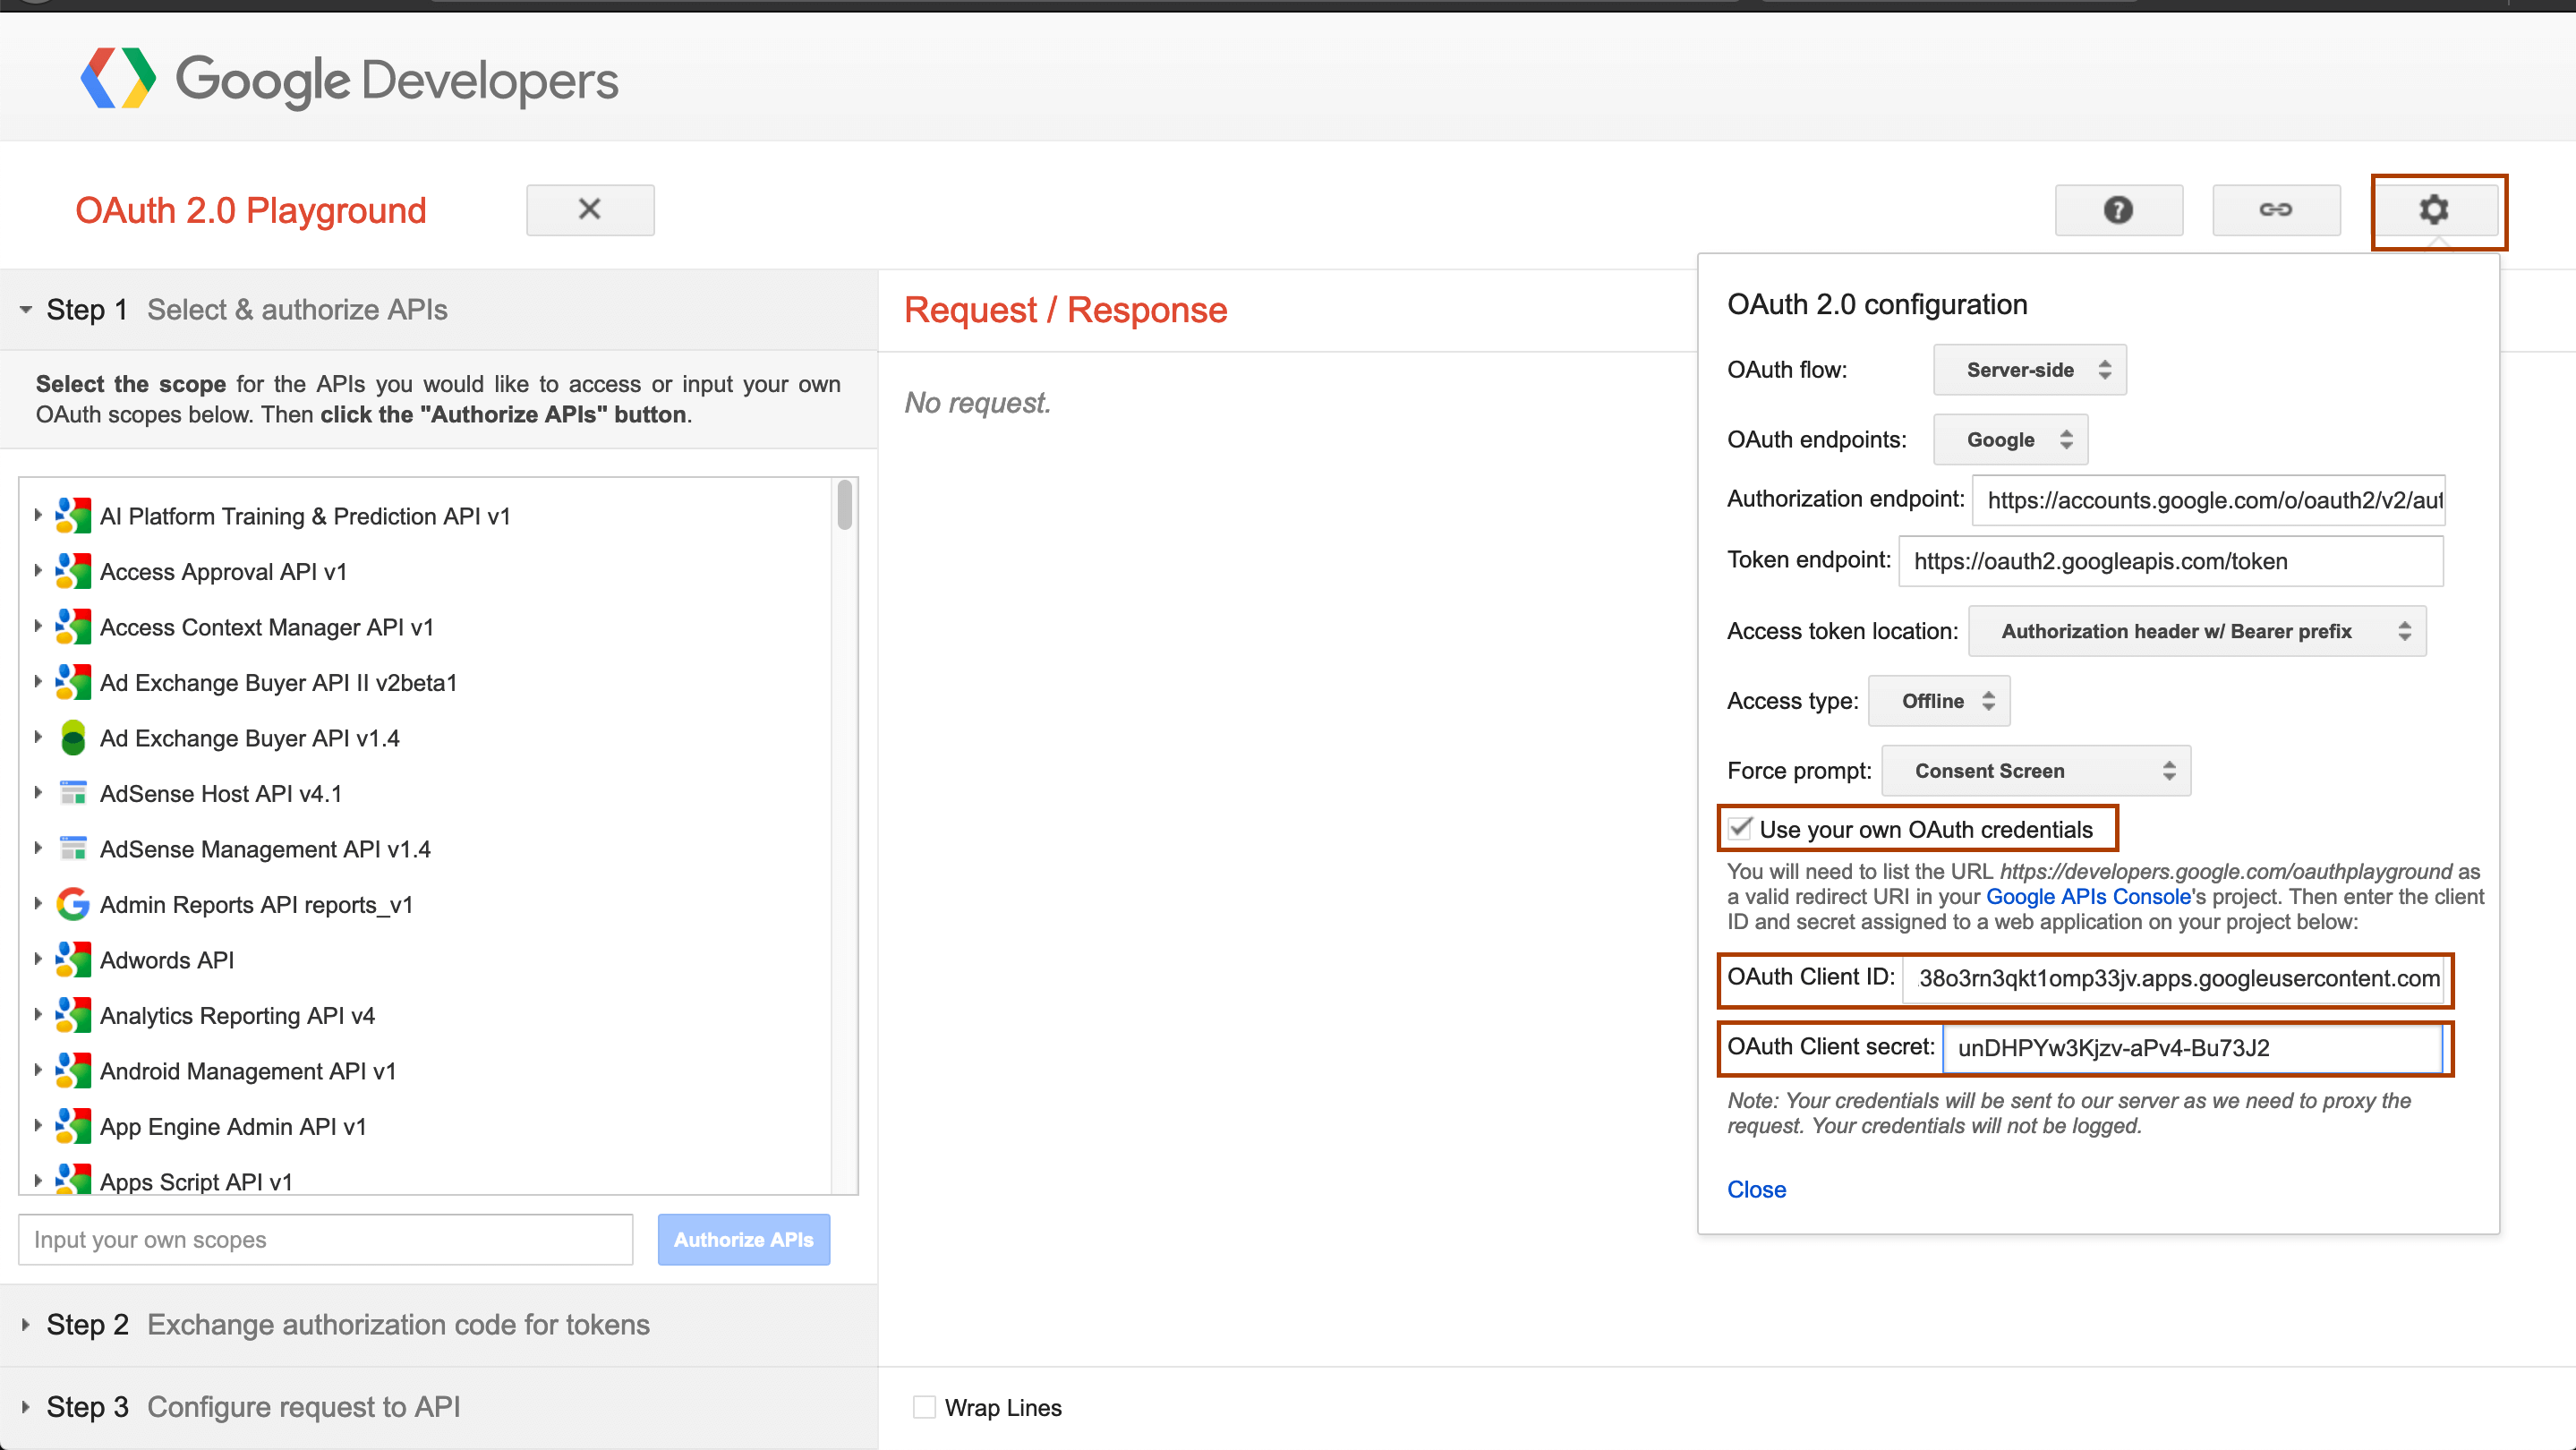
Navigate to OAuth 2.0 Playground and click OAuth 2.0 Configuration button in the Right top corner.
-
Select Use your own OAuth credentials, and provide the obtained Client ID and Client Secret values as above click on Close.
-
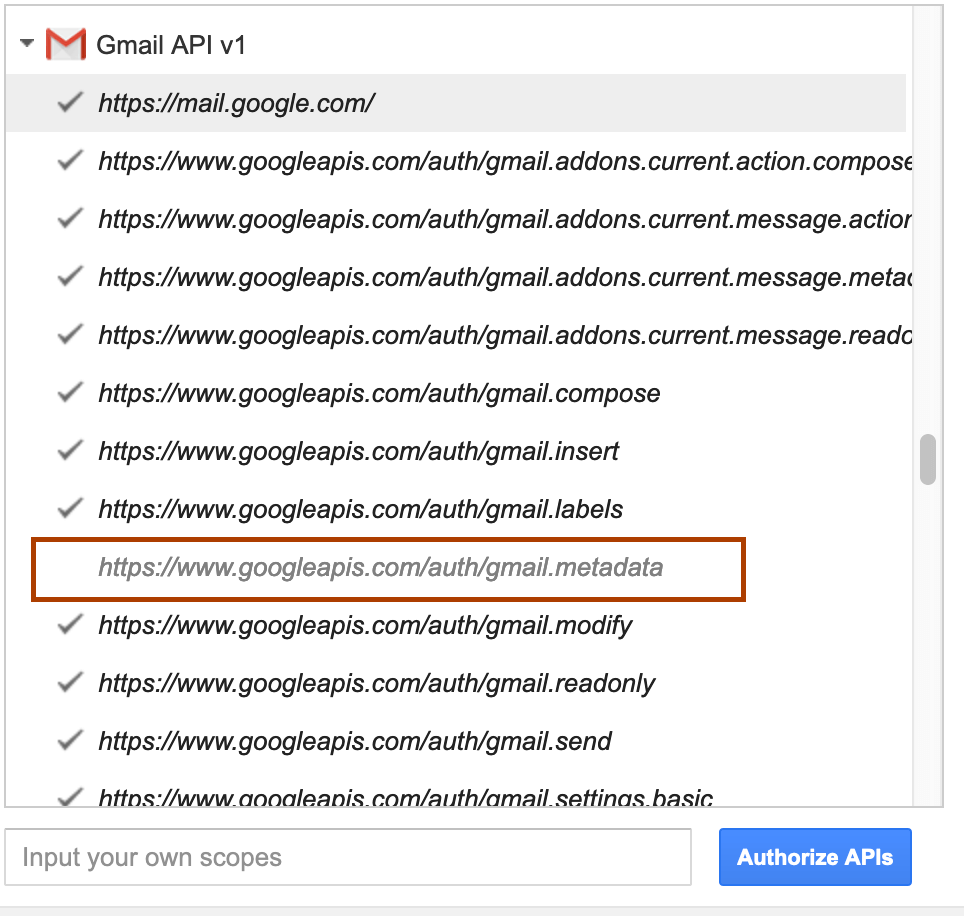
Under Step 1, select
Gmail API v1from the list of APIs, select all the scopes expect the gmail.metadata scope scope.
-
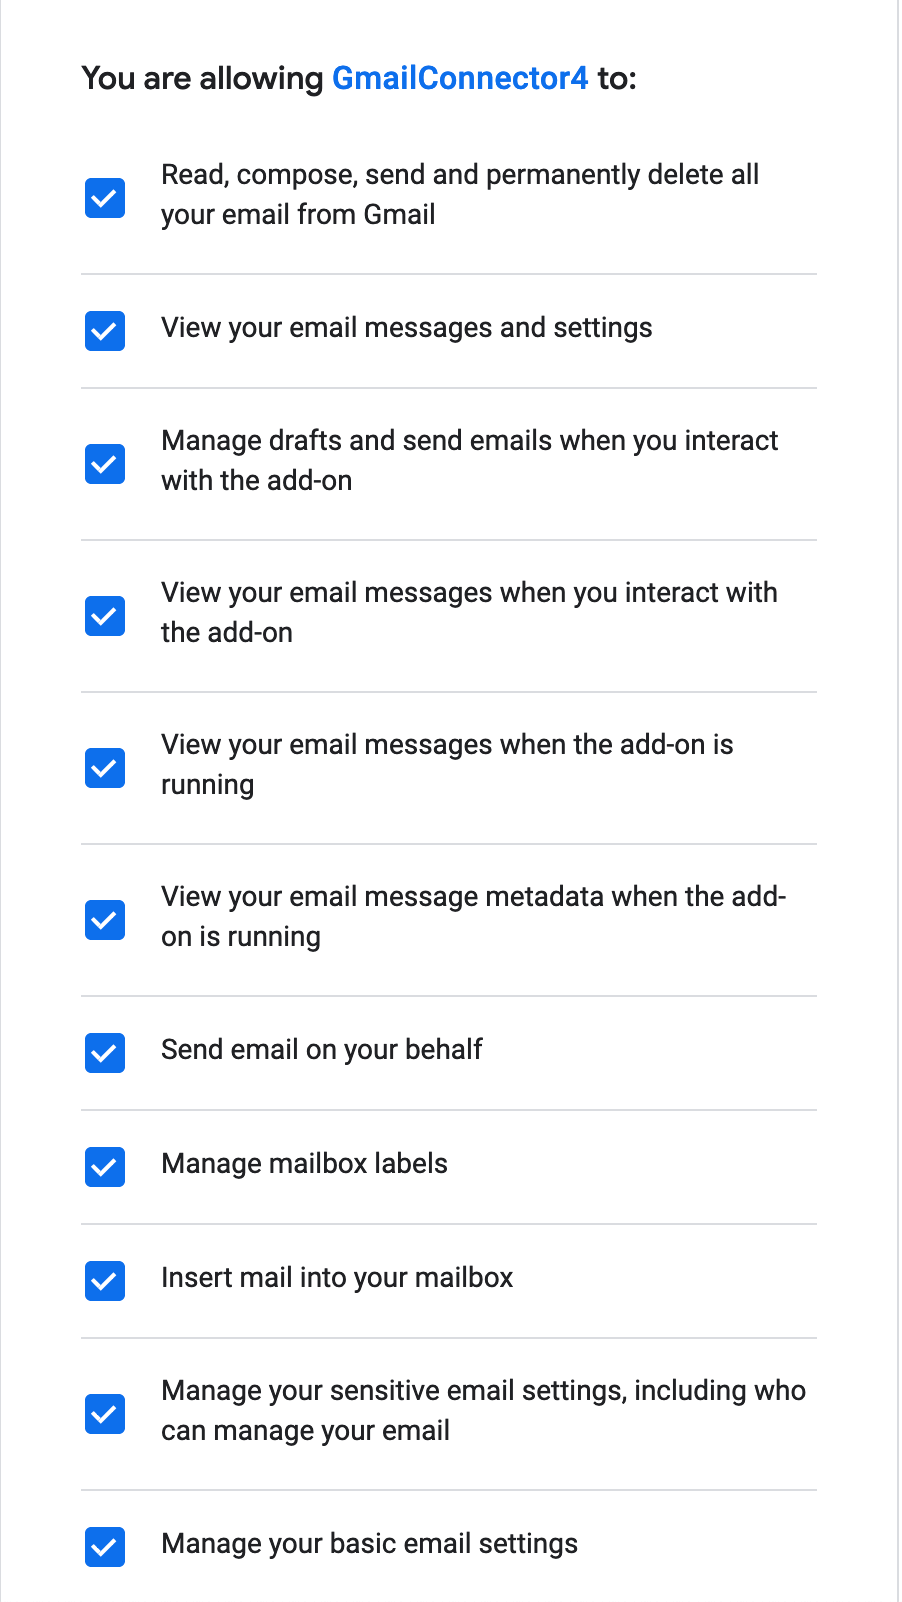
Click on Authorize APIs button and select your Gmail account when you are asked and allow the scopes.
-
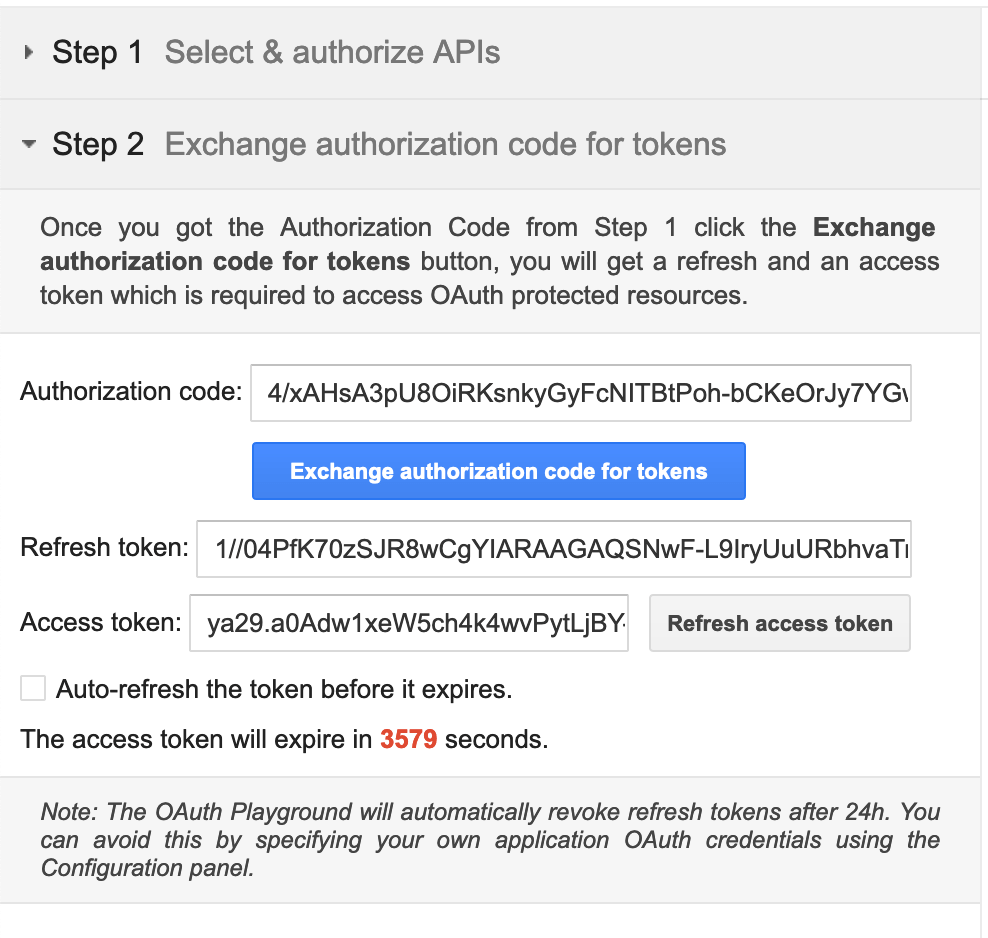
Under Step 2, click Exchange authorization code for tokens to generate an display the Access Token and Refresh Token. Now we are done with configuring the Gmail API.
