Salesforce Access Token Generation
First, we will create a Salesforce App (Connected App) and obtain the OAuth 2 tokens from Salesforce REST API.
-
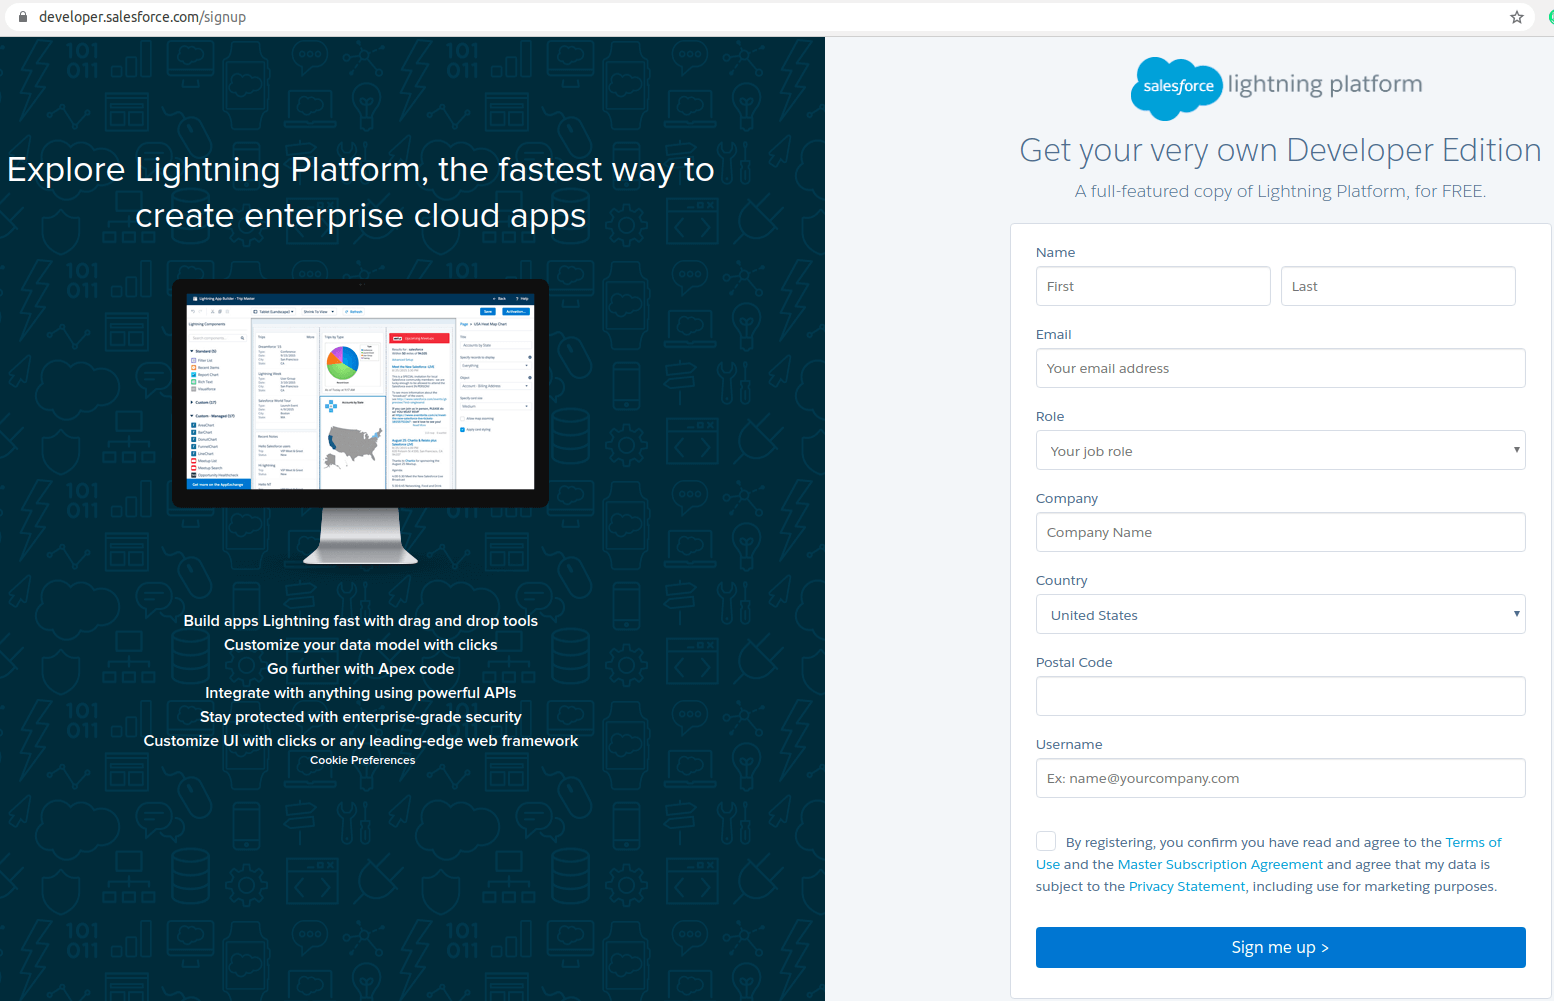
Navigate in to the Salesforce developer edition and create a Salesforce account.
-
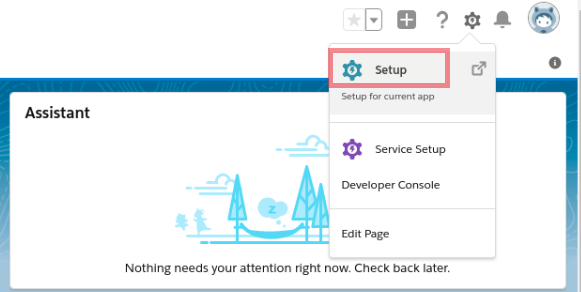
Log in to Salesforce after verifying your account, with the newly created credentials. In the upper-right corner, select Setup.
-
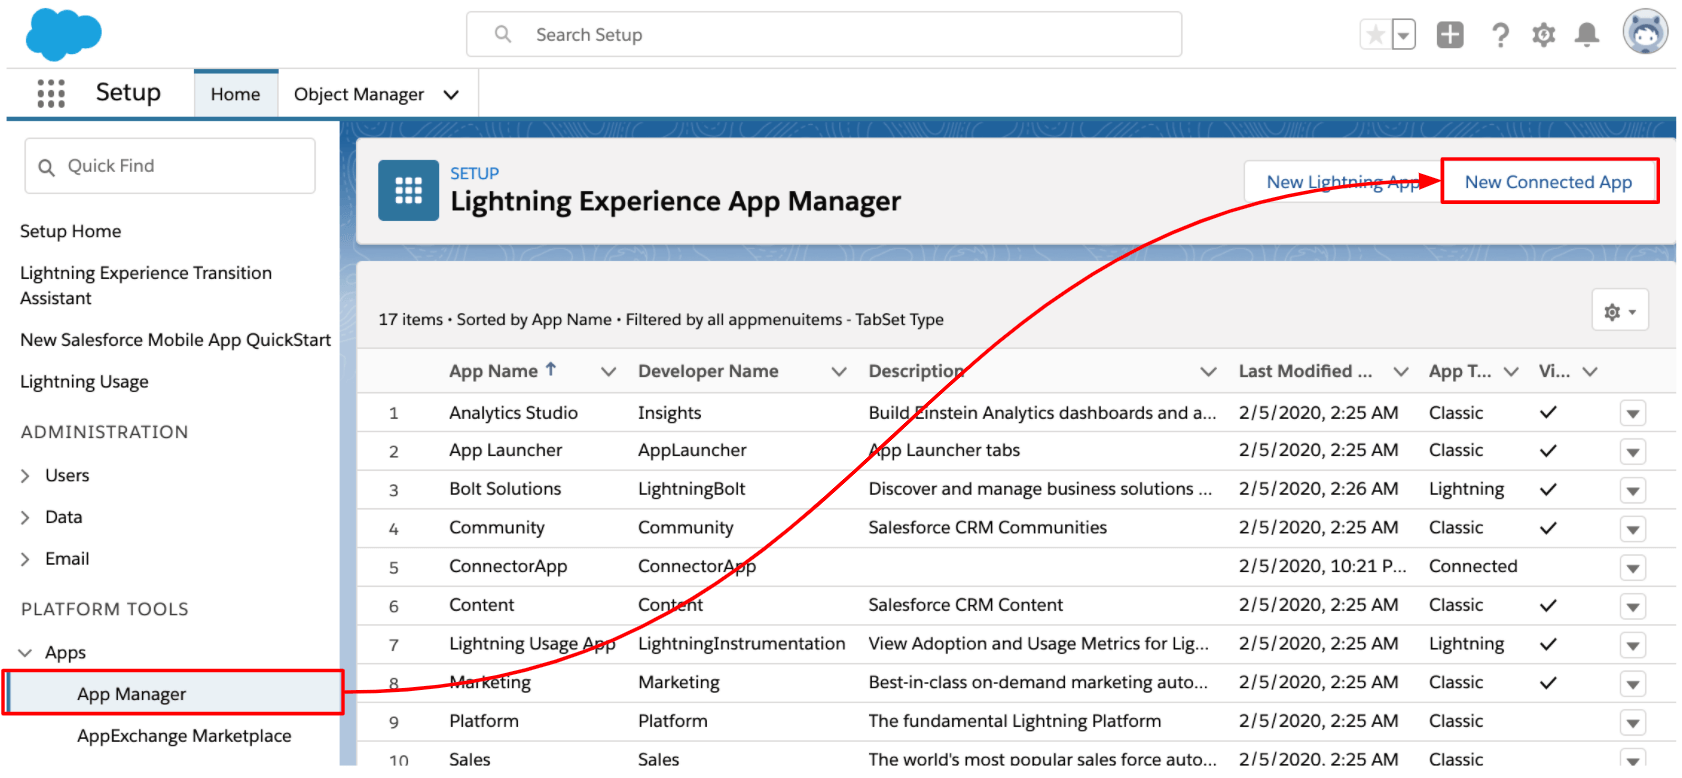
Navigate to Apps > App Manager and click on the New Connected App.
-
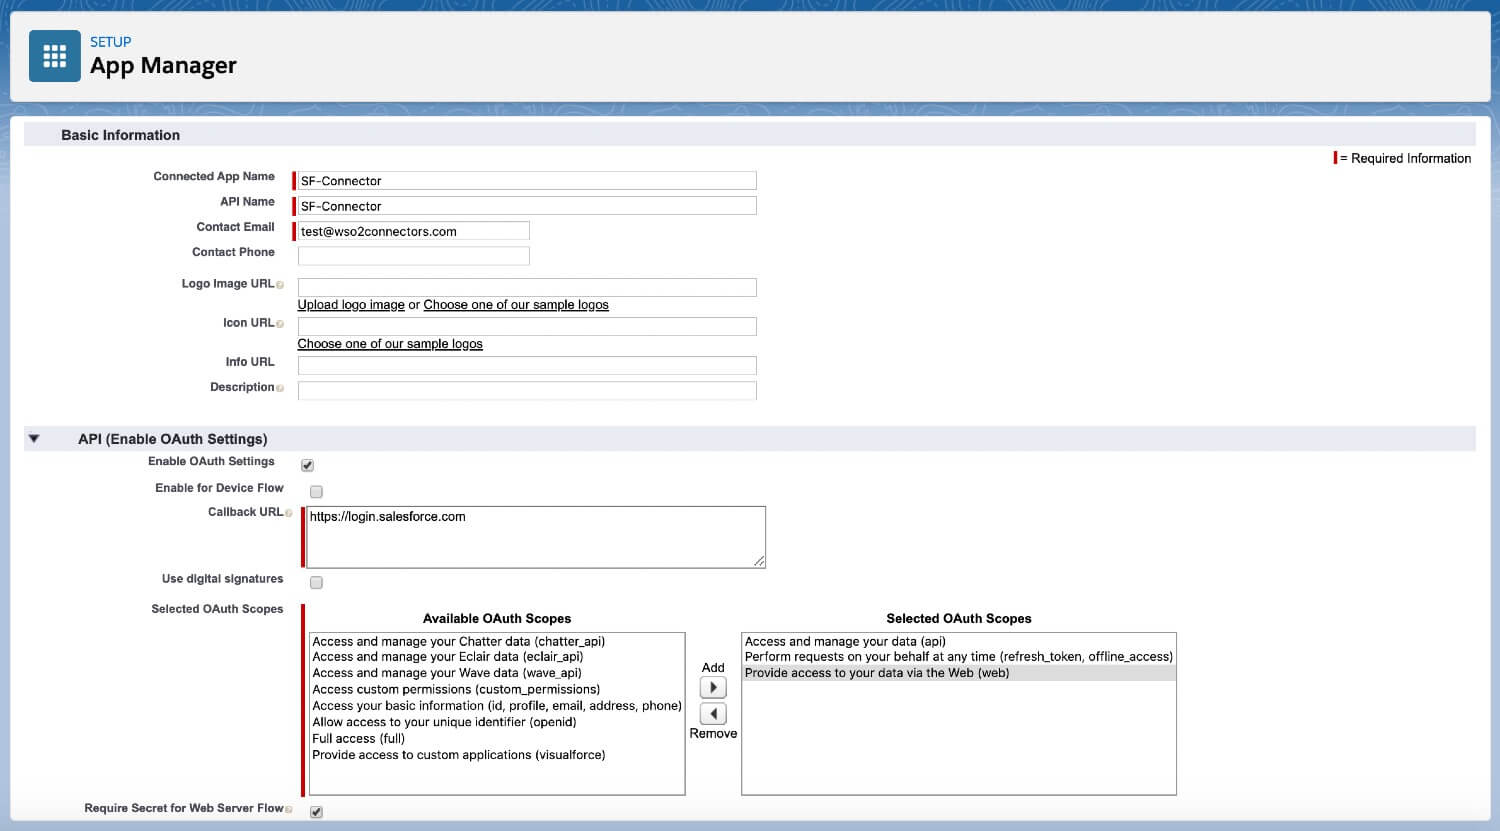
On the New Connected App page, fill the required fields as listed below.
-
Fill in Connected App Name, API Name, and Contact Email under Basic Information.
-
Go to API (Enable OAuth Settings), and select Enable OAuth Settings.
-
In the Callback URL field, enter https://login.salesforce.com.
-
In the Selected OAuth Scopes field, select the following:
- Access and manage your data (API).
- Perform requests on your behalf at any time (refresh_token, offline_access).
- Provide access to your data via the Web (web), and then click Add.
-
-
Click the Save button to save the new Connected App.
-
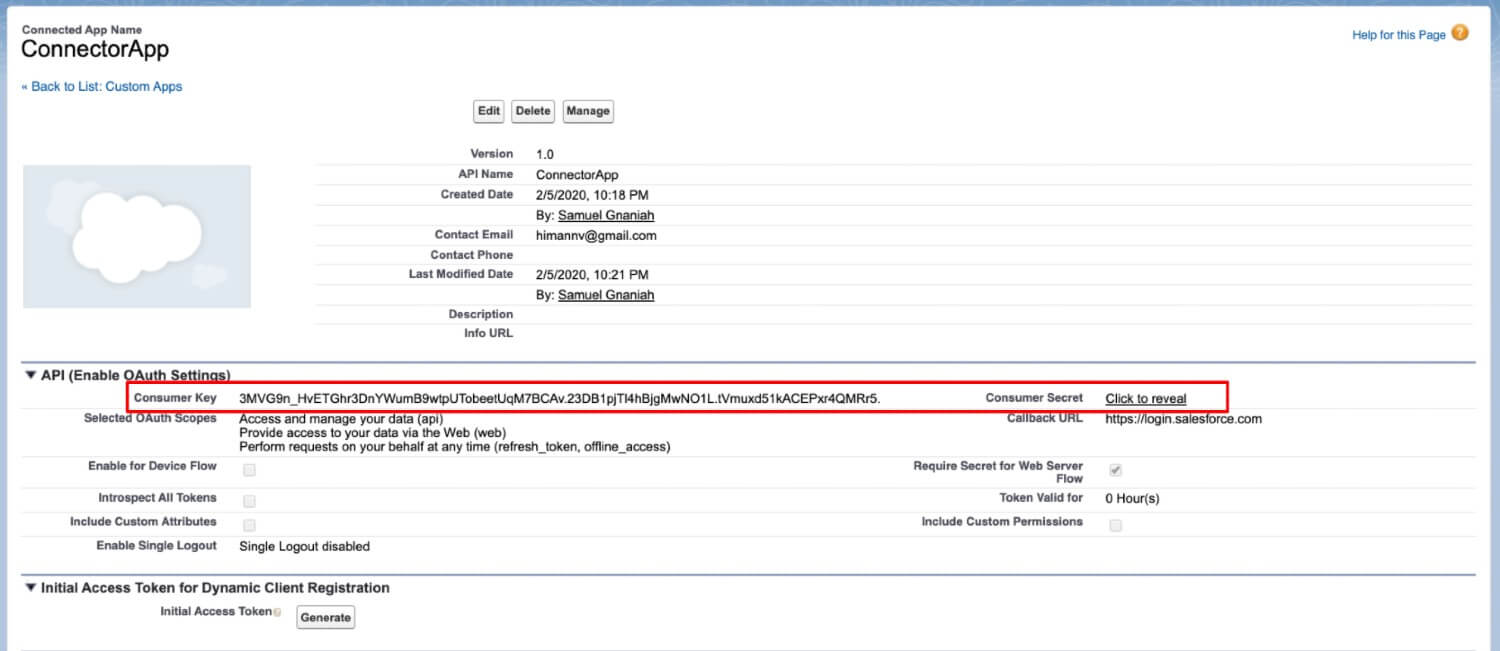
Navigate to Connected Apps (Apps > App Manager) list, and click the App that you have just created, and then click on View.
-
Go to API (Enable OAuth Settings), and note down the Consumer Key and Consumer Secret.
-
On the page that opens, click the Edit button. Under OAuth policies, select All users may self-authorize in the Permitted Users list, and then click the Save button.
-
Now we have to obtain the access token and refresh token as indicated below. Enter the following URL in your web browser.
should be replaced with your instance name, in my example it isap17.https://<INSTANCE>.salesforce.com/services/oauth2/authorize?response_type=code&client_id=<CONSUMER_KEY>&redirect_uri=https://login.salesforce.comIf this is a new browser, you will need to verify the account again with a code sent to the email, and login to the account. It will be redirected to a URL similar to the following.
https://login.salesforce.com/?code=aPrxYXyxzkuBzbiNknnlq2OFfWuX.EU66JOpBnNb_.rLpGZu.FdWAZXvDF6PtpoNWUjnrjYX8g%3D%3D -
Note down the value of the code. In my case, it is:
aPrxYXyxzkuBzbiNknnlq2OFfWuX.EU66JOpBnNb_.rLpGZu.FdWAZXvDF6PtpoNWUjnrjYX8g%3D%3D -
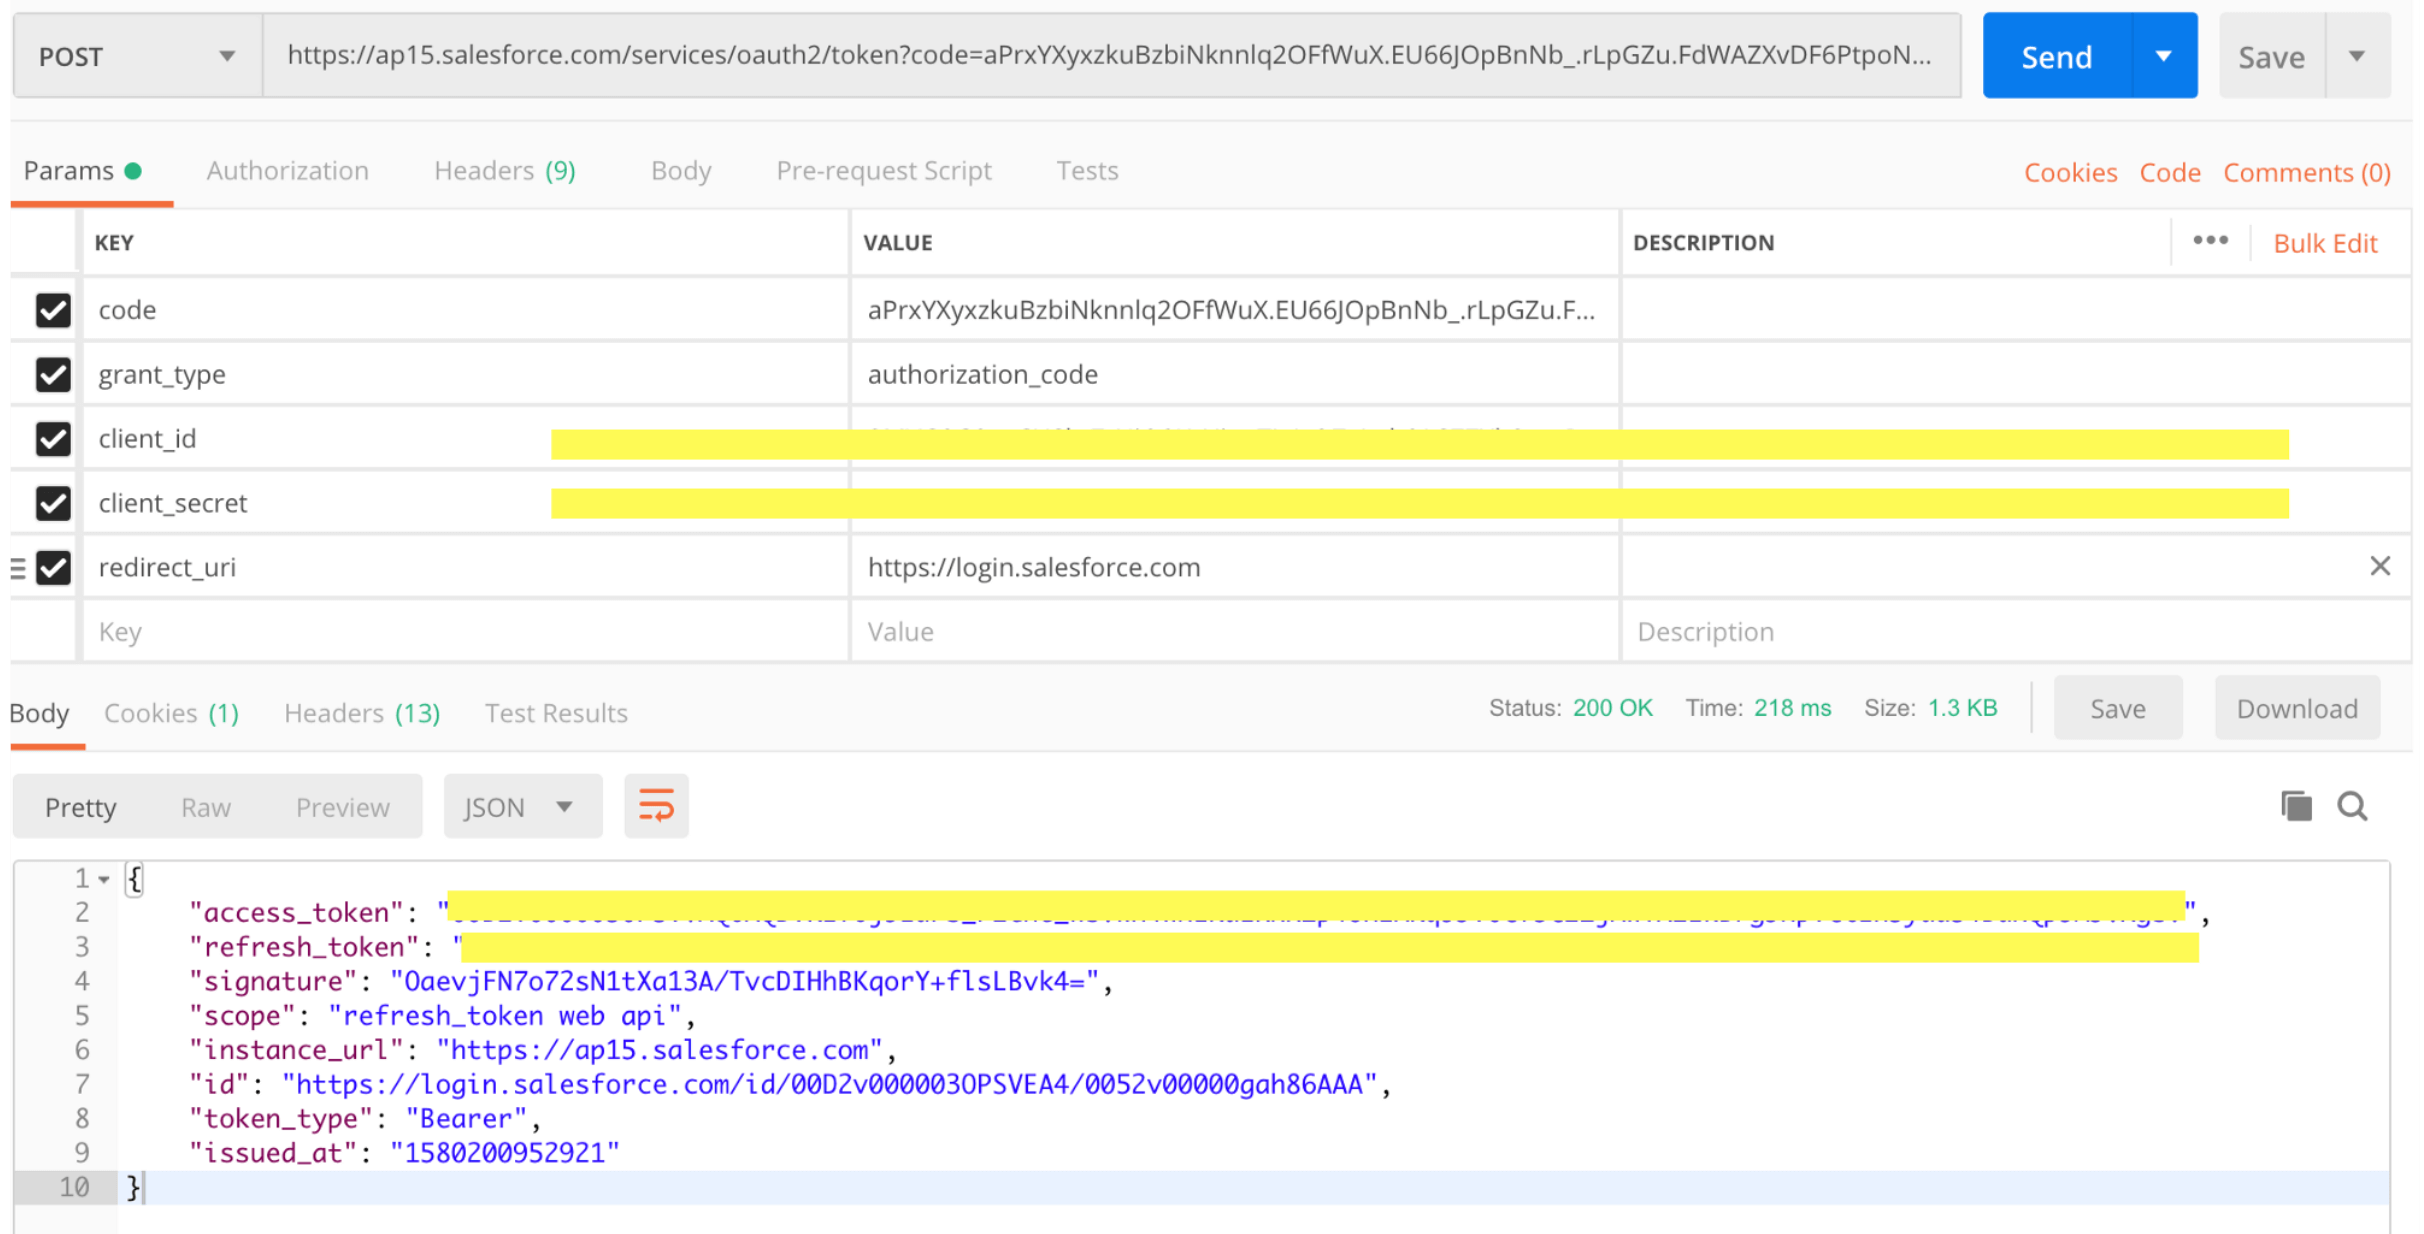
Now import the following in POSTMAN and obtain the tokens.
curl --location --request POST "https://ap15.salesforce.com/services/oauth2/token?code=aPrxYXyxzkuBzbiNknnlq2OFfWuX.EU66JOpBnNb_.rLpGZu.FdWAZXvDF6PtpoNWUjnrjYX8g%253D%253D&grant_type=authorization_code&client_id=3MVG9G9pzCUSkzZtNiO9KrUineTIaJzO7xLokQLSZ7Xb8mnRgsMC.J6EZNQ9lA.HIxMg7LRmCpxdH.mnU_1au&client_secret=37E2B8478E8C6ADBFB4045466CCB98AA067CE9D8D8A4E3F17D2440B13F046740&redirect_uri=https://login.salesforce.com" \ --header "Accept: */*" \ --header "Accept-Encoding: gzip, deflate" \ --header "Cache-Control: no-cache" \ --header "Connection: keep-alive" \ --header "Content-Length: 0" \ --header "Host: ap15.salesforce.com" \ --header "Postman-Token: 7d68f566-7907-443d-9cbc-f5a7205ff1af,7239d98b-8020-47cc-9922-595ef03c676c" \ --header "User-Agent: PostmanRuntime/7.19.0" \ --header "cache-control: no-cache" -
Once it is imported, you will have the following in POSTMAN. Replace the following fields with your values.
- code
- client_id
- client_secret
